
Estimated reading time: 5 minutes
Last updated on August 15th, 2025 at 03:54 am
If your home still features that classic but outdated popcorn-textured ceiling, it might be time for an upgrade. Removing this retro design choice can refresh your space and even address potential health concerns. Whether you’re thinking about doing it yourself or calling in professionals, understanding what’s involved will help you make informed decisions.
Here’s what you’ll discover:
- A brief look at why textured ceilings were once popular.
- The advantages of getting rid of them.
- What to expect during the removal process.
- Tips for what to do post-removal.
- Whether to hire a professional or try it yourself.
Let’s dive in!
The Rise and Fall of Textured Ceilings
In the mid-20th century, popcorn ceilings were a top choice for builders. Their bumpy texture offered practical benefits like soundproofing and hiding imperfections, making them popular in both homes and commercial spaces. They were inexpensive, quick to apply, and fit the trends of the time.
However, their appeal didn’t last. By the 1980s, smoother, more modern ceiling designs took over, leaving textured surfaces looking dated. The potential presence of asbestos in older applications also raised safety concerns. Today, many homeowners are opting for smoother finishes to keep their spaces fresh and safe.
Why Should You Remove That Textured Surface?
Removing this type of ceiling isn’t just about looks—there are practical reasons too.
1. Modern Style
Let’s face it: popcorn ceilings are no longer trendy. Smoothing them out gives your home a contemporary, clean appearance, instantly making any room feel more open and inviting.
2. Healthier Living
Homes built before the mid-1980s might have ceilings containing asbestos. This material isn’t dangerous if undisturbed, but during repairs or renovations, it can release harmful fibers into the air. Even newer popcorn finishes can trap dust, making cleaning a hassle and potentially aggravating allergies.
3. Simpler Maintenance
Textured surfaces make every repair or repaint harder. Removing the texture simplifies future upkeep and opens the door to endless design possibilities.
4. Boosting Home Value
Modern ceilings make your property more appealing to buyers. Removing outdated finishes can be a smart investment if you’re thinking of selling your home.
What Happens During Removal?
If you’re considering this project, understanding the steps will help you prepare.
Step 1: Evaluation
The first step is testing. Older ceilings may contain asbestos, which requires special handling. Professionals can collect samples and send them for lab analysis. If asbestos is found, it’s best to hire certified experts to remove it safely.
Step 2: Preparing the Room
Before any scraping begins, the space needs to be protected. This includes:
Moving or covering furniture.
Sealing vents and doorways to prevent debris from spreading.
Laying down plastic sheets or drop cloths to protect floors.
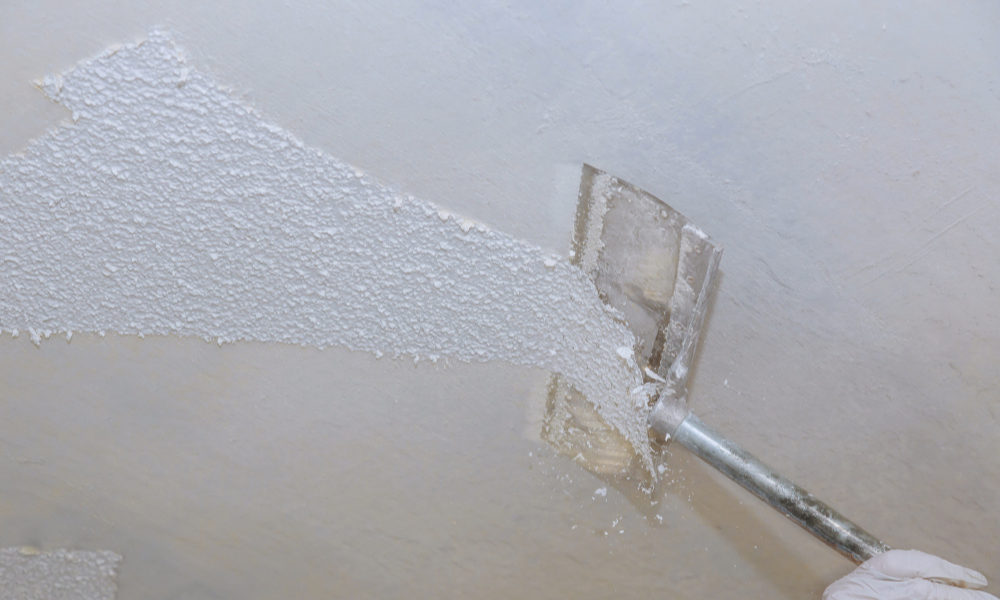
Step 3: The Removal Process
Most professionals start by wetting the textured surface to make removal easier. Using specialized tools, they scrape off the texture, being careful to avoid damaging the drywall underneath.
Step 4: Smoothing the Surface
Once the texture is gone, the ceiling is sanded to create a smooth finish. This step is crucial for achieving a polished look. If any imperfections remain, they’re patched before priming and painting.
Step 5: Cleanup
Removing a popcorn ceiling can be messy, but a good contractor will leave your home clean and debris-free. This includes proper disposal of materials, especially if hazardous substances were involved.
What’s Next After the Removal?

With the old texture gone, you have several options for giving your ceiling a fresh look:
- Smooth Finish: A timeless and versatile option.
- Subtle Textures: Knockdown or orange peel finishes offer a bit of character while staying modern.
- Bold Designs: Coffered or beamed ceilings can add a dramatic touch.
A fresh coat of paint will complete the transformation, brightening the space and enhancing its overall aesthetic.
Looking for more ceiling care tips? Check out Why Regular Ceiling Inspections Can Save You Money.
DIY vs. Hiring a Pro
Taking on this project yourself might seem tempting, but it’s important to weigh the pros and cons.
DIY Benefits
Lower costs if you already have the tools.
Flexibility to work at your own pace.
DIY Drawbacks
Messy and labor-intensive.
Risk of damaging your ceiling.
Potential health hazards if asbestos is present.
Why a Professional Might Be the Better Choice
Contractors bring the experience and equipment needed to complete the job quickly and safely. They also handle the entire process, from asbestos testing to cleanup, giving you peace of mind. Curious about the benefits of hiring experts? Learn more at Benefits of Hiring Experts for Drywall Installation.
Cost Considerations
The cost of removing a textured ceiling varies based on factors like size, asbestos testing, and whether you hire a professional.
Professional Removal: $1–$3 per square foot, on average.
DIY Costs: Equipment rental, supplies, and your time.
While DIY might save money upfront, mistakes can lead to higher costs down the road. For older homes with potential hazards, hiring experts is a safer bet.
FAQs About Popcorn Ceiling Removal
Can I paint over a textured ceiling instead of removing it?
Yes, but it won’t address underlying problems like asbestos or trapped dust. Removal is a better long-term solution.
How long does removal take?
A professional can complete the job in 1–2 days, depending on the size of the project.
Is it worth removing my popcorn ceiling before selling my home?
Yes! A modern ceiling can attract buyers and potentially increase your home’s resale value.
Conclusion
Removing a textured ceiling can breathe new life into your home, making it look and feel more modern while addressing potential health concerns. Whether you go the DIY route or hire a pro, this project is a worthwhile investment in both style and safety.If you’re ready to say goodbye to those bumpy surfaces, now’s the time to act. Your ceiling—and your home—deserve it. For more insights on home upgrades, don’t miss Top Signs Your Drywall Needs Repair or Replacement.


