Estimated reading time: 6 minutes
When it comes to protecting my home from storms, one thing I never compromise on is preparation. Among all the options available, installing storm shutters has proven to be one of the most effective ways to guard against high winds and flying debris. If you’re new to this, I’ll walk you through the process of choosing and installing accordion shutters (my personal favorite for their ease and efficiency) while sharing tips to keep the process smooth.
What You’ll Learn:
- Why installing shutters is essential for storm protection.
- Types of shutters and how to choose the right one.
- Tools and materials for the job.
- Step-by-step guide to installing accordion shutters.
- Maintenance tips and additional storm preparation ideas.
Why Storm Protection Starts with Shutters
Storms are unpredictable, and windows are one of the most vulnerable points in any home. Installing shutters provides a sturdy shield against debris and wind pressure, preventing broken glass and potential water damage.
Beyond safety, shutters offer peace of mind. During storm season, I sleep better knowing my home is prepared. They also save money in the long run by reducing repair costs and even lowering some homeowners’ insurance premiums.
Types of Storm Shutters
When I first researched shutters, the range of options felt overwhelming. Here’s a breakdown of the most common types to help you decide:
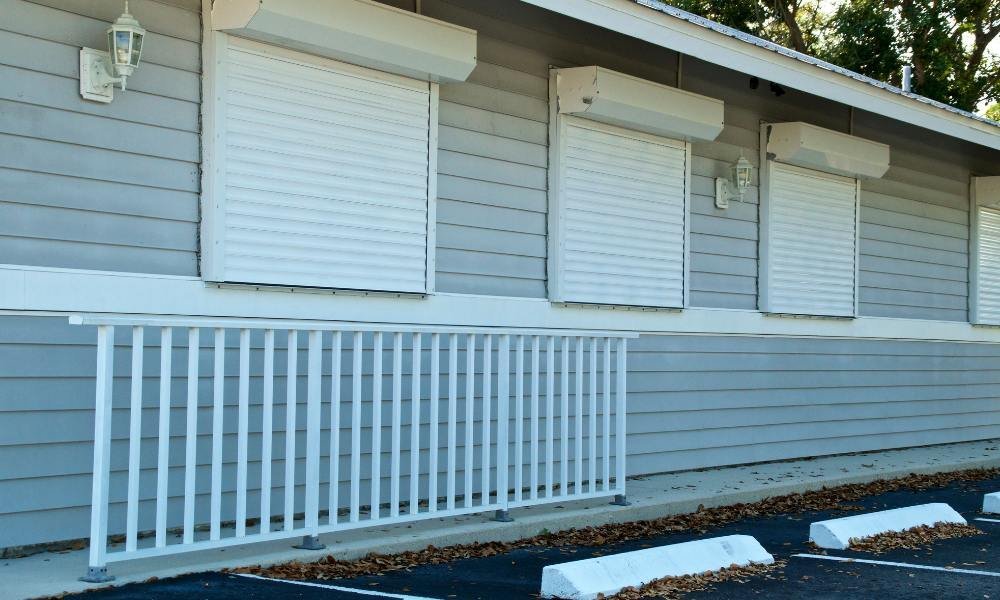
Accordion Shutters: My personal favorite. These foldable panels stay attached to your home and are easy to deploy when a storm approaches.
Roll-Down Shutters: Sleek and motorized (or manual), they provide seamless protection and double as insulation.
Storm Panels: Cost-effective and removable, these lightweight panels are ideal for those on a budget.
Bahama Shutters: Decorative yet functional, these provide sunshade and storm protection.
Plywood Panels: A temporary solution, great for emergencies but labor-intensive to set up.
Pro Tip: Consider your home’s style and storm exposure. For convenience and durability, accordion shutters strike a perfect balance.
Tools and Materials You’ll Need
Before starting, I like to organize everything I need to avoid mid-project trips to the hardware store. Here’s what you’ll need:
- Tools: Drill, screwdriver, level, tape measure, ladder, and safety goggles.
- Materials: Accordion shutter kit, screws, anchors, caulk, and a pencil for marking.
Make sure your kit includes all the components promised. Trust me, discovering missing parts after you start is frustrating.
Preparing for Installation
Preparation is key to a successful installation. Here’s how I get ready:
Measure Accurately: Use a tape measure to document the dimensions of your windows and doors. Precise measurements ensure a snug fit for your shutters.
Check Local Codes: Some areas have building codes requiring specific storm protection ratings. Double-check to avoid issues.
Clear the Workspace: Remove obstacles around the installation area to give yourself room to work.
Plan for Assistance: Installation is easier with a partner, especially when working with large or high windows.
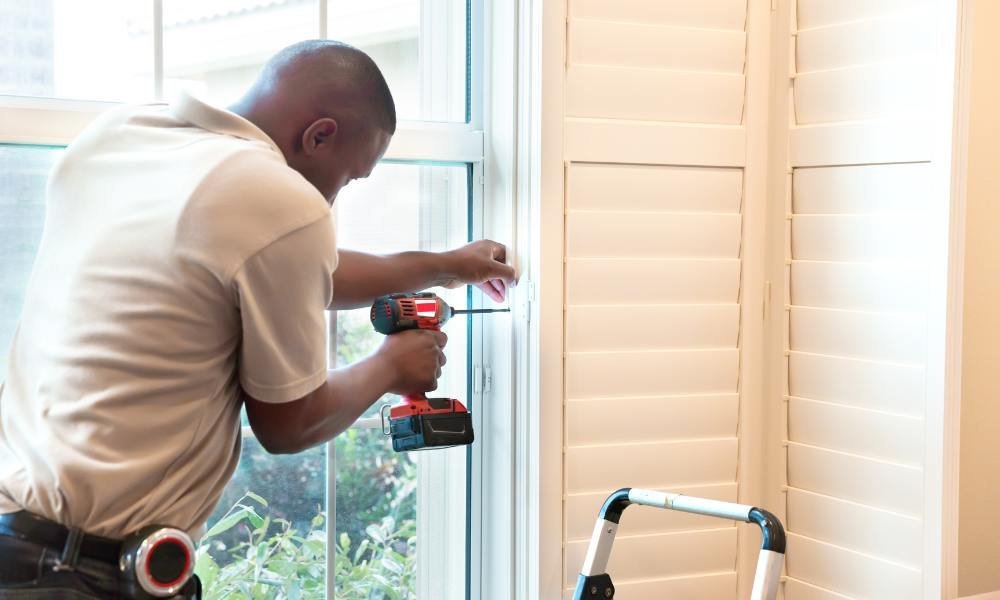
Step-by-Step Installation for Accordion Shutters
Installing accordion shutters is a straightforward process if you follow these steps:
Step 1: Mark Placement Points
Using a pencil, mark the position of the top track where the shutters will be mounted. A level is crucial here to keep everything aligned.
Step 2: Drill Pilot Holes
Drill small holes where you made the marks. This helps prevent cracking and makes it easier to secure the screws.
Step 3: Attach the Top Track
Secure the top track with screws, starting in the center and working outward. Tighten everything after confirming it’s level.
Step 4: Slide in the Shutter Panels
Place the accordion panels into the top track. Their design allows them to slide easily, which makes this step quick.
Step 5: Install Side Tracks
Attach side tracks following the same marking and drilling process. Align them carefully with the top track.
Step 6: Attach the Bottom Track
Position the bottom track, mark its placement, and secure it with screws. Ensure the panels fit snugly within the track.
Step 7: Test and Adjust
Slide the shutters back and forth to check for smooth operation. If they stick or misalign, adjust the tracks accordingly.
Step 8: Seal the Edges
Use caulk to seal around the edges. This step prevents water intrusion, which is especially important during heavy rains.
Fun Moment: The first time I installed shutters, I pretended I was assembling a secret bunker. The satisfaction of sliding those panels into place is unmatched!
Maintenance Tips for Long-Term Use
Shutters are a long-term investment, and with a little maintenance, they’ll stay functional for years. Here’s my routine:
- Clean Tracks Regularly: Dust and debris can clog the tracks, so I wipe them down every few months.
- Inspect for Damage: After every storm, I check for loose screws or cracked panels.
- Lubricate Moving Parts: A silicone-based spray keeps the tracks and hinges operating smoothly.
Beyond Shutters: Additional Storm Protection
Shutters are a strong line of defense, but they’re even more effective when combined with these strategies:
- Reinforce Doors: Install heavy-duty locks and weather seals to prevent water damage.
- Secure Outdoor Items: Bring in loose objects like patio furniture to avoid them becoming projectiles.
- Emergency Kit: Keep essentials like flashlights, batteries, and non-perishable food stocked and accessible.
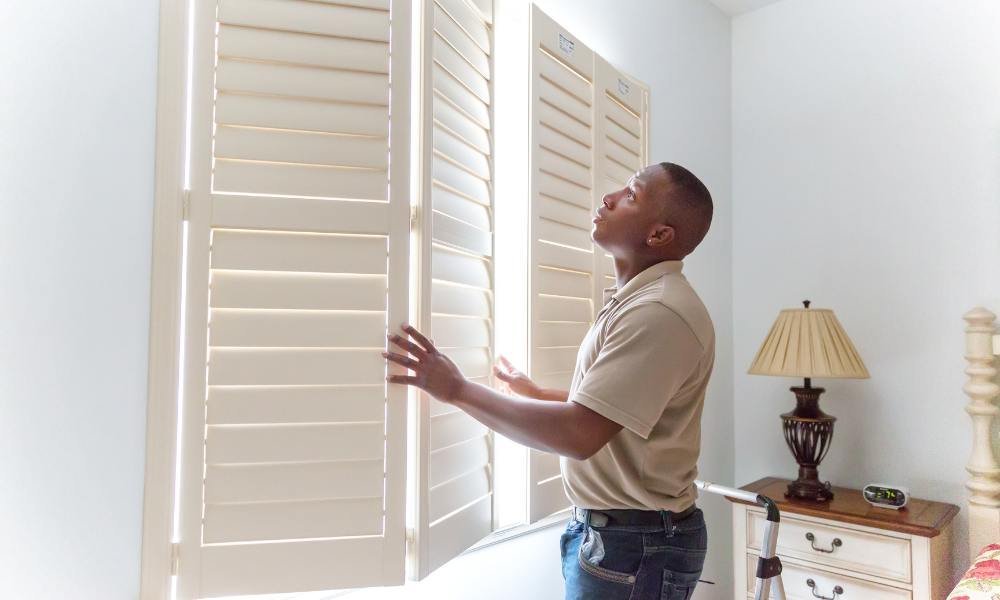
DIY vs. Professional Installation
I’m all for DIY projects, but some situations call for professional help. If you’re short on time or unsure about the installation process, hiring an expert ensures everything is done correctly. While the cost may be higher, it’s worth it for peace of mind—especially if a storm is approaching.
Frequently Asked Questions
Q: Can accordion shutters be reused?
Yes, they’re designed for repeated use and can last for years with proper care.
Q: How much do they cost?
Accordion shutters typically cost $15–$30 per square foot. Installation adds to the price, but DIY can save money.
Q: Are shutters effective for all storms?
They provide excellent protection against flying debris and high winds but should be combined with other precautions for severe hurricanes.
Final Thoughts
Installing storm shutters is one of the best investments I’ve made to protect my home. They’re reliable, cost-effective, and surprisingly easy to install. Whether you go the DIY route or hire a pro, the effort is worth it when storms roll in.
So, are you ready to protect your home? With a bit of preparation and the right tools, you’ll be set to weather any storm.