Estimated reading time: 5 minutes
When people think about tiled surfaces, they usually focus on the design, material, and color. But here’s something I’ve learned over years in the industry—what goes between the tiles is just as important as the tiles themselves. If you want a long-lasting, durable installation, getting this step correct is non-negotiable.
A poorly done job can lead to cracks, stains, mold growth, and even tile detachment. The good news? With the right approach and materials, your surfaces can stay in great shape for decades.
What You’ll Learn in This Guide:
- Why joint fillers do more than just fill spaces
- How improper application can cause damage
- The best types of materials for different applications
- How to maintain joints for long-term performance
- When to hire a professional for the job
- Let’s dive in.
The Purpose of Grout: More Than Just a Filler
I’ve seen many homeowners treat this part of the process as an afterthought. They think, “It’s just there to hold everything in place, right?” Well, not exactly. Joint fillers play multiple roles, including:
Structural Support: Keeps individual pieces from shifting and cracking.
Moisture Protection: Seals openings, preventing water from seeping underneath.
Thermal Expansion Buffer: Allows flexibility to accommodate shifts due to temperature changes.
Aesthetic Enhancement: The right color and finish can elevate the entire look of a surface.
If this step is ignored or improperly installed, even the most high-end materials won’t last long.
What Happens When This Step is Done Wrong?

I’ve had clients come to me with tiling disasters that could have been easily avoided with proper application. Here are some common issues:
Cracks and Loosening
Without a solid bond, tiles may move slightly over time. This movement causes stress, leading to hairline fractures or complete detachment.
Water Damage and Mold Growth
Gaps that aren’t sealed properly can trap moisture, leading to stains, mildew, and structural damage. This is especially problematic in bathrooms and kitchens, where water exposure is constant.
(If your surfaces are starting to show wear, it might be time for a replacement. Check out these signs that indicate it’s time to replace old materials.)
Discoloration and Stains
Using low-quality products or skipping the sealing process can lead to staining and fading, ruining the overall aesthetic.
Choosing the Right Joint Filler for the Job
Not all products are created equal. Over the years, I’ve learned that choosing the correct type can make or break a project. Here’s what you need to know:
Cement-Based vs. Epoxy
Cement-Based: The most common and budget-friendly option. Available in sanded and unsanded varieties. Needs sealing for added protection.
Epoxy: A high-performance, waterproof alternative that’s resistant to stains and chemicals. Ideal for damp areas and high-traffic zones.
Sanded vs. Unsanded
Sanded: Contains fine particles for extra strength. Best for wider gaps (larger than 1/8 inch).
Unsanded: Smoother texture, perfect for narrow joints (less than 1/8 inch) and delicate materials like glass or marble.
(Confused about what works best for your space? Check out this guide on choosing the right tile contractor for expert recommendations.)
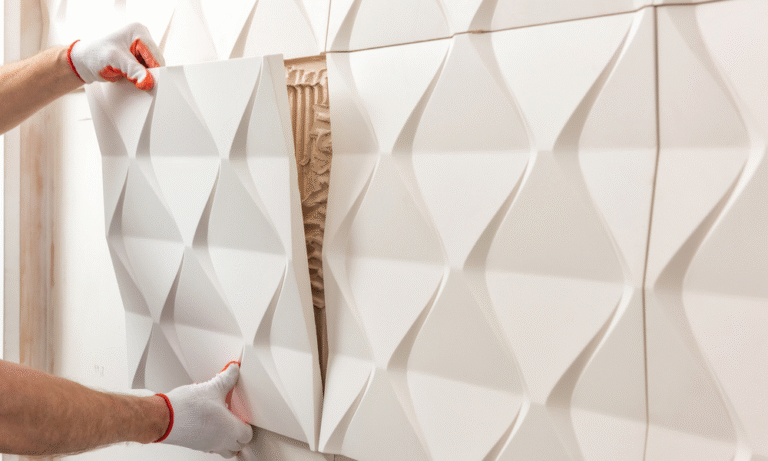
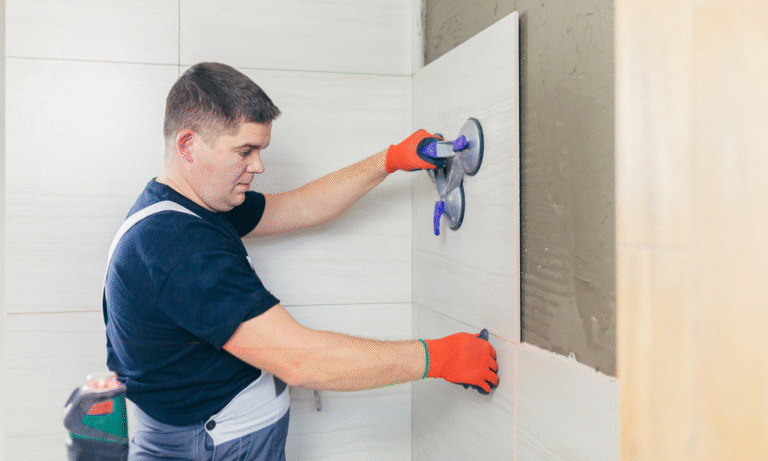
How to Apply Grout Like a Pro
Even the best materials won’t help if the application is sloppy. Here’s what I do to get flawless results every time:
- Mix it Right: Too much water weakens the mixture, while too little makes it difficult to spread.
- Work in Sections: Apply in small areas to prevent drying before smoothing it out.
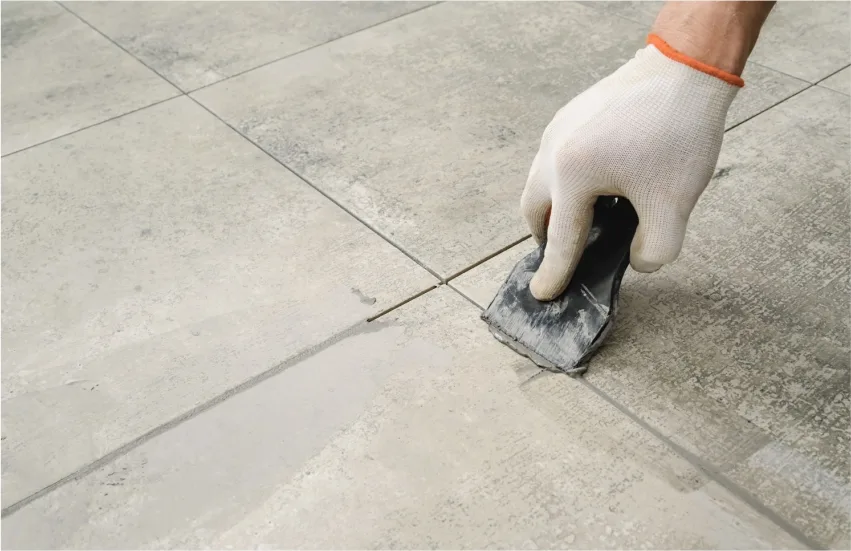
- Press It In: Use a rubber float to push material deep into the joints.
- Clean Excess Immediately: A damp sponge removes residue before it hardens.
- Seal for Protection: Once cured, a sealant helps prevent moisture damage and staining.
(Want a low-maintenance solution? Read about the best ways to keep surfaces looking new.)
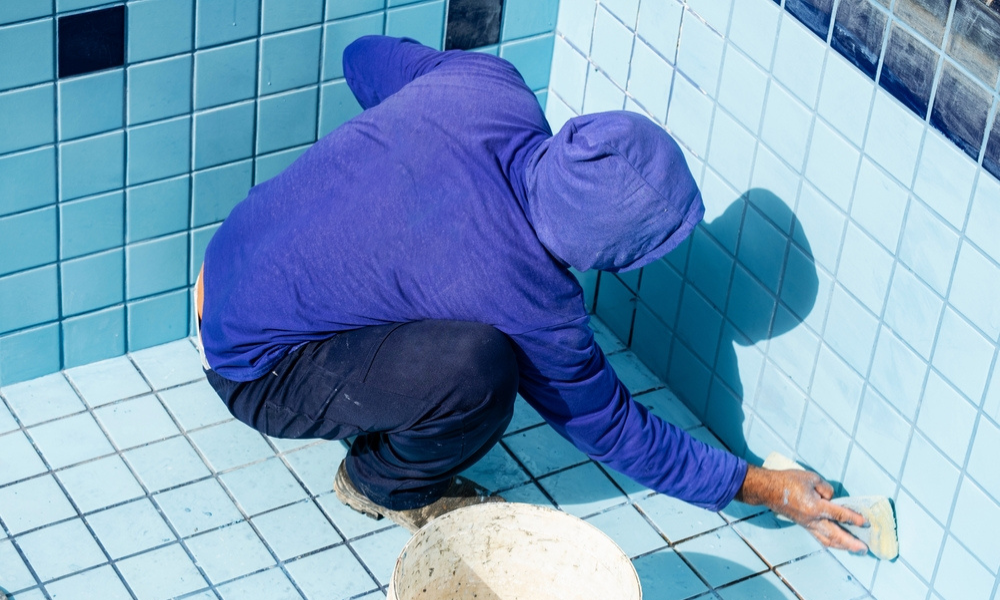
Grout Maintenance: Keeping It Strong and Clean
No one wants cracked, dirty, or moldy joints. Here’s how I keep my projects looking fresh for years:
Regular Cleaning: Use a pH-neutral cleaner to prevent buildup.
Avoid Harsh Chemicals: Bleach and ammonia can weaken the material over time.
Reapply Sealant Annually: Helps maintain water resistance.
Watch for Cracks: Small imperfections should be repaired before they worsen.
(Curious if your surfaces are still in good shape? Here’s how to tell if they need replacing: 7 signs it’s time for new tiles.)
DIY vs. Hiring a Professional: When to Call in the Experts
I always encourage homeowners to assess their skill level before taking on a project. While this might seem like a simple task, doing it wrong can lead to long-term issues.
When DIY is Okay:
Small repairs or touch-ups
Re-sealing existing grout lines
Fixing minor cracks
When You Should Hire a Pro:
Large-scale projects, like flooring or full walls
High-moisture areas that need extra protection
Using epoxy-based fillers, which require expertise
Restoring heavily damaged surfaces
(Thinking of bringing in an expert? Here’s why hiring a professional for tiling projects is worth the investment.)
Final Thoughts: Proper Grouting is the Key to Long-Term Durability
This step may seem minor, but in reality, it’s what holds everything together. The right materials and techniques will keep your floors and walls looking great and functioning properly for years.
If you’re planning a renovation, don’t overlook this step. Need advice on your next project? Reach out to a professional who knows how to do it right.
Which grouting issue have you faced in the past? Let me know—I’d love to hear about it!