Last updated on February 12th, 2024 at 12:23 am
The effective cleaning of clothing is greatly aided by the agitator in a washing machine. It causes the agitation and movement inside the washer that is required to achieve effective cleaning. Agitators, like any other component, can have problems over time. Maintaining the general functionality of your washing machine requires knowing how to remove a washing machine agitator and diagnose frequent issues. We’ll provide you with detailed instructions and insightful advice to successfully handle agitator-related problems in this in-depth tutorial.
How Does a Washing Machine Agitator Work?

Photo Credit: diaryofspaces
A washing machine’s agitator is in charge of producing the back-and-forth motion that occurs throughout the wash cycle. This motion aids in lifting stains and debris from clothing, resulting in a comprehensive cleaning procedure. The classic agitator with fins and the impeller agitator are the two main types of agitators often seen in washing machines. The impeller agitator employs a low-profile disc or cone that creates turbulence in the water as opposed to the typical agitator, which is a tall spindle with outward-facing fins. Both techniques succeed in getting the garments agitated for thorough washing.
Signs of a Faulty Agitator

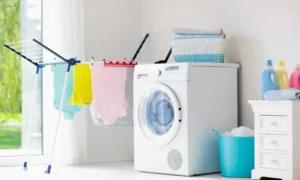
Photo Source: madebyalan
It’s essential to recognize the symptoms of a malfunctioning washing machine agitator in order to take prompt action. The following are some typical signs of an agitator-related issue:
1. Strange Sounds: Grinding, squeaking, or banging sounds during the wash cycle may be an indication that the agitator mechanism is malfunctioning.
2. Ineffective Spinning: When the agitator fails to spin or turns unevenly, it may result in ineffective cleaning and stained garments.
3. Ineffective Cleaning of garments: If you notice that your garments are not getting thoroughly cleaned after a wash, it may be because of an inefficient agitator.
You can diagnose the issue and take the appropriate action to fix it by recognizing these symptoms.
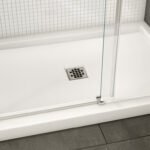
Tools and Materials Required for Agitator Removal

Photo Source: thespruce
Get the necessary tools and equipment together before attempting to remove a washing machine agitator:
- Adjustable wrench or socket set
- Flat-head or Phillips screwdriver, depending on the fasteners being used
- Pliers
- rags or towels
- Cleaning solution (vinegar or mild detergent)
- A gentle toothbrush
- Safety eyewear
- Gloves
- If accessible, the owner’s manual or manufacturer’s instructions
When using equipment, safety must always come first. As a result, be careful to take the appropriate safety measures before beginning the agitator removal procedure.
Step-by-Step Guide: How to Remove a Washing Machine Agitator
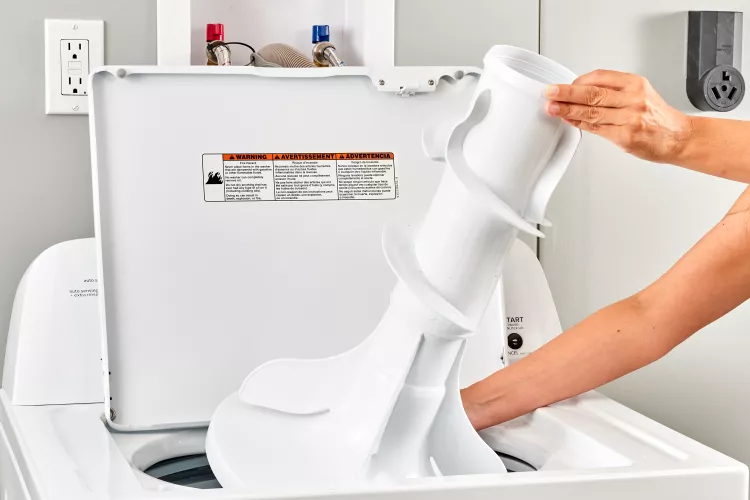
Photo Source: thespruce
Follow this step-by-step guide to safely remove a washing machine agitator:
Preparation and Safety Measures
Take the following safety precautions before starting the removal process:
– Disconnect the washing machine from the power supply to avoid any electrical hazards.
– To stop water leaks, turn off the water supply and unplug the hoses.
– Put on gloves and safety eyewear to shield your hands and eyes from harm.
Accessing the Agitator
You may generally do the following actions to get to a washing machine’s agitator:
1. Unplug the washing machine: To avoid any mishaps or electrical shocks, make sure the washing machine is not plugged into a power source.
2. Empty the washer: Take out all of the laundry and any other objects from the drum.
3. Take out the fabric softener dispenser (if necessary): If your washing machine has a fabric softener dispenser, raise it straight up or follow the manufacturer’s instructions to take it out.
4. Take off the agitator cap. The agitator is frequently covered by a cap in top-loading washing machines. It can be branded with the company’s emblem or have a little notch to help you take it off. Gently take off the cap with a flathead screwdriver or a similar instrument.
5. Remove the center bolt or nut: After removing the cap, you might find a center bolt or nut securing the agitator to the drum. The bolt or nut should be loosened and removed counterclockwise using a wrench or socket set.
6. Lift the agitator and disconnect it from the drum of the washing machine after removing the bolt or nut. It may be necessary to jiggle the agitator back and forth while drawing it up in some circumstances if it is securely connected.
7. Clean or replace the agitator: Depending on your needs, you can scrape the agitator with a brush to clean it or, if required, replace it with a new one. When cleaning the agitator, be aware of any blockages, dirt, or debris that can be impairing its functionality.
8. Reassemble the washing machine: Carefully drop the agitator into the drum after cleaning or replacing it, making sure it is correctly aligned. To secure the agitator, clockwise tighten the central bolt or nut. Both the fabric softener dispenser and the agitator cap should be replaced.
9. Reconnect the washing machine to the power source when everything has been put back together.
Keep in mind to refer to the user handbook for your washing machine for detailed instructions or to a professional if you run into problems or have questions while doing the task.
Detaching the Agitator
Follow these instructions to remove the agitator from a washing machine:
- To guarantee safety, start by disconnecting the washing machine from the power outlet.
- Remove all clothing and other things from the washing machine drum.
- Check the agitator’s top for a cap or a fabric softener dispenser. If it’s there, take it out by raising it straight up or by doing what the manufacturer suggests.
- After removing the cap or dispenser, you can notice a bolt or nut in the agitator’s core. The agitator is fastened to the driving shaft using this bolt or nut.
- To loosen and remove the bolt or nut, use the proper equipment, such as a socket wrench or pliers. To unscrew it, turn the screw in a counterclockwise manner.
- Take a tight hold of the agitator with both hands after removing the bolt or nut.
- While lifting it upward, gently wiggle the agitator back and forth. This movement aids in detaching the agitator from the motor shaft.
- If the agitator is difficult to remove, try twisting it just a little in one direction before drawing it up once again. This procedure should be repeated until the agitator separates from the motor shaft.
- After the agitator has been removed, it may be cleaned or changed as necessary.
Keep in mind to refer to the washing machine’s user manual for detailed instructions or to call a professional if you run into any problems.
Cleaning and Inspecting the Agitator
After the agitator has been removed, it is crucial to clean and check each component for dirt, damage, or wear. Take these actions:
– Fill a sink or basin with warm water and a light detergent or cleaning solution that contains vinegar.
– To remove any debris or residue, submerge the agitator in the solution and let it soak for a few minutes.
– Scrub the agitator carefully with a soft brush or toothbrush to get rid of any leftover dirt.
– Thoroughly rinse the agitator with clean water, then pat dry with towels or rags.
– Look for any evidence of damage on the agitator, such as fractures, broken fins, or worn-out components.
– Replace any broken parts if necessary, or hire a technician to fix it.
The agitator’s performance and longevity may be maintained by routine cleaning and maintenance.
Troubleshooting Common Agitator Issues

Photo Source: twincitiesappliance
Here are some common agitator issues and the corresponding troubleshooting steps:
Agitator Not Working or Spinning Properly
– Inspect the agitator and the drum for any items or clothing that could be obstructing the flow.
– Inspect the drive belt: A faulty drive belt might prevent the agitator from rotating properly. The belt may need to be changed.
– Check the motor. A defective motor could not have enough power to revolve the agitator. For motor replacement or repairs, seek expert assistance.
Excessive Noise During the Washing Cycle
– Tighten any loose parts: Inspect the driving shaft’s agitator for any slack bolts or screws. Firmly tighten them.
– Examine the bearings: Bearings that are worn out might make noise. Contact a qualified technician for an examination and repair if you think your bearings may need replacing.
– Even out the load: Uneven loads can make a lot of noise. Make sure the clothing are dispersed evenly across the drum of the washer.
Agitator Not Engaging with Clothes
– Examine the agitator dogs: These little plastic parts help the action go back and forth. Replace them if they are damaged or worn-out.
– Check couplers: A broken coupler may make it difficult for the agitator to engage correctly. If required, swap it out.
– Inspect agitator cameras: Over time, agitator cams may lose their capacity to interact with clothing. Replace them if required.
Agitator Not Rotating or Moving
– Inspect the drive block: A damaged drive block may result in the agitator ceasing to rotate. If there are indications of deterioration, replace it.
– Examining the transmission The movement of the agitator might be hampered by a bad transmission. For transmission replacement or repairs, seek expert help.
– Check the agitator drive motor; if it is broken, a qualified expert may need to fix it or replace it.
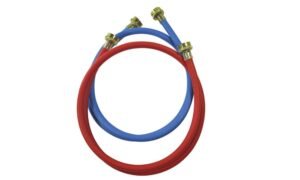
Agitator Leaking or Overflowing
– Inspect the hoses: Inspect the hoses that connect to the agitator for any fractures or leaks. Repair any broken hoses.
– Check the inlet valves for water: Leaks or overfilling can be brought on by faulty water entry valves. Make an appointment with a specialist to fix or replace them.
– Examine the pressure switches: Water levels can be affected by a broken pressure switch. If required, swap it out.
Conclusion
In conclusion, keeping a washing machine in good working order requires understanding how to remove a washing machine agitator and diagnose typical problems. You may securely remove the agitator, clean and examine its parts, and take care of other agitator-related issues by following the detailed instructions provided in this article. Always emphasize safety precautions, and for model-specific recommendations, see the manufacturer’s instructions. The lifespan and ideal functioning of your washing machine’s agitator are guaranteed by routine maintenance and rapid troubleshooting.
Frequently Asked Questions
1. Can I remove the agitator without any tools?
No, to remove the agitator correctly, you’ll need simple equipment like pliers, a screwdriver, and an adjustable wrench or socket set.
2. How often should I clean the agitator?
Every few months or whenever you see any dirt or residue accumulation, you should clean the agitator.
3. If the agitator is broken, can I fix it myself?
People with some DIY knowledge can do simple repairs like changing couplers or agitator dogs. However, it’s recommended to seek the advice of a qualified specialist for complicated repairs or if you are doubtful.
4. In the event that the agitator gets stuck and won’t release, what should I do?
Applying a penetrating lubricant may help loosen the agitator if you are having trouble removing it. Ask for expert help if the issue continues.
5. Is it necessary to disconnect the power supply before removing the agitator?
Yes, it is essential to turn off the power supply before working on the washing machine to prevent any electrical dangers. Always put safety first.