Estimated reading time: 32 minutes
Last updated on August 21st, 2025 at 06:26 am
Your trusty washing machine is an essential appliance that simplifies the chore of laundry, making your life easier and more convenient. However, like any other machine, it’s not immune to occasional hiccups and errors that can disrupt its smooth operation. From water issues and drainage problems to unbalanced loads and mysterious error codes, these glitches can be frustrating.
But fear not! In this comprehensive guide, we will delve into the world of troubleshooting common washing machine problems. Whether you’re a seasoned DIY enthusiast or a novice user, this resource will equip you with the knowledge and practical solutions to get your machine up and running smoothly again.
Let’s start now!
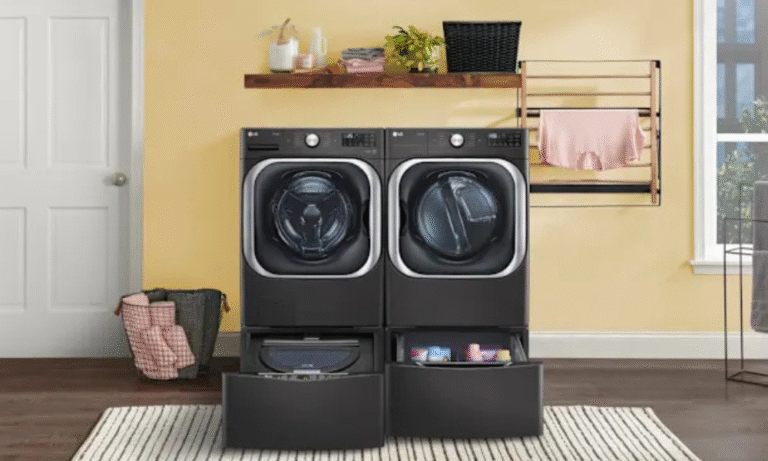
What is Washing Machine Component?

Photo Credit: Samsung
Here are the main parts you’ll find in most washing machines:
Drum: The drum is the main component of the washer where you put your laundry. To agitate and clean the clothing, it spins during the wash cycle.
Agitator/Paddles: The agitator, which is a metal or plastic spindle in the middle of the drum, is a feature of some washing machines. To provide a washing movement, the agitator oscillates back and forth. Instead of an agitator, newer washing machines may include paddles, which also aid in moving the clothing around.
Motor: The motor drives the spinning of the drum and regulates the movement of the paddles or agitator. Typically, an electric motor with a belt or direct-drive system is included.
Control Panel: The control panel allows you to adjust the temperature and other settings, as well as the wash cycle. Typically, it has knobs, buttons, or a digital display.
Timer: The timer is in charge of regulating how long the wash cycle lasts. It gives the machine the go-ahead to go through several stages, including filling with water, stirring, emptying, rinsing, and spinning.
Water Inlet: The washing machine’s connection to the water supply is made at the water inlet. Water can enter the machine through hot and cold water valves to be used for washing and rinsing.
Pump: After the wash and rinse cycles, the pump drains the water from the machine. It uses a drain line to pump the water out.
Water Level Sensor: During the wash cycle, this sensor keeps track of the water level in the drum. According to the chosen load size, it makes sure that the appropriate amount of water is used.
Heating Element: For certain wash cycles, such as hot or warm washes, a heating element is utilized in machines with built-in heaters to heat the water to the necessary temperature.
Detergent Dispenser: Detergent, fabric softener, or bleach are all stored in the detergent dispenser. During the wash cycle, it releases these compounds at the proper moment.
Lid/Lid Switch: The lid of top-loading washers may open and close. The lid switch determines whether the lid is closed or open, and if it’s open, it stops the machine from turning on.
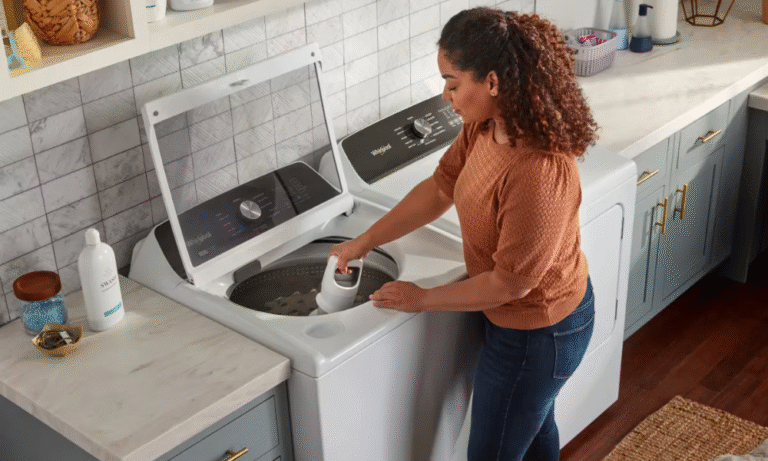
Motor Troubleshooting
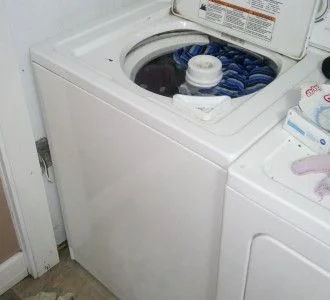
Photo Credit: doityourself
Recognizing issues with motors
Here are some typical difficulties to look out for when it comes to identifying problems with washing machine motors:
Noisy Operation: If the motor is creating loud, odd noises like grinding, screaming, or buzzing, it may be a sign that something is wrong. This could be caused by deteriorated bearings, a slack belt, or a broken motor part.
Failure to Start: If the washing machine’s motor doesn’t turn on when you turn it on, there can be an electrical problem. Verify the power supply to see whether it is operating correctly; if it is, there may be an issue with the motor or a bad connection.
Overheating: If the motor operates with an abnormally high level of heat, there may be a problem. Numerous things, such as a broken thermostat, inadequate ventilation, or a bad motor winding, might contribute to overheating. To prevent future harm, this problem has to be resolved right away.
Inconsistent or Slow Spin Cycle: If the spin cycle is not performing properly or the drum is spinning at a slower speed than usual, it could be due to motor-related issues. A worn-out belt, a defective motor capacitor, or an issue with the motor itself might be to blame for this.
Tripped Circuit Breaker: An electrical overload is indicated if the washing machine abruptly stops working and the circuit breaker trips. A short circuit or a malfunctioning motor may be to blame for this. Resetting the breaker only to have it trip once again is a blatant sign that there is a deeper problem.
Burning Smell: If the washing machine is emitting a burning smell, there may be a significant issue with the engine. It can be the result of an electrical component overheating or a broken motor winding. It is crucial to switch the equipment off and seek expert help in such circumstances.
Excessive Vibration: While some vibration is typical during operation, excessive shaking or vibrating may indicate a problem with the motor or balance. A misaligned or imbalanced motor, loosened mounting nuts, or worn-out shock absorbers may be to blame.
Steps to fix motor issues
It can be difficult to repair motor problems in washing machines and may be best left to an experienced technician. However, if you experience motor issues, you can follow these broad steps:
Safety first: To reduce the danger of electric shock, make sure the washing machine is disconnected from the power source before beginning any repairs. Additionally, take the required safety precautions, such as donning safety goggles and gloves.
Identify the Problem: Observe the symptoms and try to pinpoint the specific issue with the motor. Use the user manual or internet resources to learn about typical motor issues and the symptoms they are accompanied with.
Inspect the Power source: Verify that the washing machine’s power source is operating properly. Check to see whether the washing machine’s circuit breaker or fuse has tripped or blown. Before continuing, fix any power supply problems if there are any.
Examine the components around the motor for any obvious symptoms of the damage, such as loose connections, frayed wires, or burned components. If you encounter any problems, go to the user manual for instructions on how to fix them, or think about asking a specialist for help.
Test the motor capacitor: A typical component that can lead to motor issues is the motor capacitor. You may check the capacitor for continuity or damage using a multimeter. It could be necessary to replace the capacitor if it is defective.
Check Motor Bearings: Worn-out motor bearings can result in excessive noise or vibration. If you think this is the problem, you might need to take the motor out of the washer so you can check it and possibly replace the bearings. Consult the user manual or get advice from an expert before beginning this process because it may differ based on the exact washing machine model.
Consult a Professional: If you are unable to identify or resolve the motor problem on your own, it is advisable to contact a qualified technician or the manufacturer’s customer service for assistance. They are equipped with the knowledge and know-how to identify and fix intricate motor problems.
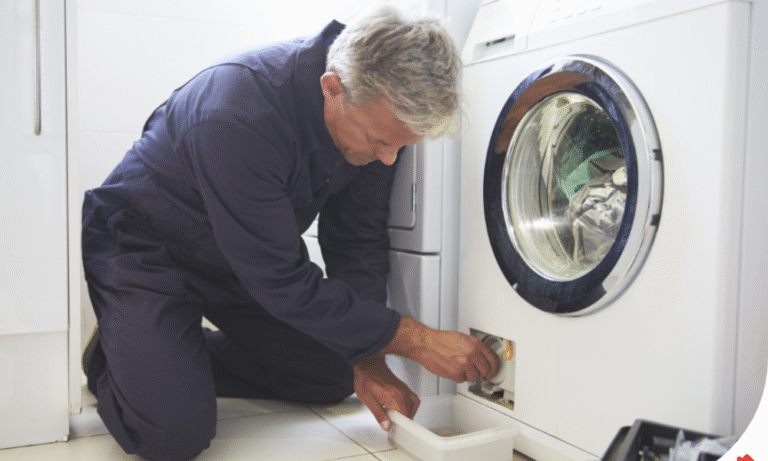
Water Inlet Valve Problems
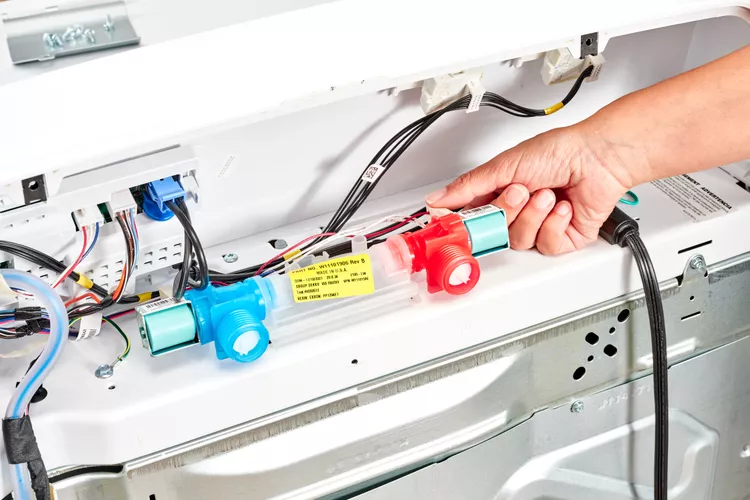
Photo Credit: thespruce
Signs of a faulty water inlet valve
Here are several indicators that a washing machine’s water entry valve may be malfunctioning:
Insufficient or No Water Flow: A broken water inlet valve may be to blame if your washing machine isn’t getting enough water to fill it up or if water flow has significantly decreased. Water may not be able to enter the machine because the valve is blocked, clogged, or not opening properly.
Constant Water Flow: On the other hand, if water continues to flow into the washer even when it is not in use or during the incorrect cycle, it may be due to a broken water intake valve that is not turning off properly. Flooding, leakage, or overfilling may happen from this.
Inconsistent Water Temperature: A faulty water inlet valve may cause inconsistent water temperature during the wash cycle. The valve is not effectively controlling the water temperature if you set the machine to a certain degree yet the water comes out too hot or too cold.
Water Leaks: Water leaks surrounding the washing machine, particularly when it is full, may indicate a broken water entry valve. A worn-out or broken valve may not form a tight seal, allowing water to flow out and perhaps harm the surrounding region.
Vibrations or noises: The water inlet valve should work softly and smoothly. During the water-filling process, if you hear any strange noises emanating from the valve region, such as buzzing, humming, or vibrating sounds, it may be a sign that the valve is malfunctioning.
Visual Inspection: You can look for any obvious evidence of deterioration, including cracks, corrosion, or mineral deposits, on the water input valve. These may prevent the valve from operating properly and point to the requirement for a replacement.
It is advised to have the water inlet valve examined and fixed by a skilled expert if you notice any of these symptoms, or to get advice from the manufacturer’s customer care. They’ll be able to correctly identify the problem and, if required, repair the broken valve.
How to replace a defective water inlet valve
These standard procedures should be followed to replace a washing machine’s faulty water input valve. It’s important to refer to the user manual or get expert assistance if necessary because the particular instructions may differ depending on the brand and type of your washing machine:
Safety first: Be careful to unplug the washing machine from the power source to reduce the chance of receiving an electric shock. Additionally, shut the hot and cold water valves to stop the machine’s water supply.
Access the Water Inlet Valve: Remove any panels or covers that obstruct access to the water inlet valve. To do this, you might need to use a screwdriver to loosen snaps or locks or to unscrew screws.
Disconnect Water Supply: Locate the water supply hoses connected to the inlet valve. To unhook the hose connections from the valve, use pliers or an adjustable wrench. Be ready for some water to leak out; keep a towel or pail nearby to capture any lingering water.
Remove Electrical Connections: Identify the electrical connections attached to the water inlet valve. Typically, terminals or connectors are used to join these wires. Depending on the connectors that were used, carefully separate the electrical connections by pulling them apart or releasing the screws.
Remove the Old Water Inlet Valve: The Old Water Inlet Valve may be mounted using screws or mounting brackets. To remove the old water input valve from the washer, unscrew the bolts or loosen the brackets.
Install the New Water Inlet Valve: Take the new water inlet valve and align it in the correct position. Make sure it is firmly in position, fasten it with the supplied screws or reinstall the mounting brackets.
Connect Electrical Connections: Join the new water intake valve’s electrical connections. Ensure that they are straight and fasten them in accordance with the manufacturer’s guidelines. Check again to make sure all connections are secure and appropriately insulated.
Re-establish Water Supply: Using the water supply hoses, connect the relevant hot and cold water inlets on the new valve. To firmly tighten the hose connectors, use pliers or an adjustable wrench.
Check for Leaks: As soon as everything is securely fastened, switch on the water supply valves and look for any leaks around the just-installed water entry valve. You can move on to the following step if there are no leaks.
Reassemble and Test: Replace any panels or coverings that had to be taken off in order to reach the water intake valve. To make sure the new valve is working properly and letting water into the machine, plug in the washing machine and do a test cycle.
Drainage and Pump Issues
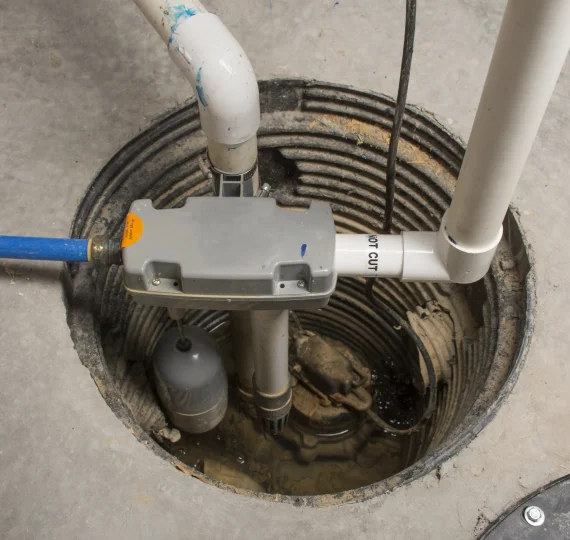
Photo Credit: glacierinspections
Identifying drainage and pump problems
Here are some indicators and actions to take in order to spot drainage and pump issues with a washing machine:
Signs of Pump and Drainage Issues:
- Standing Water: If you find standing water at the bottom of the washing machine or in the drum after a wash cycle, there may be a drainage problem. It’s possible that the machine’s water drainage system isn’t working as well as it should.
- Slow or Incomplete Drainage: If the washing machine drains abnormally slowly or leaves some water in the drum, the drainage mechanism or pump may be malfunctioning.
- Strange Sounds: During the draining process, a broken pump may make odd sounds. If the pump is laboring or running into a clog, you can hear grinding, rattling, or humming noises.
- Foul Odor: Stagnant water left in the machine due to poor drainage can lead to a foul odor. A drainage issue may be present if you detect a musty or unpleasant scent emanating from the washing machine.
A step-by-step guide to resolving drainage and pump issues
Here is a step-by-step tutorial for fixing washing machine drainage and pump issues:
Safety first: To reduce the danger of electric shock, make sure the washing machine is disconnected from the power source before beginning any repairs. Lastly, stop the machine’s water supply.
Check for Obstructions: Inspect the drain hose and ensure it is not kinked, twisted, or clogged. Straighten out any kinks and clear the hose of any obstructions or dirt. If there are any obstinate blockages, carefully remove them with a long brush or pipe cleaner.
Clean the Filter: Place the filter next to the drain pump; for exact position information, refer to the user handbook. Lint, coins, or other debris that may have become lodged inside the filter should be removed and cleaned carefully. Rinse the filter with water to make sure there are no obstructions.
Clear the Drain Pump: Remove the access panel or cover to see the drain pump (consult the user handbook for instructions). To collect any water that may leak out of the pump, place a towel or shallow container underneath it. Lint, coins, and small pieces of clothes, among other obvious detritus and foreign objects, should be removed from the pump.
Test the Pump: Reconnect the hoses and power supply to the washing machine after clearing any blockages from the drain pump. Run a brief test cycle to determine if the drainage problem has been fixed. Keep an eye on the water flow and keep an ear out for any strange sounds coming from the pump. Continue to the following step if the issue doesn’t go away.
Inspect the Impeller of the Pump: If the pump is still not operating correctly, you might need to check the impeller. Access the impeller (usually close to the drain pump) by cutting off the electricity. Make sure it can spin unhindered and freely. Clear away any accumulation or debris that may be obstructing the impeller’s motion.
Check your drainage once more: Reconnect all of the hoses and the power source, then do a second water-only test cycle. Keep an eye on the drainage procedure to check if the problem has been fixed. If the issue continues, think about hiring a specialist or getting in touch with the manufacturer’s customer support for more advice.
Maintenance and Prevention: It’s crucial to routinely maintain your washing machine after the drainage and pump problems are fixed. In order to avoid more issues, frequently clean the filter and inspect the drain hose. Before beginning a wash cycle, avoid overloading the machine and take out any loose items from pockets, such as coins or tiny objects.
Addressing Common Washing Machine Errors
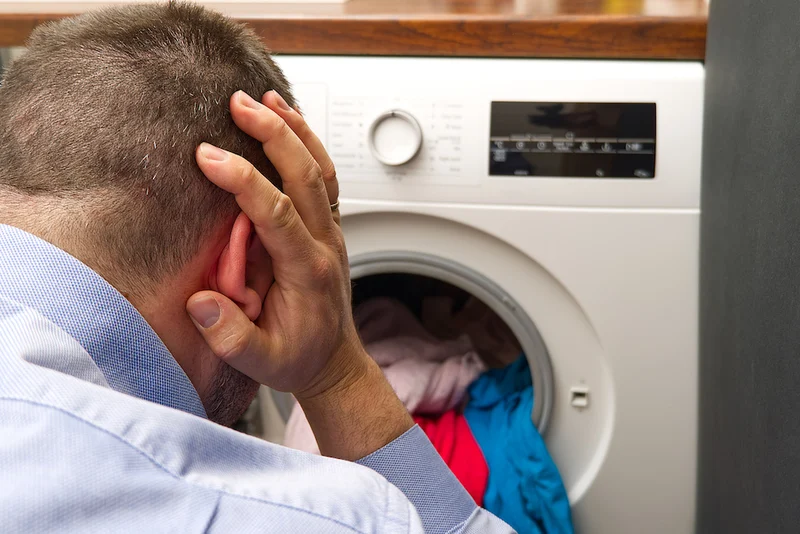
Photo Credit: expresssewer
Here are some typical washing machine issues and possible fixes:
Error Code: E1, E2, E3, (Numeric Error Codes):
Solution: Depending on the type and manufacturer of the washing machine, numerical error codes might differ. To find the precise problem code and its associated fix, it is advisable to consult the user manual or the manufacturer’s website. The majority of manuals include a list of problem codes and instructions on how to troubleshoot them.
Error Code: OE, E20, or Draining Issues:
Remedy: This error often denotes a drainage system issue. Start by looking for any obstructions in the pump filter or drain pipe. Debris, lint, or foreign items that could be impeding the drainage passage should be removed. If the problem still exists, a professional examination or drain pump replacement may be necessary.
Error Code: UE or Unbalanced Load:
Solution: The washing machine identifies an imbalanced load when this mistake occurs. Reposition the clothing evenly throughout the machine, making sure they are not clumped together on one side. Reduce the load size or use an alternative wash cycle with a slower spin speed if the issue continues.
Error Code: F1, F2, F3, (Alphabetical Error Codes):
Solution: various washing machine models and manufacturers may have various alphabetical trouble codes. For a complete list of error codes and their accompanying fixes, go to the user guide or the manufacturer’s website. For more assistance, either contact customer service or adhere to the suggested troubleshooting instructions.
Error Code: Door Lock Error or Door Not Closing Properly:
Remedy: The washing machine may indicate a door lock error if it determines that the door is not closed tightly or that the door lock mechanism is malfunctioning. Make sure the door is properly secured and closed. Look around the entrance for any impediments, such as clothing or garbage. The door lock mechanism might need to be examined and, if required, replaced if the problem persists.
Error Code: Motor Overheating or Overload:
Solution: The washing machine motor may display an error code if it overheats or is overworked. In this scenario, give the engine some time to cool before starting the appliance again. Make sure the load size is adequate and doesn’t go beyond the suggested capacity. If the mistake keeps happening, there can be a problem with the motor or motor control unit, which calls for professional help.
Decoding error codes and their meanings
The following list of typical washing machine trouble codes and their associated meanings includes:
Error Code: E1, E2, E3 – Meaning: Numeric error codes can vary depending on the washing machine model and manufacturer. To determine the precise error number and its significance, it is recommended to consult the user manual or the manufacturer’s website.
Error Code: OE or E20 – Meaning: This error typically indicates a draining issue. It can be caused by a broken drain pump, a clogged pump filter, or a clogged drain hose. The drain pipe and pump filter should be examined and cleared of any blockages. The drain pump may need to be examined or replaced if the issue continues.
Error Code: UE – Meaning: This error indicates an unbalanced load. It denotes an uneven distribution of the laundry within the machine, which results in an unbalanced spin cycle. Reposition the clothing evenly throughout the machine, making sure they are not clumped together on one side. Reduce the load size or use an alternative wash cycle with a slower spin speed if the issue continues.
Error Code: LE or E6 – Meaning: This error usually points to a motor or motor control problem. It could be brought on by a broken motor, a defective motor sensor, or problems with the motor control board. It might be necessary to seek professional help to identify and resolve the specific motor-related issue.
Error Code: DE or Door Lock Error – Meaning: This error indicates a problem with the door lock mechanism. It can imply that the door is not shutting securely or that the door lock is broken. Make sure the door is completely closed and unobstructed. The door lock mechanism may need to be examined, fixed, or replaced if the problem continues.
Error Code: PF or Power Failure – Meaning: This error occurs when the washing machine experiences a power interruption during operation. It acts as a prompt to restart the device during a power outage. To resume the specified wash cycle, simply restart the washing machine.
Troubleshooting common error codes
Error Code E1: Water does not enter the machine or the water level does not change.
Troubleshooting Steps:
- Check if the water supply is properly connected and the water valves are open.
- Ensure the water pressure is sufficient.
- Clean the water inlet filters if they are clogged.
Error Code E2: The machine is not draining water.
Troubleshooting Steps:
- Check if the drain hose is kinked or clogged. Clear any obstructions.
- Verify if the drain pump is functioning properly. It may need to be cleaned or replaced.
Error Code E3: The machine detects an unbalanced load.
Troubleshooting Steps:
- Open the machine and redistribute the load evenly.
- Remove any bulky items that may be causing the imbalance.
- Check if the machine is level and adjust its feet if necessary.
Error Code E4: The machine door is not securely closed.
Troubleshooting Steps:
- Make sure the door is closed properly and securely.
- Check if there are any obstructions preventing the door from closing.
- If the problem persists, there might be an issue with the door latch or sensor that needs to be examined.
Error Code E5: The machine detects a water leakage.
Troubleshooting Steps:
- Turn off the machine and disconnect the power supply.
- Inspect the hoses, connections, and seals for any leaks or damages.
- Replace any faulty parts or tighten the connections as necessary.
Error Code E6: The machine’s motor or motor control board is experiencing a problem.
Troubleshooting Steps:
- Turn off the machine and unplug it from the power source.
- Wait for a few minutes and then restart the machine.
- If the error persists, contact a professional technician for further inspection and repair
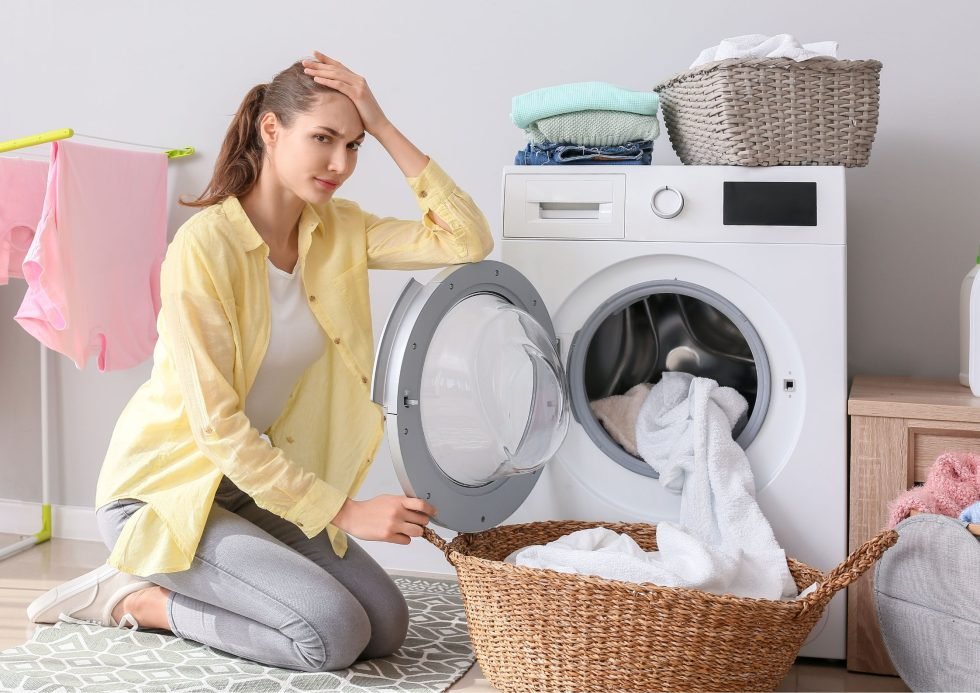
Dealing with Leaks
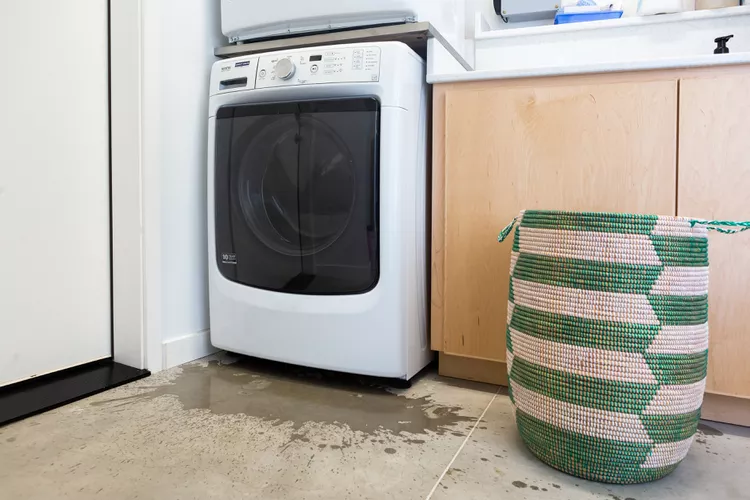
Photo Credit: thespruce
In washing machines, leaking is a frequent problem that may happen for a number of reasons. Effective troubleshooting depends on locating the leak’s origin. What you need to know is as follows:
Causes of washing machine leaks
Washing machine leaks might be caused by a number of factors. Here are a few typical examples:
Damaged or Worn Out Hoses: The inlet and outlet hoses that connect your washing machine to the water supply and drainage system can develop cracks or become worn over time. Leaks may result from this. Regularly check the hoses for deterioration, and replace them if necessary.
Loose or Faulty Connections: Inspect the hoses, washing machine, and water supply/drainage pipes for any loose or faulty connections. Leaks can be brought on by loose or incorrectly installed connections. Make sure all connections are tight and secure.
A damaged water inlet valve: This valve regulates the amount of water that enters the washing machine. Water may spill out of the device if the valve becomes damaged or starts to leak. Look for any indications of damage or leaking in the valve, and replace it if required.
Overloading the Machine: When the washing machine is overloaded, the drum is put under extreme strain, which can lead to water leaks from the door or other places. To avoid overloading, adhere to the manufacturer’s load capacity recommendations.
Damaged or obstructed Pump: Your washing machine’s pump aids in removing water from the drum. Leaks may occur if the pump is compromised or clogged with debris. Examine the pump for any damage or obstructions, then clean or replace it as necessary.
Worn Out Door Seal or Gasket: Between the door and the drum, the door seal or gasket creates a watertight seal. The seal may deteriorate or sustain damage over time, causing leaks. Look for any evidence of wear or tears in the seal, and replace it if required.
Excessive Detergent Use: Using excessive amounts of detergent or the incorrect kind of soap might result in suds that overflow and produce leaks. Observe the detergent usage instructions provided by the manufacturer.
Incorrect Levelling or Placement: If the washing machine is set up incorrectly or on an uneven surface, water may leak. Make sure the machine is positioned on a firm, flat surface.
It’s critical to take immediate action if you discover a leak in your washing machine to save further harm. Find the leak’s origin and take the necessary action to repair or replace the broken components. It is advised to visit a qualified expert or get help from the manufacturer’s customer service if you are unclear on how to proceed or if the problem persists.
Fixing leaks based on their source
Finding the cause of the issue is necessary for leak repair. Here are some typical leak sources and their accompanying fixes:
Water seeping from the door seal: A worn-out or broken seal may be to blame if you detect water leaking from the door seal. In this situation, a new door seal will need to be installed. For precise directions on changing the door seal, see your washing machine’s instruction manual or get in touch with the maker.
Check the intake and outlet hoses for any cracks, kinks, or loose connections if there is hose leakage. Replace any broken hoses and tighten any loose connections. Before removing the hoses, don’t forget to switch off the water supply. Because they are more resilient and less likely to leak, think about adopting stainless steel hoses.
If the leak is coming from the drain pump, it can be because of a blockage or a malfunctioning pump. Start by checking the drain pump for obstructions or debris. Remove any stumbling blocks and check that the pump is operating correctly. The pump might need to be changed if it is broken or not functioning properly.
Water leaking from the detergent dispenser: The detergent dispenser may occasionally leak water. If the dispenser is blocked or the water pressure is too high, this may occur. Eliminate any residue or obstructions by properly cleaning the dispenser. If the problem continues, you might need to change the water pressure or get in touch with a specialist for more help.
Keep in mind that before performing any repairs, you should always take measures and refer to your washing machine’s handbook. It is preferable to seek the assistance of a trained expert if you are hesitant or uncomfortable doing repairs yourself.
Regular Maintenance Tips to Prevent Problems
Your washing machine’s lifespan may be increased with proper maintenance, which can also stop frequent issues from developing. Here are some crucial pointers for maintaining your equipment in top shape:
Cleaning and Maintenance Schedule
You can keep organized and make sure that duties are carried out on a regular basis by setting up a cleaning and maintenance routine. Here is an example timetable that you may modify to suit your own requirements:
Daily Tasks:
- Wipe down kitchen countertops and dining table.
- Vacuum or sweep heavily used areas.
- Take out the garbage.
- Dishes should be washed or placed in the dishwasher.
- Make the beds and clean the rooms.
- Frequently touched objects like doorknobs, light switches, and remote controls should be cleaned and disinfected.
Weekly Tasks:
- Dust furniture, shelves, and electronics.
- Mop or vacuum each floor.
- Keep all shower, sink, and toilet fittings spotless.
- Alternate towels and bed linens.
- Clean the cabinets and equipment in the kitchen.
- Polish your mirrors and windows.
- Sort through and clean up one part of the home.
Monthly Tasks:
- Deep clean kitchen appliances, such as the oven, microwave, and refrigerator.
- Vacuum blinds or curtains.
- Keep the light fixtures and ceiling fans clean.
- Change the HVAC filters and clean the air vents.
- Shine up any wooden furniture.
- Organize and clean storage spaces and closets.
- Check the smoke and carbon monoxide detector batteries and change them as necessary.
Seasonal Tasks:
- Clean and store seasonal clothing.
- Examine and tidy up the gutters and downspouts.
- Repair and upkeep of heating and cooling equipment.
- Keep the grill and patio furniture clean.
- Clean up the yard, and trim the shrubs.
- Examine and clean the chimney and fireplace.
Yearly Tasks:
- Deep clean carpets and upholstery.
- Arrange for key appliances to have expert maintenance.
- Examine and maintain sprinkler systems outside.
- Maintain and lubricate the garage door’s working parts.
- Inspect and clean the gutters and roof.
- Examine the foundation and walls for cracks and damage, then fix them.
Remember that this is only a general recommendation, and you are free to modify the timetable to suit your tastes and the particular requirements of your house. To keep a living area tidy and well-maintained, consistency is essential.
Importance of regular cleaning and maintenance
Maintaining the operation, look, and durability of numerous objects, systems, and locations is crucially important. Here are several major justifications for the significance of routine maintenance and cleaning:
Preventing damage: Regular maintenance assists in seeing and resolving possible problems before they become serious ones. A tiny plumbing system leak, for instance, may be checked for and fixed to avoid future water damage and expensive repairs.
Extending longevity: Carefully cleaning and maintaining products and equipment may greatly increase their lives. Appliances like refrigerators and air conditioners may be kept operating effectively and avoid untimely breakdowns by receiving routine maintenance.
Improving performance: Regular maintenance guarantees that equipment and systems operate at their best. For instance, a car’s engine may be cleaned and tuned up to increase overall performance and fuel economy.
Promoting safety: Keeping safety equipment, such as smoke detectors or fire extinguishers, clean and maintained will ensure that it is in excellent working order, giving early warnings and protection when required. Accidents and injuries can also be avoided by performing routine maintenance on household furniture and equipment.
Increasing energy efficiency: Insulating areas as well as cleaning and repairing HVAC (heating, ventilation, and air conditioning) systems can improve energy efficiency. This minimizes energy use, lowers utility costs, and is better for the environment.
Preserving aesthetics: Regular cleaning and maintenance assist keep environments, such as homes, businesses, or cars, clean, beautiful, and generally appealing. It keeps everything appearing clean and welcoming by preventing the accumulation of dirt, grime, and stains.
Promoting a healthy environment: Keeping rooms clean and maintained, especially in terms of cleanliness and sanitation, helps to create a healthy home or workplace. The risk of disease and allergies can be decreased by routinely cleaning surfaces, replacing air filters, and removing allergens.
Financial savings: Putting time and effort into routine upkeep and cleaning will ultimately cost you less money. You may save money by avoiding expensive repairs or replacements that result from neglect or unplanned failures.
In general, routine upkeep is necessary to maintain the quality, usefulness, and worth of diverse objects, systems, and areas. You may benefit from increased performance, safety, lifespan, and cost savings by being proactive and adopting these practices into your daily routine.
Step-by-step guide for maintaining a washing machine
Sanitize the drum: To get rid of any dirt, lint, or debris, clean the drum on a regular basis. To clean the inner surfaces, use a moist cloth or sponge. Consider adding a cup of white vinegar or a washing machine cleanser to an empty hot water cycle for a more thorough clean.
To clean the detergent dispenser, take it apart and give it a good rinsing in warm water. Remove any residue or accumulation by scrubbing with a brush or toothbrush. Before reconnecting it to the machine once more, make sure it is thoroughly dry.
Examine and clean the filter: The front or rear of many washing machines houses a filter. To identify the filter and get rid of any lint, coins, or other debris that may have gathered, refer to your machine’s manual. To keep the water flowing properly, clean the filter frequently.
Examine and clean the rubber door seal, sometimes referred to as the gasket, since it is prone to accumulating debris, soap residue, and moisture. To stop mold from growing, frequently wipe the seal with a moist cloth. If you see any mold or mildew, properly clean the seal with a solution of water and vinegar.
Maintain the exterior’s cleanliness by using a moist cloth to wipe away dust and stains from the machine’s outside surfaces. Avoid using strong chemicals or abrasive cleansers that might harm the finish.
Tips for Proper Loading and Usage
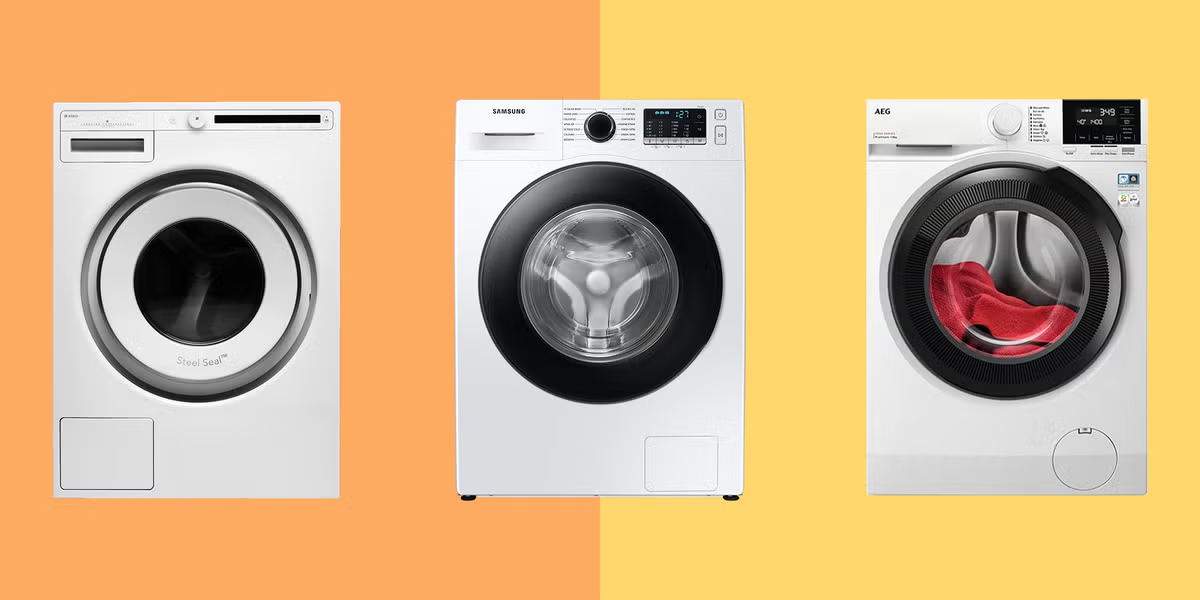
Photo Credit: goodhousekeeping
The right use and loading of your washing machine may help save needless wear and tear, lower the chance of damage, and assure the best cleaning outcomes. Here are some crucial pointers to remember:
Clean up your laundry: Sort your laundry by color, fabric, and degree of soiledness. Sorting your clothing before filling the washer prevents colors from bleeding through and ensures that delicate textiles are handled with care.
Always follow manufacturer guidelines: For information on suggested detergent dosages and load size, always consult the manufacturer’s instructions.
While using too much or too little detergent may lead to subpar cleaning outcomes or residue building, overloading the machine can put stress on the engine and hinder washing effectiveness.
You should pre-treat stains to remove any particularly difficult ones before washing them. Apply the stain remover immediately to the impacted area as directed on the label. Before putting the item in the washer, let it sit for a while.
Use the proper water temperature: Pay attention to the instructions for the recommended water temperature on the labels of your clothing, and then modify your washing machine as necessary. Cold water is best for fragile materials and potentially bleedable colors while hot water is appropriate for highly dirty objects.
A number of wash cycles are available in modern washing machines to accommodate various materials and levels of dirtiness, so choose the one that is right for you. Choose the right cycle for your load, such as a mild cycle for fragile goods or a heavy-duty cycle for extremely dirty clothing.
Detergent residue can be left on your clothing and inside the washing machine if you use too much. To get the best cleaning results, use high-quality, concentrated detergents and stick to the dosage instructions.
Equilibrate the load: Excessive vibration and noise during the spin cycle might result from unevenly distributed clothes. To keep the drum balanced, scatter the garments around it equally. Balance out a single large item, like a blanket, with a few smaller ones.
Regularly clean the machine: As part of your usual maintenance, clean your washing machine frequently. To avoid the accumulation of dirt, lint, and residue, this involves cleaning the drum, detergent dispenser, and filters.
These suggestions can help you get the most out of your washing machine, extend its life, and guarantee that your clothes come out every time clean and fresh.
Final Thoughts
Fixing typical washing machine issues doesn’t have to be a difficult process. You may save time, money, and stress by comprehending the many parts of your washing machine and being aware of how to handle frequent problems. Keep in mind to abide by safety regulations, refer to your machine’s handbook, and call in experts when necessary.
Furthermore, frequent maintenance and good usage habits are crucial for avoiding issues and maintaining your washing machine in top shape. You may enjoy effective performance and increase the longevity of your appliance by sticking to a cleaning plan, fixing leaks as soon as they appear, and loading your machine appropriately.
Always seek the advice of a qualified expert if you experience recurring problems or are hesitant about carrying out repairs yourself. If you take care of your washing machine, it will continue to provide you with clean, fresh laundry.
Frequently Asked Questions
1. How frequently should I clean my washer?
It is often advised to clean your washing machine once every three to six months. However, it’s advisable to clean it more often if you notice smells, mold, or other problems.
2. What causes my washing machine to make odd noises?
Unbalanced loads, loose parts, or worn-out components are only a few of the causes of strange noises. For help determining the precise reason, it is advisable to speak with a specialist.
3. How can I keep my machine from developing mold and mildew?
Prevent mold and mildew in your washing machine with these tips:
- Keep the door open after each use to allow airflow and prevent moisture buildup.
- Regularly clean the drum and rubber seal with a wet cloth to remove lint, detergent residue, and moisture.
- Once a month, run an empty hot water cycle with vinegar or bleach to eliminate mold and mildew. Follow the manufacturer’s recommendations for the proper amount.
- Use high-efficiency (HE) detergents to reduce suds and prevent residue buildup, minimizing the chance of mold and mildew growth.
- Promptly remove wet laundry to avoid creating a breeding ground for mold and mildew.
4. If my washing machine won’t spin, what should I do?
The following troubleshooting techniques should work if your washing machine won’t spin:
- Make sure there are no uneven loads present since they can stop the machine from spinning. Restart the machine after stopping the cycle and evenly distributing the clothes.
- Look at the lid or door switch. This device controls whether the machine spins when the lid or door is closed. The machine could not spin if the switch is malfunctioning. For repair or replacement, seek the advice of a qualified technician.
- Check the drive belt: A worn-out or damaged drive belt may have an impact on how the mechanism spins. Make arrangements to have the belt replaced if it looks to be damaged.
- Examine the motor coupler, which links the motor and transmission. The machine could not spin if it was worn out or damaged. If necessary, a professional can swap out the motor coupler.
5. How can I fix a spin cycle that vibrates too much?
Excessive vibration during the spin cycle can be bothersome and could be a sign of something deeper. To troubleshoot the issue, try these steps:
- The machine may vibrate significantly if the load is imbalanced or distributed unevenly. Restart the machine after stopping the cycle and redistributing the clothing.
- Verify that the machine is level by using a spirit level to see if it is positioned level on the floor. To establish stability, adjust the leveling feet as necessary.
- Examine the suspension rods or shock absorbers: Vibration can be worsened by damaged or worn-out suspension rods or shock absorbers. A technician could be required to repair these components if they are damaged.
- Check for good installation Ensure that the transit bolts: which hold the drum in place during transportation have been taken out. It may result in significant vibration if the bolts are still in place.