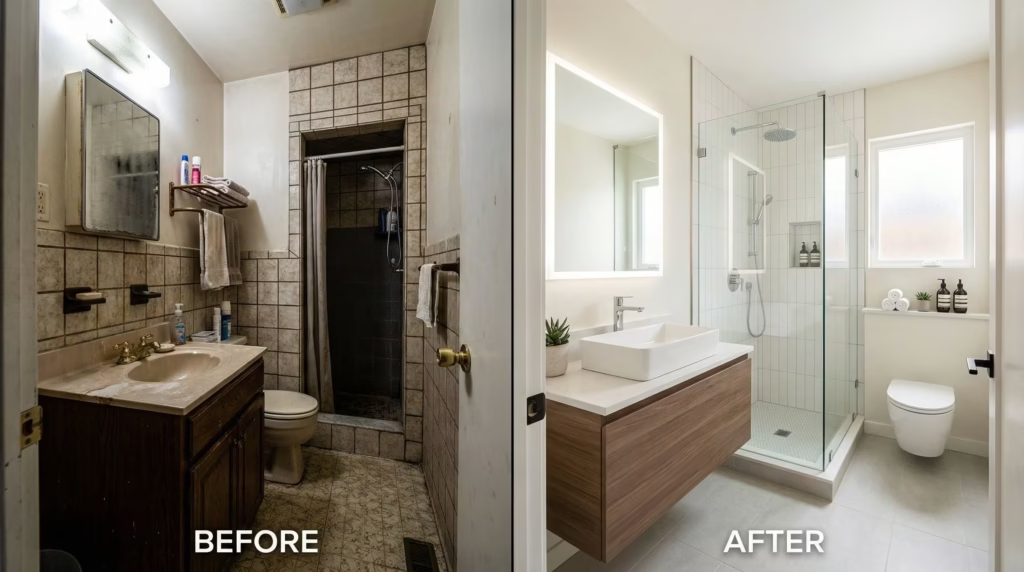
Estimated reading time: 10 minutes
Here’s what actually happens to most people who skip a checklist: they order tile two weeks into demo, realize it’s backordered for six more weeks, and end up brushing their teeth at the kitchen sink for a month and a half longer than planned. Or they tear out the old vanity before deciding on the new layout, then discover the plumbing doesn’t line up where they wanted it.
None of that is dramatic. It’s just expensive and annoying, and it’s almost always avoidable.
A bathroom remodel checklist isn’t really about ticking boxes. It’s about making the big, expensive decisions in the right order, before the part of the project that’s hard to undo. That’s the whole point of this one — it’s built around when decisions need to happen, not just what they are.
How Long Does a Bathroom Remodel Actually Take?

Most full bathroom remodels take 3 to 8 weeks of active construction. A cosmetic refresh — new vanity, new fixtures, fresh paint, no layout changes — usually runs 1 to 3 weeks. Add another 1 to 4 weeks on the front end for planning, ordering materials, and pulling permits before a single wall comes down.
That range is wide on purpose. Layout changes, permit requirements, and how fast you make decisions all push the timeline in either direction. If you’re moving plumbing or knocking down walls, plan for the longer end. If you’re keeping everything where it is and just updating finishes, you’re closer to the shorter end.
One thing worth saying plainly: that “two-week” refresh you’re picturing will probably take three. Not because anyone did anything wrong, but because something always comes up — a part is on backorder, an inspector needs another day, the grout needs 24 to 48 hours to cure before anyone can walk on the new tile. Build the buffer in now, both in your calendar and your patience, instead of being surprised by it later.
The Bathroom Remodel Checklist, By Phase
This breaks into three phases: planning and design, construction and installation, and final checks. Each one has its own pace, its own risks, and its own “don’t skip this” moments.
We’ve also put the whole thing into a free, downloadable PDF you can print or pull up on your phone at the hardware store — no email required, no signup form standing between you and the list. [Download the Bathroom Remodel Checklist PDF here].
Phase 1: Planning and Design (1–4 weeks)
This is the phase everyone wants to rush through, and it’s the one that determines whether the rest of the project goes smoothly.
- Set a real budget, including a 15–20% buffer for surprises
- Decide on the overall layout — are fixtures staying put or moving?
- Choose your tile, vanity, fixtures, and paint colors
- Confirm material lead times before you fall in love with anything custom
- Hire a contractor or designer if you’re not doing this yourself
- Check whether your project needs a permit (more on that below)
- Order long-lead-time items now, not after demo starts
Lock these in before demo day: layout, tile, vanity, fixture finishes, and your lighting plan. Once the old vanity is gone and the walls are open, changing your mind on any of these means paying for redone work, not just a different selection. Custom tile and vanities commonly take 4 to 8 weeks to arrive — that’s the single most common reason bathroom remodels run long, more often than contractor delays or even permit issues.
If this is your first time managing a renovation, it’s worth reading through a broader home renovation guide for beginners before you finalize anything — a lot of the planning mistakes that derail bathrooms are the same ones that derail kitchens, basements, and everything else.
Phase 2: Construction and Installation (1–6 weeks)

This is the loud, messy, satisfying part. The order matters here more than almost anywhere else in the project.
- Demolition — old fixtures, flooring, and any walls coming out
- Rough-in plumbing and electrical (this is when outlets, GFCI protection, and pipe locations get set)
- Inspections, if your permit requires them, before walls close up
- Waterproofing and membrane work in the shower or tub area
- Subfloor repair or replacement, if there’s water damage underneath
- Tile installation, followed by the required grout cure time
- Vanity, toilet, and fixture installation
- Lighting and exhaust fan installation
- Paint and final trim
Waterproofing has to happen before tile goes down, not after — there’s no shortcut here, and it’s one of the few steps in a bathroom remodel that genuinely can’t be skipped without risking mold or water damage behind the walls later. If your contractor suggests skipping it to save a day, that’s worth a second conversation.
This is also where storage decisions get made — built-in niches, medicine cabinets, or a vanity with real drawer space. If you’re tight on square footage, it’s worth looking at smart storage and shelving solutions before the walls close up, since adding a recessed shelf later means opening drywall again.
Phase 3: Final Checks (a few days to a week)

The project doesn’t end when the last tile goes in. This phase is short, but skipping it is how people end up calling a contractor back six months later for something that should’ve been caught at the walkthrough.
- Test water pressure at every fixture
- Run the drains and check for slow drainage or leaks underneath
- Turn on the exhaust fan and confirm it’s actually pulling air (not just spinning)
- Test every GFCI outlet
- Check that doors, drawers, and cabinet hardware open and close properly
- Walk the whole space for caulking gaps, paint touch-ups, or uneven grout lines
- Make a punch list of anything that needs fixing and get a date for it
- Deep clean before you actually start using the space
A few minutes of testing here saves you from discovering a slow leak under the vanity three months from now, after the warranty conversation gets a lot more complicated.
Common Bathroom Remodel Mistakes (And Why They’re Expensive)
Choosing the wrong materials for a wet room. Untreated wood, regular wallpaper, and non-rated paint don’t hold up to bathroom humidity — they warp, peel, or grow mold within a year or two. If you love a wallpaper look, save it for a space without constant moisture; our peel-and-stick wallpaper ideas guide has options that work beautifully in drier rooms.
Skipping or undersizing ventilation. An exhaust fan that’s too small for the room won’t clear humidity fast enough, and that moisture has to go somewhere — usually into your walls and ceiling. Size the fan to the square footage of the room, and if you can fit a window in, even better.
Underestimating the budget. Almost every remodel runs into something unplanned — old plumbing that needs replacing, a subfloor with hidden water damage, a backordered item that needs a substitute. Building in that 15–20% buffer up front means a surprise costs you stress, not a maxed-out credit card.
Skipping the floor plan before moving fixtures. Moving a toilet or shower drain sounds simple until you’re into the plumbing and electrical permits, structural considerations, and lead times that come with it. Always check your existing floor plan and talk to a professional before deciding to relocate anything load-bearing or plumbed.
A Few Sustainable Swaps Worth Considering
You don’t need to rebuild your whole bathroom around sustainability to make a few choices that pay off in lower bills and less waste.
Low-flow toilets, faucets, and showerheads carrying the WaterSense label cut water use without you noticing a difference in performance. LED lighting uses a fraction of the energy of older bulbs and lasts years longer, which matters in a room you’re probably not planning to gut again anytime soon. VOC-free paints and adhesives keep the air in a small, enclosed room healthier, which is worth it even setting the environmental angle aside.
If your old vanity or cabinet is structurally fine, a fresh coat of paint and new hardware can give it a second life instead of a trip to the landfill — it’s one of the easiest swaps in the whole project, and it’s usually the cheapest line item, too.
Should You DIY Any of This, or Hire It Out?
Not every step needs a professional, but some genuinely do, and mixing those up is how small savings turn into big repair bills.
Painting, hardware swaps, caulking, and even installing a new mirror or towel bar are reasonable DIY territory for most homeowners. You’ll save on labor, and the stakes if something goes slightly wrong are low.
Plumbing and electrical work are a different story. Moving a drain line, adding a new electrical circuit, or tying into existing wiring incorrectly can mean a failed inspection, a water leak inside a wall you just closed up, or a fire hazard you won’t notice until much later. The cost of hiring a licensed plumber or electrician for just those pieces is almost always smaller than the cost of redoing finished work because something behind the wall wasn’t done to code.
A reasonable middle ground a lot of homeowners land on: hire out plumbing, electrical, and tile work, then handle the demolition, painting, and final styling yourself. It cuts labor costs where it’s safe to, and protects you where it isn’t. If you’re weighing this decision for the first time, it’s worth reading more on what to expect from a beginner home renovation before committing either way — the calculus is similar whether it’s a bathroom, a kitchen, or anything else involving plumbing and wiring.
What This Looks Like for a Small Bathroom or Powder Room
A lot of this checklist scales down naturally if you’re working with a powder room or a small hall bath instead of a full master bathroom. The phases stay the same — plan, build, finish — but the timeline shrinks, and a few priorities shift.
Storage becomes the bigger design problem in a small space, since there’s less square footage to work with and usually no room for a linen closet inside the room itself. A vanity with real drawer storage, a recessed medicine cabinet, or a few well-placed shelves and drawer organizers tend to matter more here than they would in a larger bathroom, simply because every inch is doing double duty.
Layout changes are also riskier to attempt in a small footprint, since there’s less flexibility to work around existing plumbing without major cost. If the current layout already works reasonably well, it’s often smarter to keep fixtures where they are and put the budget toward finishes instead.
Frequently Asked Questions
What does a bathroom remodel checklist actually cover?
It covers the full project from planning through final inspection — budgeting, layout decisions, material selection, demolition, plumbing and electrical work, installation, and the final walkthrough. The goal is making sure nothing critical gets decided too late or skipped entirely.
What order do you remodel a bathroom in?
Generally: planning and design, demolition, rough-in plumbing and electrical, waterproofing, tile installation, fixture and vanity installation, paint and trim, then a final inspection and punch list. Skipping or reordering steps — especially waterproofing before tile — is where most redo costs come from.
Do you need a permit for a bathroom remodel?
Typically yes if you’re changing plumbing, electrical work, or the layout. A cosmetic refresh — new paint, new vanity in the same spot, same fixtures — usually doesn’t require one. Local codes vary, so check with your municipality before you start.
Can I still use my bathroom during a remodel?
Not usually, once demolition starts. If it’s your only bathroom, plan for an alternative for the full construction window, not just a few days — even a “quick” refresh can take longer than expected once walls are open.
Is this bathroom remodel checklist free to download?
Yes. It’s a straightforward PDF with no signup required — just download it and start using it.
Renovations rarely go exactly to plan, and that’s fine. What actually matters is making the expensive decisions early, in the right order, so the inevitable surprises stay small instead of compounding into something that costs you another month and another few thousand dollars.