Estimated reading time: 10 minutes
Last updated on June 23rd, 2026 at 07:27 am
There’s usually one thing that starts it. A light fitting that makes the whole ceiling look tired. Cabinet handles that belong in 2003. A bathroom mirror that’s somehow making a perfectly decent room feel like a budget hotel. You’ve walked past it a hundred times telling yourself it’s fine — and then one day it just isn’t anymore.
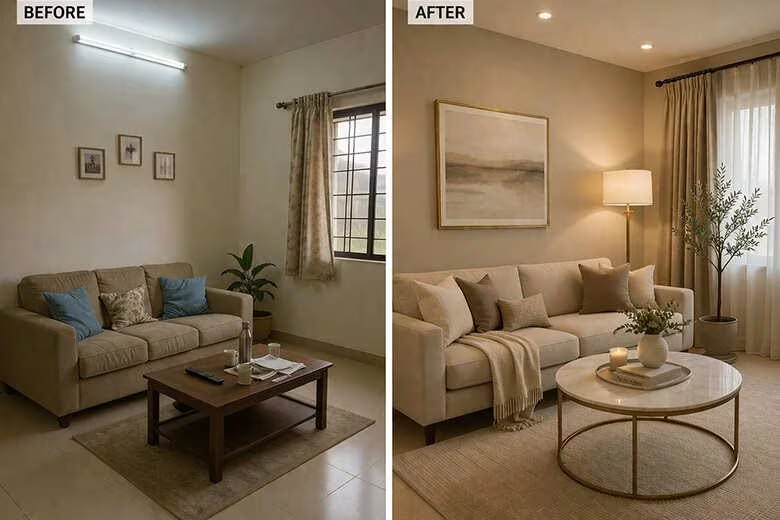
The good news is that most of the things that make a home feel dated or drab are surprisingly fixable without touching your savings. Budget home upgrades don’t mean compromising on how things look. Done right, the right small changes punch wildly above their price point. The key is knowing which ones actually matter visually — and which ones are just Pinterest filler.
Here’s what genuinely makes a difference.
The Upgrades With the Biggest Visual Return
Not all cheap improvements are equal. These three have the highest visual impact per pound and should be your first move before anything else:
Swap the hardware. Cabinet handles and door knobs are the jewellery of a room. The wrong finish makes everything around them feel cheap. The right one — matte black, brushed brass, or satin nickel — makes the same cabinets look intentional and modern.
Change the lighting. A single dome light fitting can make a room feel like a rental property regardless of what else is in it. Replacing one fixture, or adding a dimmer to an existing one, changes the atmosphere of the entire space.
Paint something bold. Not a whole room — a front door, a piece of furniture, or a single wall. The contrast does more work than a full repaint at three times the cost.
Everything else builds on these three.
Hardware: The Cheapest Way to Date or Modernise a Room
Kitchen cabinet handles
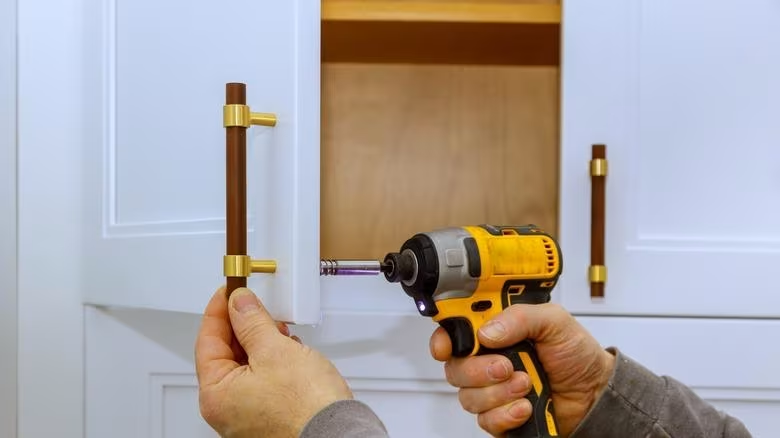
Chrome handles date a kitchen fast. The visual reason is that polished chrome has a cold, reflective quality that reads as “standard” — it’s what builders reach for because it offends nobody, which also means it impresses nobody. Matte black or brushed brass have visual weight. They create contrast against cabinet doors and pull the eye in a way that makes the whole kitchen feel considered.
Swapping kitchen cabinet handles is about twenty minutes of work, a single screwdriver, and patience with measuring to keep them straight. The most common mistake is choosing the wrong scale — oversized bars on small cabinet doors look awkward, and tiny knobs on large drawer fronts disappear. Match the handle length roughly to about a third of the cabinet width as a starting point.
Cost: Low. Difficulty: Easy.
Interior door handles and outlet cover
Round door knobs are one of those things nobody consciously notices — until you swap them for modern lever handles, and suddenly the hallway feels completely different. Same principle applies to light switch plates and outlet covers: yellowed or mismatched covers are visual noise. Replacing them with clean screwless white versions takes minutes and costs almost nothing, but removes a constant low-level distraction the eye was processing without you realising it.
These aren’t headline upgrades. But they’re the kind of detail that makes a home feel finished rather than just furnished.
Cost: Very low. Difficulty: Easy.
Paint: Still the Cheapest Visual Reset Available
Paint the front door
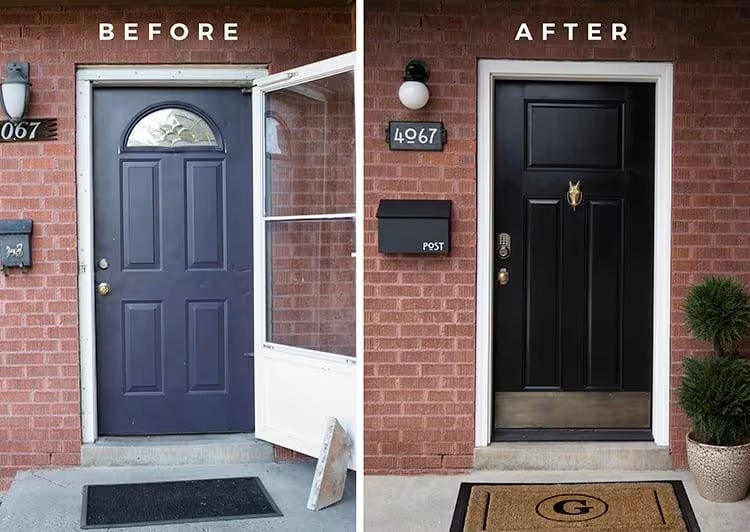
This is probably the highest-impact single change you can make to the outside of a house. A bold front door — navy, forest green, deep red — does two things at once: it creates a focal point that lifts the entire facade, and it signals that someone thoughtful lives there. Estate agents know this. It’s one of the first things they recommend before a valuation.
The sheen matters: use a satin or semi-gloss exterior paint, not a flat finish, which absorbs light and looks flat in outdoor settings. One tin goes a long way. An afternoon’s project.
Cost: Low. Difficulty: Easy to moderate.
Freshen the trim and baseboards
Dingy baseboards are one of those things that drag a room down without anyone being able to articulate why. A coat of bright white semi-gloss on the skirting boards, door frames, and window trim makes a room feel cleaner and crisper immediately. It’s unglamorous work, but the before-and-after is genuinely striking.
Use semi-gloss rather than matt — it’s more durable, easier to wipe clean, and reflects light in a way that makes the room feel better lit.
Cost: Low. Difficulty: Easy but time-consuming.
Chalk paint an old piece of furniture
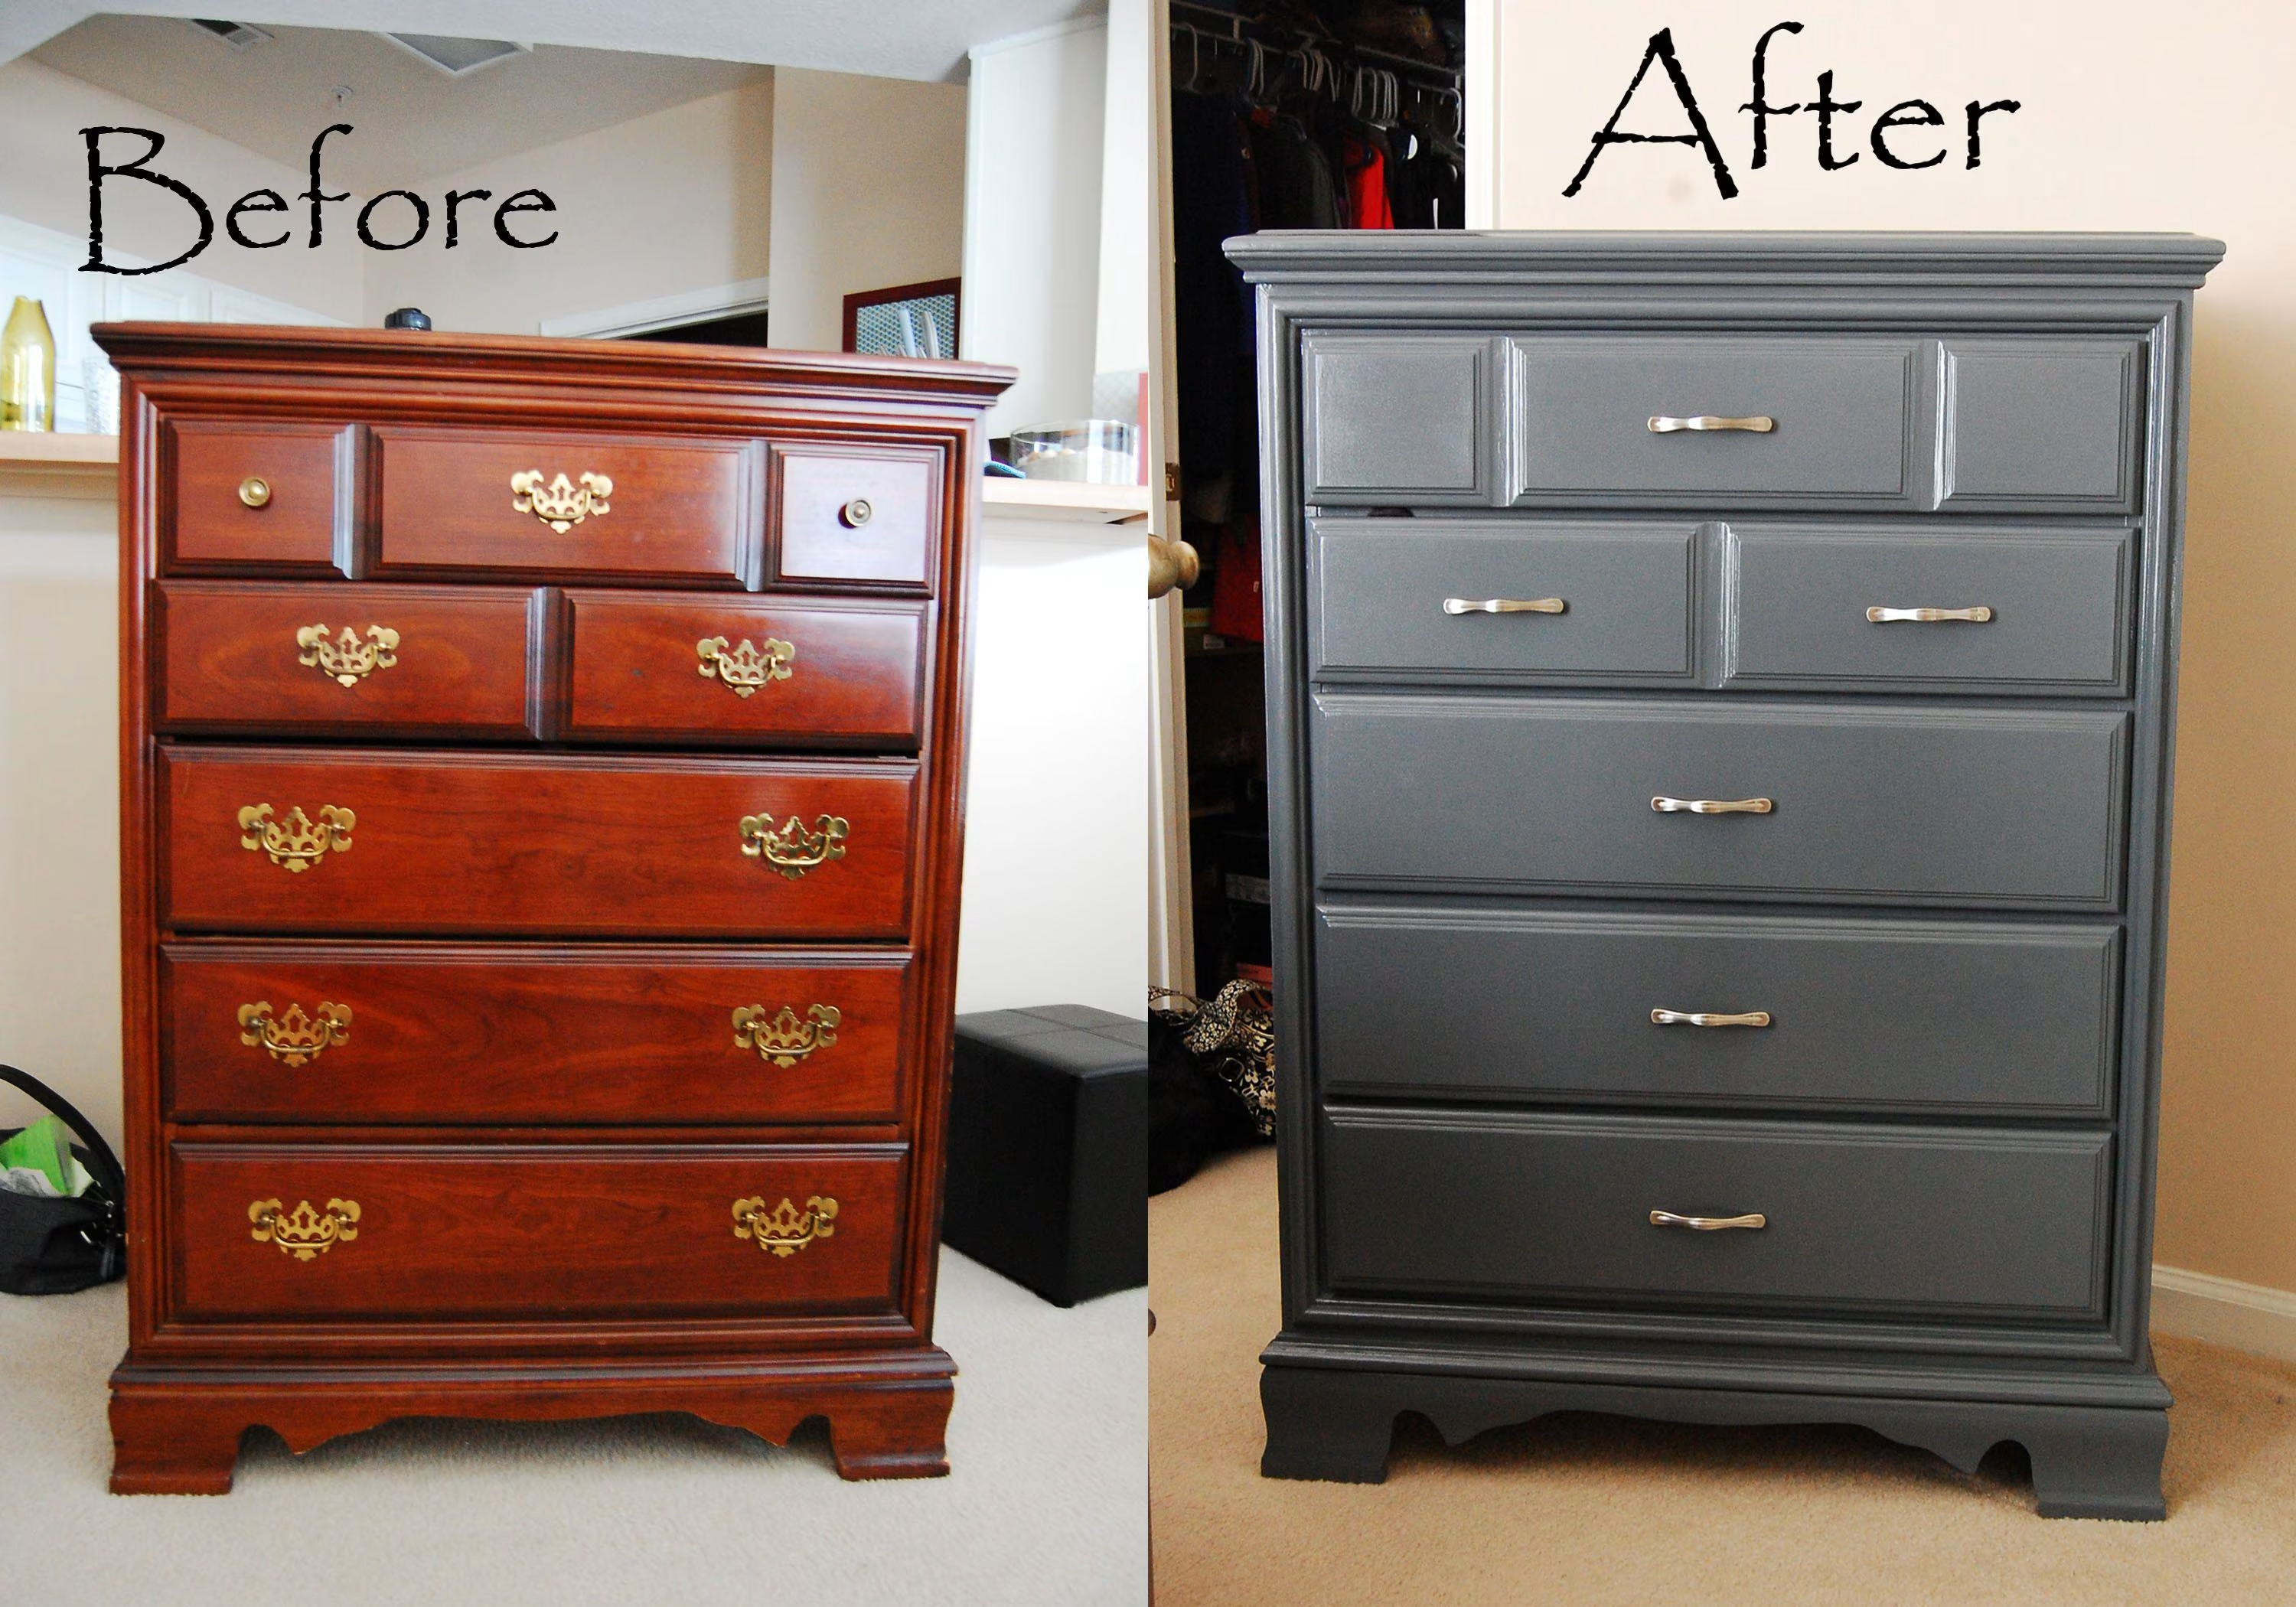
A dated wooden coffee table, a bedside unit, a tired chest of drawers — chalk paint is one of the few products that genuinely delivers on its promise. No sanding, no priming, and it dries to a matte finish that looks intentionally vintage rather than worn out. It dries quickly though, so work in small sections and don’t overload the brush. Seal it with a wax or matte varnish when you’re done or it’ll mark easily.
Cost: Low. Difficulty: Easy.
For more creative ideas on refreshing walls without a full repaint, peel-and-stick wallpaper is worth looking at — particularly for renters who can’t use paint.
Lighting: The One Thing That Changes How Every Other Upgrade Looks
Replace one main fixture
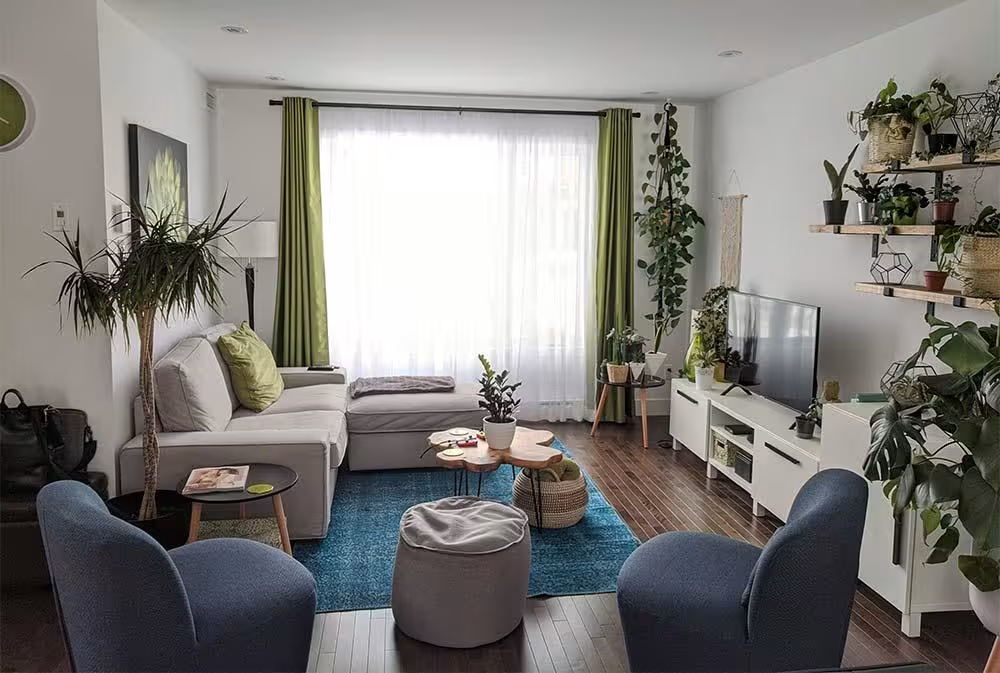
A flush-mount dome light is functional and entirely charmless. Replacing it with a geometric flush-mount, a semi-flush pendant, or even a simple drum shade takes the ceiling from background noise to a design detail. It doesn’t need to be expensive — the effect comes from shape and proportion, not price tag.
Important: if you’re not comfortable with basic wiring, this one needs an electrician. It’s not a complex job, but working with mains wiring without experience isn’t worth the risk. Factor that into the cost.
Cost: Low to moderate (plus electrician if needed). Difficulty: Moderate.
Install a dimmer switch
This one is underrated. A dimmer on your living room or bedroom light doesn’t just reduce brightness — it fundamentally changes the atmosphere. Bright lighting in the evening makes a room feel like an office. Dimmed warm light makes the same room feel like somewhere you want to be. A dimmer switch itself costs very little and takes about fifteen minutes to fit (again, basic electrical comfort required).
Cost: Very low. Difficulty: Easy if you’re comfortable with switches.
LED strips under kitchen cabinets
Rechargeable peel-and-stick LED strips under kitchen wall units are genuinely renter-friendly — no drilling, no wiring, removable — and the practical light they add to the worktop is actually useful. Choose warm white (2700K–3000K) rather than cool white. Cool white looks clinical; warm white looks like it belongs.
Cost: Very low. Difficulty: Easy.
More bathroom lighting ideas that work in smaller spaces are worth a look if you’re doing a room-by-room refresh — this guide to bathroom lighting covers the specifics.
Bathroom Upgrades That Feel Expensive (And Aren’t)
Swap the showerhead
A high-pressure rain showerhead costs a fraction of what you’d expect given how much it changes the daily experience of the bathroom. Most are a straight swap — unscrew the old one, thread on the new one — and take about ten minutes with an adjustable spanner. No plumber required in the vast majority of cases.
The difference in how the shower feels is immediate. The difference in how the bathroom looks — a large, considered fixture rather than a dingy standard fitting — is nearly as significant.
Cost: Low to moderate. Difficulty: Easy.
Frame a builder-grade mirror
The large frameless mirror that comes standard in most bathrooms looks fine. But frame it with peel-and-stick wood moulding or MDF strips painted to match the room, and it immediately looks like something you chose rather than something that was already there. This is a renter-friendly option too — the adhesive versions come off cleanly.
The visual principle here is that a frame gives the mirror a boundary, which makes it read as a deliberate design object rather than a utility item. It’s a small thing that changes how polished the whole room feels.
Cost: Very low to low. Difficulty: Easy.
Regrout old tiles
This is the honest one. Regrouting is genuinely satisfying, but it’s also fiddly and takes a few hours. You rake out the old grout, clean the joints, apply new grout, and seal it. The result — bright white grout lines against clean tiles — makes a bathroom look dramatically fresher. Tiles that looked grimy and tired often look almost new.
Worth it? Absolutely, especially if replacing the tiles entirely isn’t on the table. Just go in knowing it’s a proper afternoon job, not a quick fix.
Cost: Low. Difficulty: Moderate (fiddly but not hard).
If your tiles are beyond regrouting and you’re thinking about replacement, these budget-friendly tile options show what’s achievable without overspending — and the signs that tiles genuinely need replacing are worth checking first.
Kerb Appeal and the Entryway: First Impressions on a Small Budget
Update the house numbers
Large, modern floating house numbers near the front door are one of those changes that photographs much better than it sounds. The existing numbers on most houses are an afterthought — small, plastic, and slightly drooping. Modern brushed steel or black powder-coated numbers have presence. They cost very little and take about twenty minutes to fit.
Cost: Very low. Difficulty: Easy.
Layer the doormat
This is a finishing touch, not a transformation — be honest with yourself about that. But a layered doormat (a small patterned rug underneath, a textured coir mat on top) is a simple way to make the entrance feel styled rather than just functional. It’s renter-friendly, completely removable, and changes the first impression of the front step more than you’d expect.
Cost: Very low. Difficulty: None.
Add solar path lights
Inexpensive solar LED lights staked along a front path look intentional and welcoming in the evening without any wiring or ongoing running costs. Choose a consistent style — all black, or all brushed silver — rather than mixing finishes. Mismatched styles undermine the effect.
Cost: Low. Difficulty: Easy.
For more ideas on making the entryway work harder, these budget entryway makeover ideas are worth bookmarking — and home decor accessories covers finishing touches for every room.
FAQs
What budget home upgrades add the most value?
Hardware swaps, lighting changes, and a freshly painted front door consistently offer the highest visual return for the lowest cost. If you’re preparing to sell, these three areas are where estate agents typically focus first.
Can I upgrade my home without a contractor?
Most of the upgrades listed here are genuinely DIY-friendly — handles, paint, peel-and-stick products, showerhead swaps, dimmer switches. The main exception is replacing a light fixture, which involves mains wiring and should involve a qualified electrician unless you’re confident with electrics.
What’s the cheapest way to modernise a kitchen without replacing the cabinets?
New hardware is the single most cost-effective change. Combine it with a thorough clean, fresh paint on the walls, and under-cabinet LED strips, and the kitchen can look significantly different without touching the cabinet doors or worktops.
Are these upgrades suitable for renters?
Several are — peel-and-stick wallpaper, LED strips, layered doormats, and framed mirrors using adhesive moulding can all be removed without damage. Hardware swaps are possible if you keep the original fittings to restore before moving out. Check your tenancy agreement if unsure.
What paint finish should I use for interior trim?
Semi-gloss is the standard recommendation for skirting boards, door frames, and window trim. It’s more durable than matt, easier to wipe clean, and the slight sheen reflects light in a way that makes the trim look crisp and intentional.
How do I stop budget upgrades from looking cheap?
Cohesion is the key. Mixing finishes — chrome handles next to brushed brass taps, for example — looks accidental. Pick one metal finish and use it consistently across a room. The upgrades don’t need to be expensive; they need to look like they belong together.