Estimated reading time: 12 minutes
You don’t need a contractor, a tile saw, or a serious budget. Just a weekend, the right prep work, and a clear idea of which option actually suits your kitchen.
There’s a particular kind of frustration that comes with a kitchen that’s perfectly functional but just… off. The backsplash that came with the house, or the one you never quite got around to replacing. It’s fine. It works. But every time you’re standing at the stove, you notice it.
The good news is that a backsplash is one of the highest-visibility changes you can make without a renovation. The options available now — especially for renters and budget-conscious DIYers — are genuinely impressive. And most of them don’t require grout, a wet saw, or any prior tiling experience.
This isn’t a list of ideas with matching stock photos. It’s a breakdown of what each option actually involves, what it costs, how long it holds up, and which one is probably right for you.
The Quickest Option: Peel-and-Stick Tiles Explained Properly
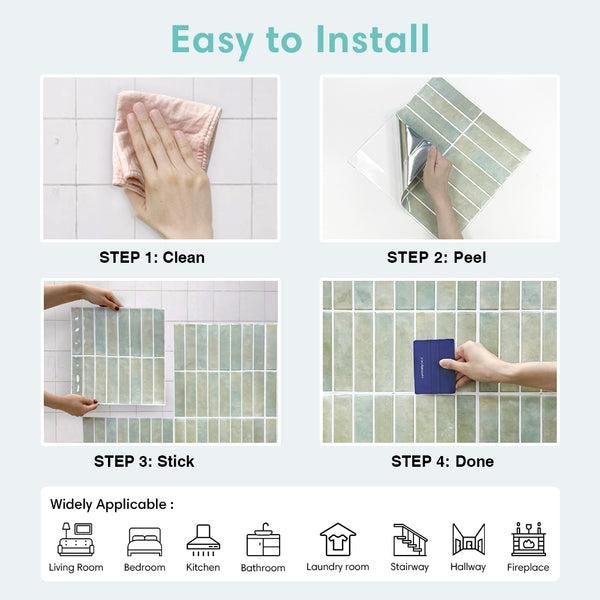
Peel-and-stick tiles are the entry point for most first-time DIY backsplash projects — and for good reason. They’re easy to source, relatively affordable, and they look significantly better than they did even five years ago. Some of the thicker options now are nearly indistinguishable from real ceramic in photos.
That said, there are real differences between a peel-and-stick install that lasts three years and one that starts curling at the corners within six months. Nearly all of them come down to prep — not the tiles themselves.
The prep step most tutorials skip
Kitchen walls near the stove collect an invisible film of grease over time. It’s not always visible, but it’s there — and adhesive tiles won’t stick to it reliably. Before you open a single tile pack, clean the entire surface with a degreaser or a TSP substitute. Not a general-purpose spray cleaner. Actual degreaser. Wipe it down, let it dry completely, and then wipe it again.
If your walls are textured — even lightly — that’s a bigger problem. Peel-and-stick tiles need a flat, smooth surface to bond properly. On textured walls, the adhesive only contacts the raised points, and the tile starts lifting from the edges pretty quickly. You can skim-coat with joint compound to smooth things out first, but if that feels like too many steps, one of the other options below will suit you better.
Honest durability note
Near the stove — on the wall directly behind high-heat burners — even good quality peel-and-stick tiles can start to lift within a year if there’s significant heat exposure. Thicker tiles (around 2mm) perform noticeably better than thin budget packs. For the stove wall specifically, real adhesive tile or subway tile is worth considering.
For a standard backsplash area of around 15–20 sq ft, budget between $30–$120 depending on tile thickness and style. The install itself takes 2–3 hours once the surface is prepped.
How to handle corners and outlets
Corners are the annoying part. If you’re tiling an inside corner, a utility knife and a metal straight edge are your best friends — score and snap, rather than trying to cut freehand. Outlets require cutting around cover plates, which is fiddly but manageable. Remove the outlet cover, tile right up to the edge of the box, then reinstall the cover over the tile. It looks clean and it takes about ten extra minutes per outlet.
What Nobody Tells You About Surface Prep
It’s worth spending a moment on this independently of any specific method, because it’s the reason most DIY backsplash installs look great in the first photo and ordinary six months later.
The three things that kill adhesive installs in kitchens are grease residue, moisture, and texture. You’ve already heard about grease. Moisture is trickier — if you’re tiling near a sink, make sure the wall is completely dry before starting. Any residual dampness behind the tile becomes a problem over time. And texture, as mentioned, is the silent killer of peel-and-stick projects.
If you’re tiling over existing tile — which is totally possible with most peel-and-stick and adhesive panels — make sure the existing tile is clean, flat, and that no individual tiles are cracked or loose. Installing over a surface that’s already failing just accelerates the failure. See our breakdown of kitchen upgrade mistakes homeowners make for more on this.
Reclaimed Wood and Beadboard — More Achievable Than They Look
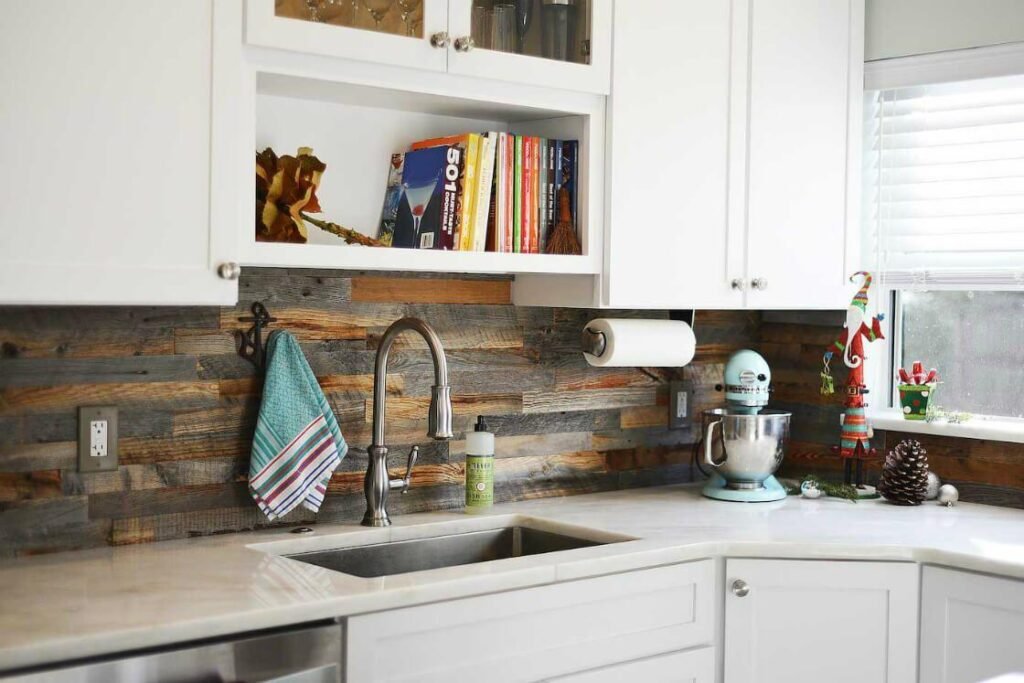
Wood as a backsplash sounds like a design risk, but done right it’s genuinely warm and distinctive — especially in kitchens where the subway tile look feels overdone. Reclaimed wood planks give a textured, rustic finish. Beadboard panels are cleaner and more traditional.
The non-negotiable step for either: sealing. Wood near a kitchen sink or stove that isn’t properly sealed with a polyurethane finish or similar moisture-resistant coating will warp, stain, and deteriorate. Apply two or three coats with light sanding between them, and the result is surprisingly durable. Skip this step and you’ll be replacing it inside a year.
Reclaimed wood planks typically run $3–$8 per sq ft. Beadboard panels are often cheaper — sometimes as low as $1.50 per sq ft for MDF versions — and they paint well, which is useful if you want a specific colour. Total material cost for a standard backsplash area: roughly $50–$160, plus sealant.
Neither option is particularly renter-friendly unless you use adhesive mounting strips and thin, lightweight panels. For permanent installs, both are excellent choices.
Stencilling: The Most Overlooked Budget Backsplash
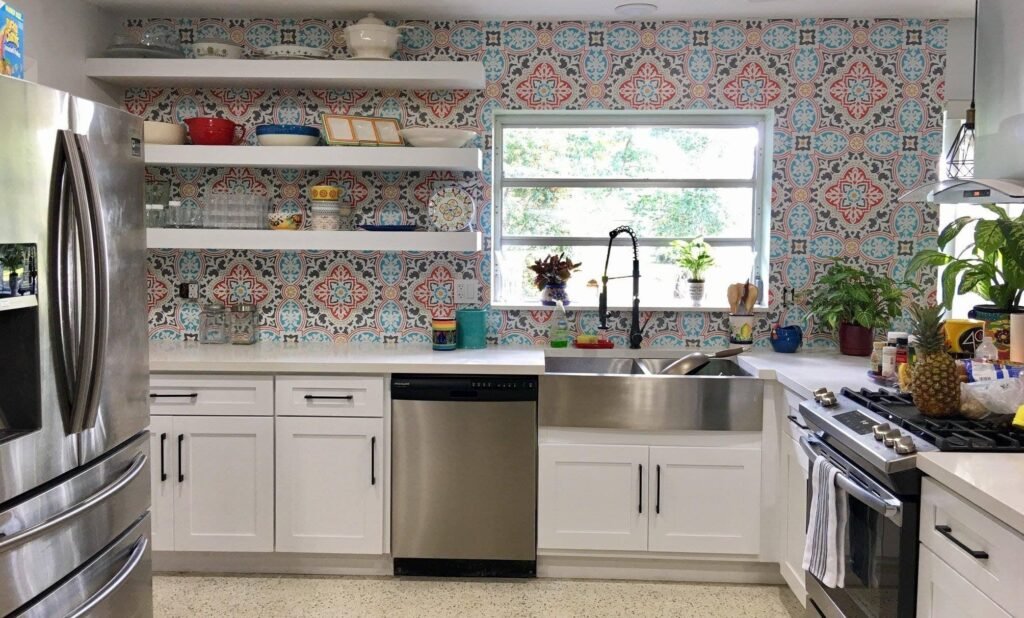
Every backsplash roundup gives stencilling a single sentence and a photograph. That’s a shame, because it’s arguably the most customisable and most affordable option on this list — and the result, when done carefully, genuinely looks like hand-painted or patterned tile.
The basic process: prime your wall (or existing tile), use a repositionable stencil and a small foam roller to apply the pattern, seal with a clear coat when dry. That’s it. Stencil kits designed for walls run from $20–$50. A can of chalk paint or tile-specific paint is another $20–$40. Total project cost: $40–$90 for a full backsplash area.
The time investment is the trade-off. A stencil backsplash takes longer than peel-and-stick — probably 4–6 hours including drying time — because you’re working in sections and repositioning the stencil carefully each time. Misalignment is visible. But if you’re patient, the result has a handcrafted quality that no peel-and-stick tile can replicate.
Pro tip for stencil alignment
Mark your centre point on the wall and work outward in both directions. Use low-tack painter’s tape to hold the stencil in place and a level to check alignment every third or fourth repeat. The edges near cabinets and countertops get cut sections — accept that they won’t be perfect, and plan the layout so the focal point of the wall is centred.
Stencilling is also one of the only options on this list that’s fully reversible with paint. If you hate it, prime and repaint. For renters with landlord permission to paint, it’s worth considering.
Trendy Options Worth Knowing About
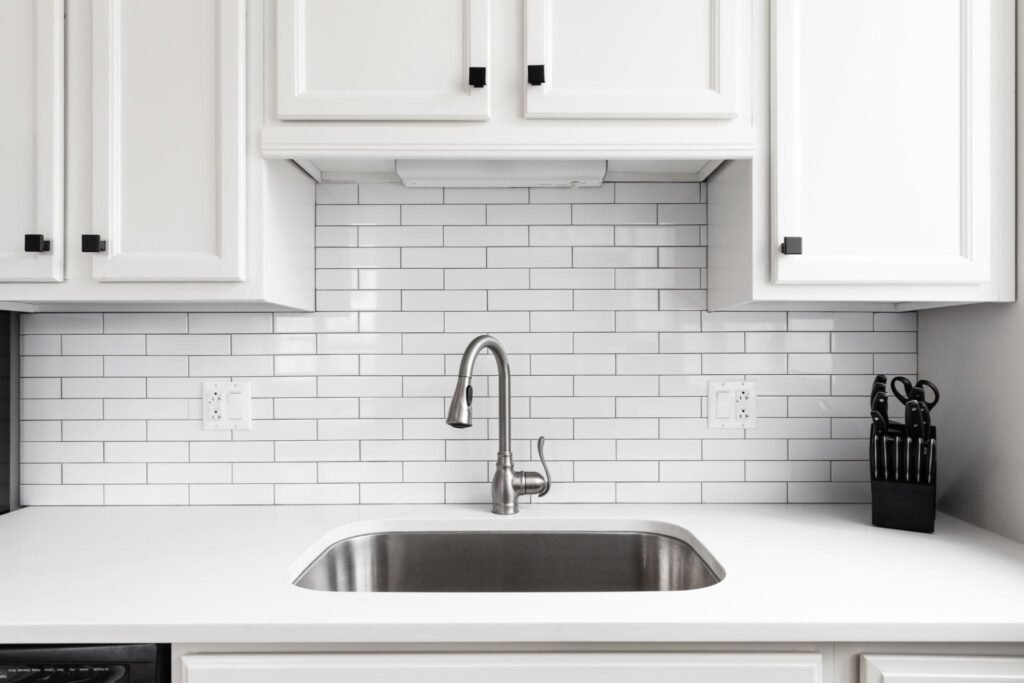
A few options that come up regularly in kitchen design conversations — with honest context attached.
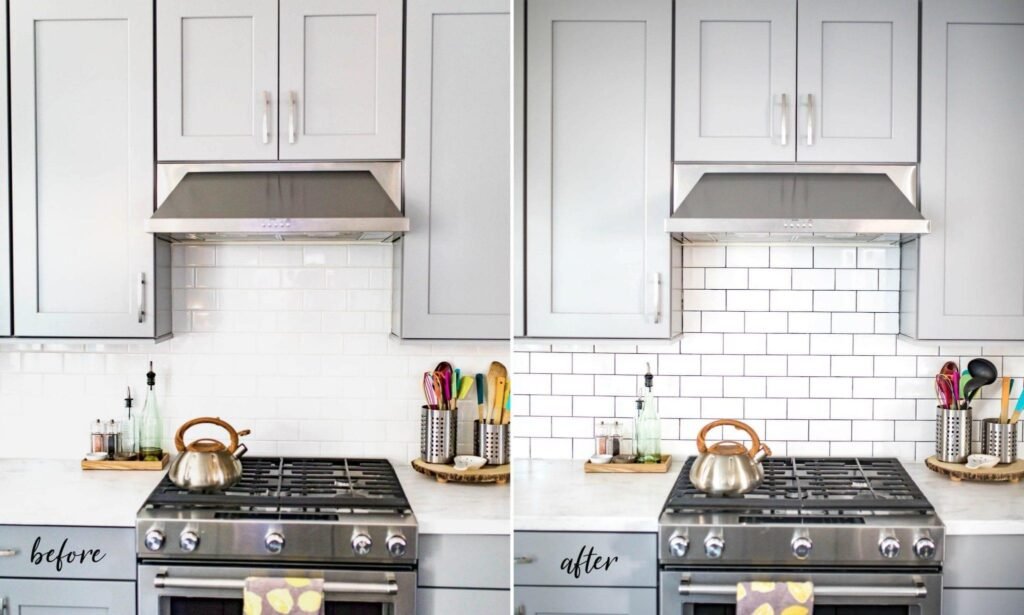
Subway tiles. Classic for a reason. They’re widely available, easy to cut, and genuinely forgiving for beginner tilers. A standard 3×6 white subway tile install with grout costs roughly $2–$4 per sq ft in materials — one of the cheaper permanent options. The herringbone pattern (tiles laid at 45 degrees in a zigzag) costs the same in materials but takes longer to install and has more waste from cutting.
Moroccan zellige tiles. These handmade, slightly irregular glazed tiles have had a long moment in interior design. They look extraordinary in the right kitchen. They’re also expensive ($15–$30+ per sq ft), harder to find locally, and more demanding to install because the variation in thickness means consistent grout lines require more attention. Not a beginner project — but worth knowing about if budget isn’t the constraint.
Glass tile and mosaic sheets. Glass tiles catch light well and look fresh in smaller kitchens. Mosaic sheets (small tiles on a mesh backing) are easier to install than individual tiles. Budget around $8–$15 per sq ft for decent quality. One caveat: grout lines on mosaic sheets are small and harder to keep clean over time.
Vinyl tile decals. Similar to peel-and-stick but designed specifically to go over existing tile. They’re thinner, cheaper, and easier to remove — which makes them useful for renters or for testing a look before committing. Durability near heat is lower than thicker peel-and-stick tiles, so keep them away from the stove wall.
Which Option Is Right for Your Kitchen?
Here’s the honest comparison that most articles skip. The right choice depends on your walls, your skill level, whether you’re renting, and where in the kitchen you’re installing.
Option Cost (per sq ft) Skill Level Removable Heat-Safe Time Est.
Peel-and-stick tiles $2–$6 Beginner Partial Away from stove only 2–3 hrs
Stencil + paint $2–$5 Beginner–Mid Yes (repaint) Yes (sealed) 4–6 hrs
Beadboard panels $1.50–$4 Beginner–Mid Depends on fix method Away from stove 3–5 hrs
Reclaimed wood $3–$8 Intermediate No Sealed only, not stove wall 4–6 hrs
Subway tile $2–$4 Intermediate No Yes Full day
Vinyl tile decals $1–$3 Beginner Yes Not near stove 1–2 hrs
Glass / mosaic tile $8–$15 Intermediate No Yes Full day
Moroccan zellige $15–$30+ Advanced No Yes Full day+
If I had to pick one option for most kitchens, it would be peel-and-stick subway tiles. They’re genuinely forgiving, easy to source from most hardware stores, and they look good if the prep work is right. For anyone who wants more character without spending more, the stencil method is massively underrated.
Renter-Friendly Backsplash Ideas That Leave No Damage
This section is specifically for people who need to hand the kitchen back in its original state. A few of the options above technically qualify, but with caveats worth spelling out.
What “removable” actually means in practice
Vinyl tile decals are the most straightforwardly removable option. They’re designed to peel off cleanly, and on most wall surfaces they do — though in kitchens with painted walls, it’s worth testing one tile on an inconspicuous spot first, since some paint finishes aren’t robust enough to survive removal without pulling away.
Peel-and-stick tiles are more of a grey area. Many brands describe themselves as removable, and they are — but removal sometimes takes effort and can leave residue on painted walls. If your landlord has a no-changes policy, peel-and-stick on a painted wall is a risk.
The genuinely zero-risk options for renters are: stencilling over existing tile (paint washes off tile with enough effort), vinyl decals, and — if you have permission to paint — wall paint with a stencil pattern. All three are reversible.
If you’re renting and planning to use peel-and-stick tiles, install them over the existing tile rather than over painted walls. Tile-to-tile adhesion is stronger, and removal is cleaner. It also means you don’t risk damage to the paint underneath.
Thinking about doing more in the kitchen while you’re at it? Pairing a new backsplash with updated cabinet hardware or under-cabinet lighting makes a visible difference for relatively little effort — and both are fully reversible in a rental.
Quick takeaway
The best DIY kitchen backsplash is the one that matches your surface, your skill level, and your situation — not just whatever looks best in a photo. Nail the prep, pick the right option for your walls, and the result will look genuinely good. Skip the prep, and it won’t matter how nice the tiles are.
If you’re planning a wider kitchen refresh alongside this, our DIY kitchen makeover before and after is worth a look — it shows what a realistic full-kitchen update looks like without a renovation budget. And for anyone thinking about cabinet updates at the same time, the budget kitchen upgrades homeowners actually love is a useful companion piece.
Frequently Asked Questions
Can you install a backsplash in a rental apartment?
Yes — if you choose the right type. Vinyl tile decals and stencil painting are both fully reversible. Peel-and-stick tiles can work in rentals if applied over existing tile rather than painted walls, which makes removal much cleaner. Always test one piece first in an inconspicuous area before committing.
Does peel-and-stick tile hold up near a stove?
Directly behind high-heat burners, adhesive tiles can start to lift within a year, especially thinner options. Thicker tiles (around 2mm) hold significantly better than budget-pack alternatives. For the stove wall specifically, a grouted ceramic or glass tile is the more durable long-term choice.
How do I prepare a wall for a peel-and-stick backsplash?
Clean the wall thoroughly with a kitchen degreaser — not a general-purpose cleaner — to remove grease residue. Let it dry completely, then wipe again. Make sure the wall is flat and smooth; textured walls need to be skim-coated with joint compound before adhesive tiles will bond properly. This prep step is the single biggest factor in how long the install lasts.
What’s the easiest backsplash for a beginner?
Peel-and-stick tiles or vinyl decals are the most beginner-friendly options. Both require no grout, no special tools, and no previous tiling experience. Peel-and-stick tiles look more convincing and last longer; vinyl decals are the better choice if you need something fully removable.
How much does a DIY kitchen backsplash cost?
It varies considerably by method. Vinyl decals and stencil painting can cover a standard 15–20 sq ft backsplash area for $40–$90 in materials. Peel-and-stick tiles run $30–$120 depending on quality. Subway tile or glass tile installations cost more ($60–$200 in materials alone) and require additional tools. The cheapest option that looks genuinely good is a stencilled finish or quality peel-and-stick tiles.
Can you put peel-and-stick tiles over existing tile?
Yes, and it often works better than installing over painted walls. Make sure the existing tile is clean, flat, and fully adhered — no cracked or loose tiles. Grout lines that are too deep can show through thinner peel-and-stick options, so choose thicker tiles (2mm or more) if the existing grout lines are pronounced.
How long does a peel-and-stick backsplash last?
With proper surface preparation and good quality tiles, a peel-and-stick backsplash typically lasts 3–5 years on side walls. Near the stove, expect 1–3 years before some edge lifting appears. The prep work — degreasing and ensuring a smooth, flat surface — has more impact on longevity than the tile brand.