Estimated reading time: 13 minutes
Black shower caulk is one of those things you can ignore for months — and then one day you really look at it and can’t unsee it.
If the caulk in your shower has gone dark, cracked, or started pulling away from the tiles, the good news is this is a genuinely fixable DIY job. No specialist skills required. The less-good news is that most guides make it look easier than it is, which is why so many first attempts look rough or start peeling within a few months.
The difference between a caulking job that lasts a week and one that lasts two or three years comes down almost entirely to the steps people skip — specifically removal and prep. Get those right and the rest is fairly straightforward.
Here’s the honest version of how to caulk a shower properly.
Why Your Old Caulk Failed (This Part Matters)
Before buying anything or picking up a scraper, it’s worth understanding why the previous caulk deteriorated in the first place — because if you don’t fix the underlying cause, you’ll be back doing this again in a few months.
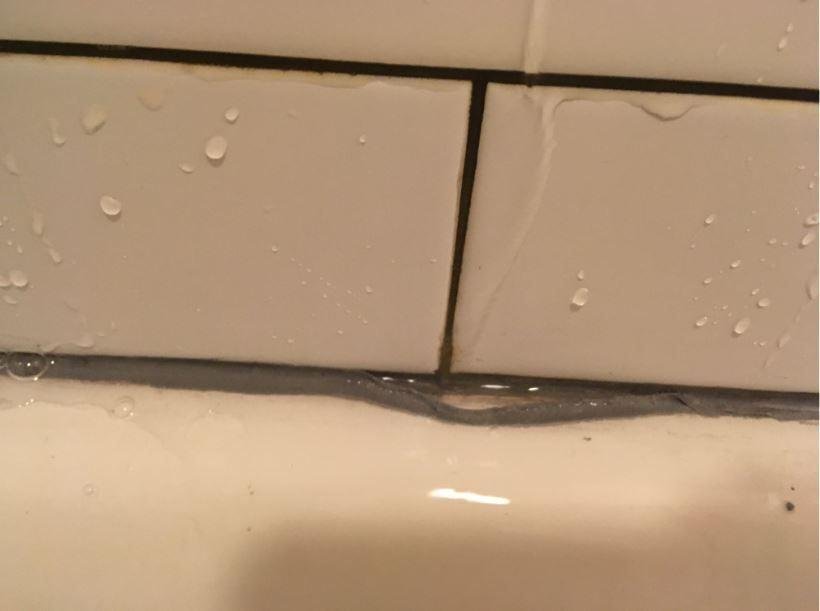
Shower caulk fails for a few common reasons. Mould and mildew growth are the most visible — this happens in bathrooms with poor ventilation where steam and moisture hang in the air after showers. Even mould-resistant caulk can’t overcome a bathroom that stays damp for hours after every use.
Caulk also cracks or pulls away when it was applied over an unclean surface, when it wasn’t given enough time to cure before the shower was used, or when it was applied over existing caulk rather than being properly removed and replaced. Silicone in particular needs an extremely clean, dry, grease-free surface to bond properly. Any soap residue or moisture on the surface when you apply it and the adhesion is compromised from day one.
The steps below are ordered specifically to address each of these failure points.
Silicone or Latex? The Honest Answer
Silicone caulk is the better choice for shower joints. It’s fully waterproof, remains flexible as tiles expand and contract, and doesn’t absorb moisture — which means it resists mould at the surface level better than latex over time.
The trade-off is that silicone is harder to work with. It doesn’t smooth as easily as latex, it can’t be painted over, cleanup requires mineral spirits rather than just water, and if you get it somewhere you didn’t intend, removing it cleanly is a pain.
Latex caulk (sometimes called acrylic caulk) is easier to apply and smooth, cleans up with water, and is paintable. It’s fine for lower-moisture areas like around a vanity or window trim, but in a wet shower environment it absorbs moisture over time and degrades faster.
The middle-ground option is siliconized latex — an acrylic caulk with silicone added. It’s considerably easier to work with than pure silicone, handles wet environments better than standard latex, and gives a decent finish. For a first-time caulker doing a standard ceramic tile shower, siliconized latex with mildew resistance is a practical, forgiving choice. For natural stone, or anywhere water exposure is heavy, stick with pure silicone.
What You’ll Need
Keep this list short. You don’t need a lot.
- Caulk tube (silicone or siliconized latex — mould/mildew resistant labelling is worth paying for)
- Caulk gun (if using a standard tube — cheaper squeeze tubes exist but are harder to control)
- Utility knife or oscillating multi-tool for removal
- Plastic scraper or dedicated caulk remover tool
- Isopropyl alcohol (rubbing alcohol) for final surface cleaning
- Painter’s tape — optional but genuinely helpful for straight lines
- A caulk finishing tool or just a wet finger and patience
One thing worth knowing before you buy: check that your caulk colour matches the existing grout. White and off-white are different, and the gap between them is obvious once the job’s done.
The Removal Step: This Is Where Most Jobs Go Wrong
If there’s one section to read carefully, it’s this one. Removal takes longer than most guides suggest — plan for 45 minutes to an hour for a standard shower corner or tub surround — and rushing it is the most reliable way to end up with a patchy result or, worse, scratched tiles.
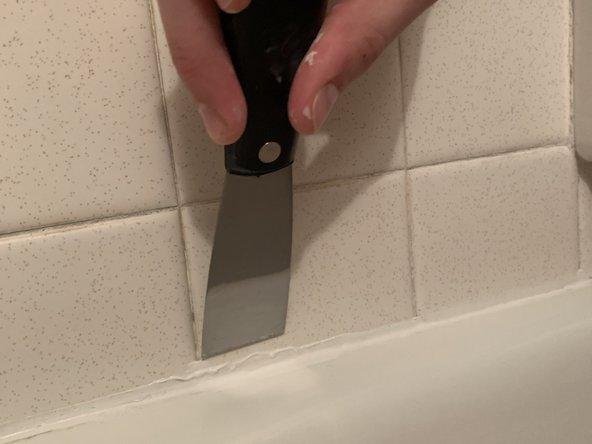
Start with a utility knife or oscillating multi-tool to cut through the caulk strips on both sides of the joint. Run the blade along the edge where the caulk meets the tile, not through the middle of the bead. The goal is to loosen the adhesion so the caulk can be lifted out in strips rather than scraped in fragments.
Once the main bulk is cut loose, use a plastic scraper or dedicated caulk removal tool to lift and peel the remaining material. Avoid metal scrapers on acrylic or fibreglass surrounds — they scratch easily and that damage is permanent. Ceramic tile is more forgiving, but there’s still no reason to use metal when plastic tools work fine.
After the main removal, there will almost certainly be residue left — thin patches of caulk that are nearly transparent and easy to miss. These matter. Any caulk residue left on the surface will prevent the new caulk from bonding properly in that spot, and you’ll see it eventually as a section that lifts or bubbles. Use a plastic scraper and work slowly.
If you’re dealing with years of silicone buildup, a commercial silicone remover product can soften the residue and make it significantly easier to scrape clean without damaging the surface underneath.
Surface Prep: The Step That Determines Everything
Once the old caulk is fully removed, clean the joint thoroughly. A bathroom cleaner designed to cut through soap scum and mildew works well here — scrub both tile surfaces that border the joint, not just the gap itself.
Rinse completely, then wipe down with isopropyl alcohol. This step removes any remaining soap film, grease, or cleaning product residue that would interfere with adhesion. It’s quick and makes a real difference, especially with silicone.
Then wait. The surface needs to be completely dry before you apply new caulk — not just surface-dry, but genuinely dry. Silicone caulk won’t cure properly if there’s residual moisture in the joint. The standard advice is to wait at least 24 hours after the last shower use. If your bathroom doesn’t ventilate well, leave it longer. Running a fan or opening a window for a few hours after the final clean helps considerably.
This waiting period is probably the most ignored step in every DIY caulking guide. It’s also one of the most important.
Applying the Caulk: Technique Over Speed
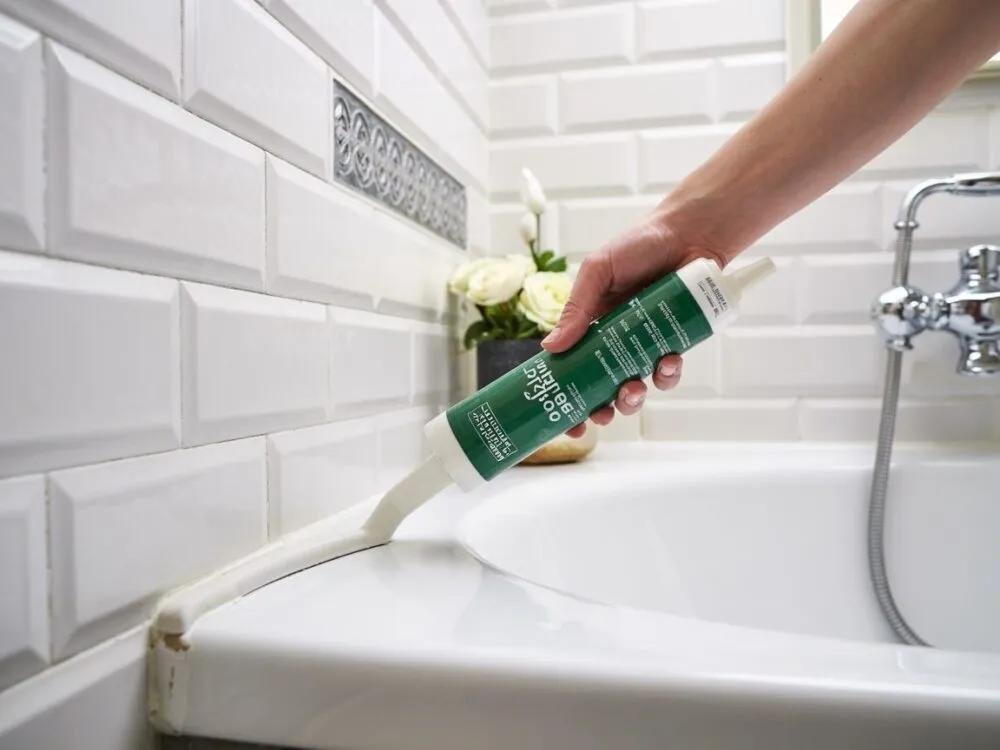
Cut the nozzle at a 45-degree angle. The opening should be slightly smaller than the joint you’re filling — you can always apply more, but you can’t un-apply an overloaded bead. Start with a small opening and adjust if needed.
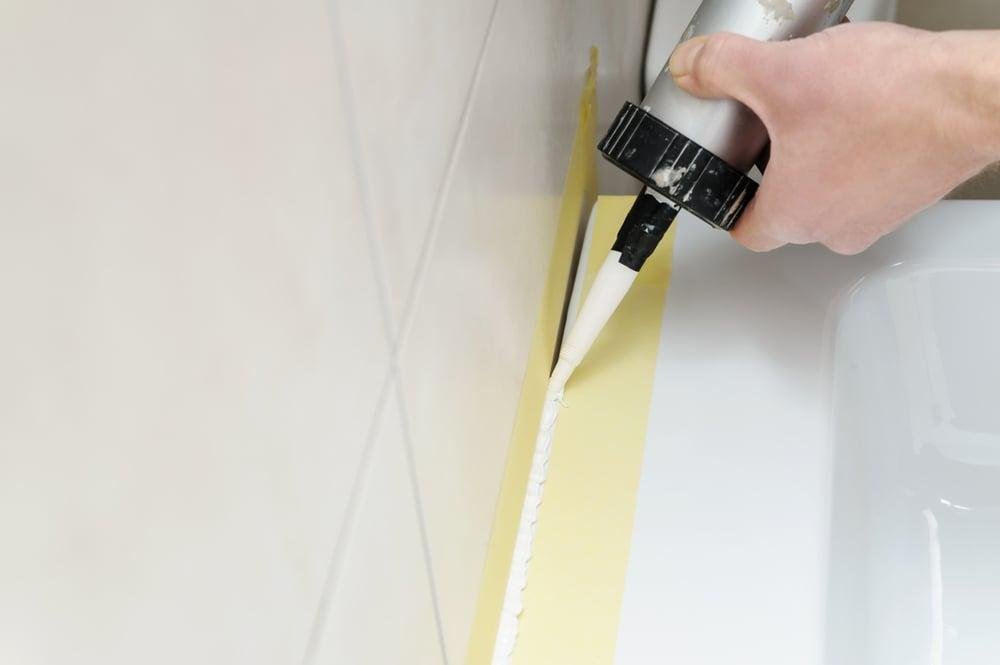
Apply the caulk in one steady, continuous motion if possible. Move at a consistent pace — too slow and you get a thick, lumpy bead; too fast and you get a thin, inconsistent one. Hold the gun at a consistent angle. This takes a bit of practice and the first joint probably won’t be your best. That’s fine.
The tooling step is where most DIY jobs either succeed or look amateurish. Tooling means smoothing the bead so it’s pressed into the joint, has a slightly concave profile, and blends cleanly into the tile surface on both sides.
A wet finger works and is what most people use. Dip it in water, run it along the bead in one confident, consistent stroke — don’t go back and forth. The problem with fingers is they’re the wrong shape for creating a clean concave profile, and if you hesitate or lift mid-stroke you get a visible mark.
A dedicated caulk finishing tool (they cost about $5–8 and are worth every cent) gives you a proper concave radius and a much cleaner result. Run it along the bead immediately after applying — silicone in particular starts skinning over quickly, so don’t delay.
If you’re using painter’s tape, apply it before caulking along both edges of the joint, leaving just the gap exposed. Remove it while the caulk is still wet — pulling it off after it sets will tear the edges.
Cure Time: Dry Isn’t the Same as Cured
Shower caulk is typically touch-dry within a couple of hours. Most manufacturers say it’s ready to use after 24 hours. Both of those things are true, but there’s a third stage that most guides ignore: full cure.
Silicone caulk reaches full cure — meaning full hardness and maximum water resistance — after approximately five to seven days. In the first week, the caulk is functional but still relatively soft and vulnerable. Prolonged water exposure or cleaning with strong products during this period can affect the final result.
For the first 24 hours: don’t use the shower at all. For the first week: use it normally but don’t scrub the new caulk lines or expose them to harsh cleaners. After that, it’s fully cured and you can treat it like any other surface.
Why Mould Keeps Coming Back
Mould-resistant caulk is better than standard caulk, but it’s not a permanent solution if the underlying conditions encourage mould growth. The caulk contains biocides that inhibit mould at the surface, but they deplete over time — typically faster in bathrooms with poor ventilation.
The most effective thing you can do is reduce how long moisture stays in the bathroom after each shower. Squeegee the shower walls after use, run an extractor fan during and for at least 15 minutes after showering, and leave the bathroom door or window open to allow air circulation. These habits extend the life of your caulk considerably.
If you find mould returning within weeks of recaulking, the issue is ventilation rather than the caulk itself. No product fully compensates for a bathroom that stays persistently damp.
For mould that’s already established on grout lines elsewhere in the shower, that’s a separate problem from caulking — these DIY grout cleaning hacks cover what actually works for restoring grout before it gets worse.
Can You Caulk Over Old Caulk? (The Honest Answer)
No — not in any situation where you want it to last.
Applying new caulk over existing caulk might look fine initially, but the new caulk is bonding to the old caulk rather than to the tile surface. Old caulk is often contaminated with mould, soap scum, and surface degradation. That bond fails faster and less predictably than a clean application to bare tile.
The only scenario where caulking over existing caulk makes any sense is as a very short-term patch while waiting to do the job properly. For anything you want to hold up, full removal first is non-negotiable.
This is the question most guides quietly avoid, probably because the answer requires more work. But it’s also why so many DIY caulking jobs fail — someone applied new caulk over old, it looked fine for a month, and then they concluded that shower caulking just doesn’t last.
When to Call Someone Instead
Most shower recaulking jobs are genuinely manageable as DIY. The exceptions are worth knowing.
If you remove the old caulk and find soft, stained, or crumbling tile adhesive or substrate underneath, that’s water damage behind the tiles — a more serious problem that needs professional assessment. Similarly, if the grout throughout the shower is cracking or failing (not just the caulk in corners and joints), that suggests movement or substrate issues that recaulking won’t fix.
Visible mould on the surface of caulk is normal and fixable. Mould smell that persists after removing the caulk, or dark staining in the grout that doesn’t shift with cleaning, can indicate mould growth behind the tiles. That situation warrants a professional opinion before you seal everything up again.
For the rest — standard recaulking, corner repairs, tub surrounds — you’ve got this. It’s slower than the YouTube tutorials make it look, and your first attempt won’t be perfect. But the second one will be noticeably better, and either way it’ll be a significant improvement on what was there before.
If you’re tackling a broader bathroom refresh alongside the caulking, the bathroom DIY mistakes homeowners regret article is worth reading beforehand — several of the most common ones involve exactly this kind of prep work being skipped.
Frequently Asked Questions
How long does shower caulk take to dry and cure?
Shower caulk is typically touch-dry within a few hours and safe to use after 24 hours. Full cure — where the caulk reaches its maximum hardness and water resistance — takes five to seven days for most silicone products. Avoid scrubbing or using harsh cleaners on new caulk lines during that first week.
Can I caulk over existing shower caulk?
It’s not recommended. New caulk applied over old caulk bonds to the degraded surface rather than the tile, which causes it to fail faster. Full removal of old caulk before applying new is the only approach that produces lasting results.
What’s the best caulk for a shower?
For most standard ceramic or porcelain tile showers, a mildew-resistant siliconized latex caulk is practical and forgiving to apply. For natural stone, fibreglass, or areas with heavy water exposure, pure silicone is the more durable choice — it requires more care during application but holds up better long-term.
How do I get a smooth caulk finish?
Apply the caulk in one steady continuous stroke, then immediately tool the bead using a wet finger or a dedicated caulk finishing tool. Work in one direction without lifting or going back over sections. A caulk tool gives a cleaner concave finish than a finger and costs very little. Using painter’s tape along both edges before applying caulk is the fastest way to get straight, clean lines.
Why does my shower caulk keep going mouldy?
Mould-resistant caulk contains biocides that inhibit surface mould growth, but they deplete over time — faster in poorly ventilated bathrooms. The root cause of recurring mould is moisture that stays in the bathroom for extended periods after showering. Running an extractor fan, squeegeeing walls after use, and improving air circulation will extend the life of any caulk significantly.
How often should shower caulk be replaced?
A well-applied caulk job in a maintained bathroom should last two to five years before needing replacement. Signs it’s time to recaulk: visible mould that can’t be cleaned off, caulk pulling away from the tile surface, cracking, or any section that feels soft or spongy when pressed.
Is shower caulking a realistic DIY job for a beginner?
Yes — with realistic expectations. The removal step takes longer than most guides suggest, and getting a perfectly smooth bead on the first attempt takes a bit of practice. But the process itself doesn’t require specialist skills or tools. Most people who follow the prep steps properly get a result they’re genuinely happy with.