Estimated reading time: 11 minutes
There’s a particular kind of disappointment that comes from a kitchen upgrade that looked perfect on paper — and in the showroom, and on the mood board — but somehow doesn’t work in real life. The island that turned out to block every traffic path. The open shelving that looked beautiful for about three weeks until real kitchen life caught up with it. The lighting that felt fine until you tried to chop something at 6pm in November.
These aren’t rare outcomes. They’re the predictable result of a handful of mistakes that show up in kitchen upgrades constantly — and that most renovation content never explains with enough honesty to actually be useful.
What follows isn’t a list of vague cautions. Every mistake here comes with what actually goes wrong, and what it realistically costs when it does.
The Kitchen Upgrade Mistakes That Cost Homeowners the Most
Designing for looks, not for how you actually cook
This is probably the most common kitchen upgrade mistake, and it’s easy to understand why it happens. You’re looking at beautiful kitchens online, you fall in love with an aesthetic, and the upgrade becomes about achieving that look. Functionality becomes secondary.
The trouble is that kitchens are working rooms. A kitchen that photographs well but creates friction every time you cook is a kitchen you’ll quietly resent. The deep farmhouse sink that looks wonderful but is awkward to drain. The handleless cabinets that look sleek but are annoying to open when your hands are full. The statement hood that dominates the room visually but doesn’t actually ventilate well.
None of this means aesthetics don’t matter — they obviously do. But the fix is simple: before finalising any design decision, ask yourself how that choice interacts with how you actually use the kitchen. Cook there mentally. Walk through a typical morning. The conflicts tend to surface quickly.
Ignoring the work triangle — and why it still matters
The kitchen work triangle — the relationship between the sink, stove, and refrigerator — sounds like a design theory that belongs in a 1970s textbook. It isn’t. The principle has evolved, but the core idea holds: the three stations you use most should be positioned so that moving between them doesn’t require crossing the entire kitchen, navigating around an island, or constantly getting in someone else’s way.
When this gets wrong, you feel it immediately. Cooking becomes physically effortful in ways that are hard to articulate but easy to notice. And unlike a backsplash you don’t like, this isn’t a $200 fix. Relocating a sink or changing an island position after everything’s been built is a significant cost — plumbing alone can run $1,500–$4,000 depending on what needs to move.
If you’re planning a layout change, spend twenty minutes mapping your movement during a typical cooking session before committing. It’s one of the highest-value things you can do before any contractor starts work.
Underestimating storage — then trying to fix it after
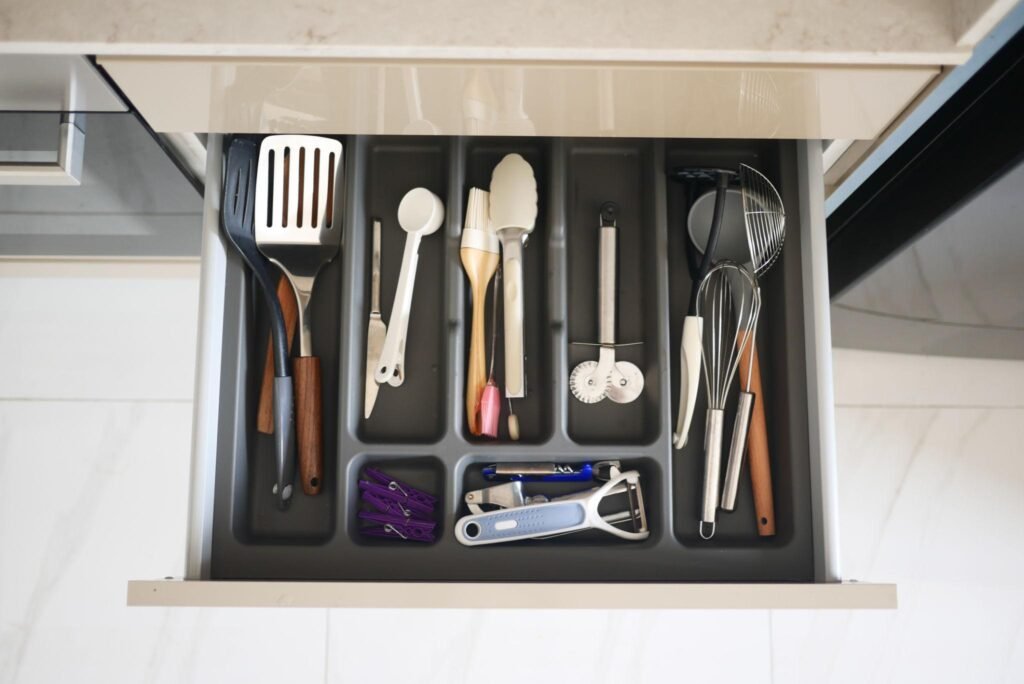
The storage mistake is the one that catches people most off guard, because it’s not about having no storage — it’s about having the wrong storage in the wrong places.
Counter-level storage gets prioritised over deep base cabinet organisation. Drawer space gets sacrificed for an extra run of lower cabinets that don’t actually hold much. The pantry corner gets converted to open shelving that looks great but holds far less than a proper cabinet would.
Retrofitting storage after the fact is expensive and awkward. Pull-out drawer inserts cost $80–$200 per cabinet. A proper pantry solution added post-installation means either lost counter space or a secondary project. The fix at the planning stage costs almost nothing — it just requires thinking through where every category of kitchen item actually lives before the cabinets are ordered.
If you’re using a kitchen that doesn’t work well right now, note what you’re constantly looking for and where your counters get cluttered. That’s your storage map. Use it before the upgrade, not after.
The Mistakes That Hit Your Budget Hardest
Hidden costs: permits, electrical, plumbing
This is where kitchen upgrades derail most often, and where the consequences go beyond inconvenience into genuine financial stress.
Permit costs for electrical or plumbing work vary significantly by location, but $150–$500 is a realistic range for residential kitchen permits in most areas. That sounds manageable. What’s less manageable is discovering mid-project that the electrical panel needs upgrading to handle a new appliance load — an unplanned cost that can run $1,200–$3,000. Or that the plumbing rough-in for the new sink position isn’t where you assumed it was, adding another $800–$2,000 to the job.
The standard advice is to “budget 10–20% for contingencies.” That’s true but vague. More useful: before any project that involves moving or adding a sink, upgrading appliances, or changing any electrical circuits, get a plumber and electrician to do a walkthrough before you finalise the budget. Not after. A pre-project assessment typically costs $100–$200 and can save multiples of that in surprises.
One more thing on permits: skipping them to save money is a real risk if you’re planning to sell. Unpermitted work can surface during a home sale inspection and require either retroactive permitting or removal. It’s not a theoretical concern — it happens.
Getting the lighting wrong — the most expensive fix
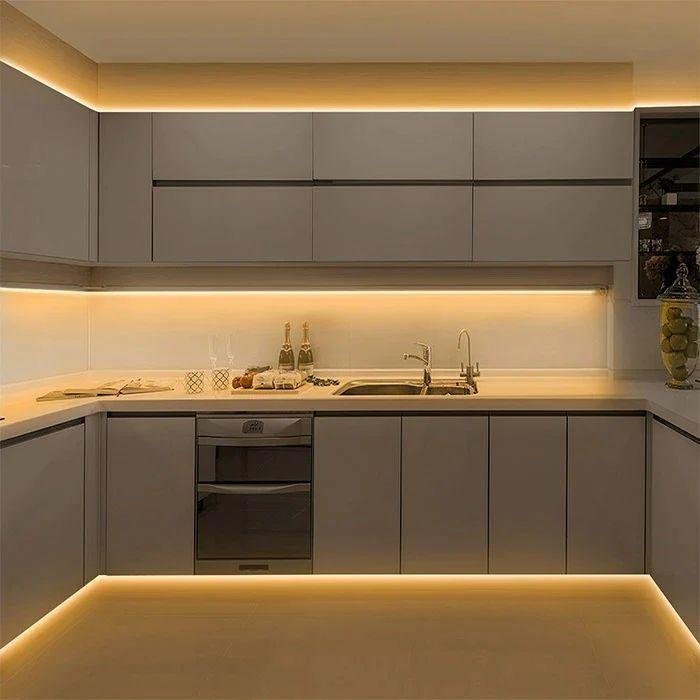
Lighting is the kitchen mistake that surprises people most, and it’s the one that’s hardest to fix once everything is finished.
Most kitchens are planned with overhead lighting and nothing else. That creates a kitchen that looks bright in an empty show home and is full of shadows the moment you stand at the counter — your own body blocks the light, and you end up working in your shadow. Under-cabinet lighting solves this almost completely, but it’s significantly cheaper and less disruptive to install during a renovation than after cabinets are already in.
Retrofitting under-cabinet lighting in a finished kitchen requires running cable through finished walls or ceilings, or using plug-in options that are effective but messier. Adding it during the build is a fraction of the cost — typically $150–$400 for a standard run, versus $400–$1,000+ for a retrofit with new wiring.
The broader lighting point: plan for task lighting, ambient lighting, and at least the option of accent lighting as three separate considerations, not one overhead fixture that’s supposed to do all three. Our guide to under-cabinet lighting setup covers this in detail, and it’s genuinely one of the highest-return upgrades a kitchen can get. For a fuller look at kitchen lighting planning, the best lighting for kitchen remodels guide walks through the full picture.
The Trend Mistake: What Dates Fast and What Actually Holds Up
“Avoid trends” is advice that appears in almost every renovation article and means almost nothing without specifics. Some trends hold up for decades. Others look dated within five years. The difference matters, especially if resale value is part of the calculation.
Which kitchen trends have a short shelf life
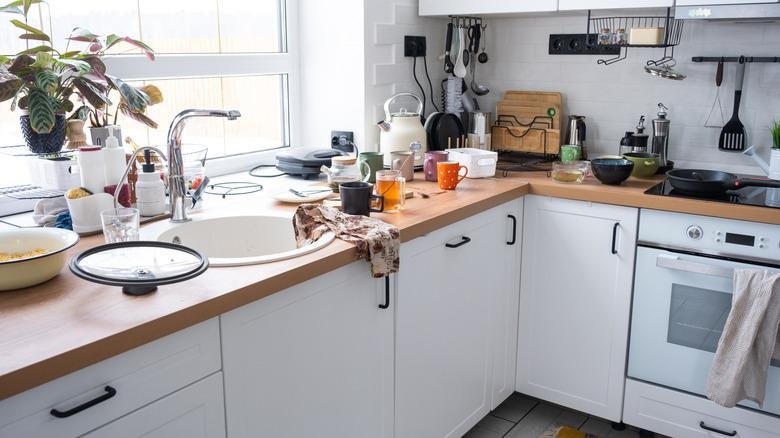
The all-white kitchen was everywhere for a long time, and it still works — but the high-maintenance version with white grout, white countertops, and white cabinetry without any tonal variation shows its age fast, and shows every mark in the meantime.
Open shelving is the more instructive example. The trend moved from “warm and accessible” to “shows every dust particle and requires constant curation” for most households. Open shelving works well as an accent — one section, styled intentionally — but wholesale replacing closed storage with open shelving is a choice many homeowners have quietly reversed. If you’re drawn to the look, consider open shelving for one section of wall rather than committing the full run.
Highly specific hardware finishes — particularly anything described as “of the moment” in interior design circles — tend to cycle faster than most people expect. Matte black was ubiquitous, then oversaturated. Brushed brass had a long run. Replacing cabinet hardware is relatively affordable (our cabinet hardware replacement guide covers the full process), but it’s worth defaulting to finishes that have demonstrated staying power.
What timeless actually means in kitchen design
Timeless doesn’t mean boring. It means choosing elements where the core appeal isn’t tied to a particular moment in interior design. Shaker-style cabinets have been continuously popular for over a century. Subway tile has had revivals in every decade since the 1900s. Natural stone and wood tones have no expiry date.
The practical test: look at a kitchen from fifteen years ago that used the element you’re considering. Does it look dated? If yes, factor that into how permanently you’re committing to it. Save the more trend-forward choices for elements that are relatively cheap to replace — hardware, light fixtures, textiles — and keep the big-budget items classic.
A Quick Checklist Before You Commit Your Budget
Before any money moves on a kitchen upgrade, these questions are worth answering honestly:
- Have you walked through how you actually cook in this kitchen, not just how it looks in photos?
- Have you mapped the relationship between sink, stove, and fridge — and is movement between them unobstructed?
- Have you inventoried where every category of kitchen item will live in the new layout?
- Have you had a plumber and electrician assess the space before finalising the budget for any work involving those systems?
- Have you planned for task lighting specifically, or just assumed the overhead fixture covers it?
- Have you looked at the design elements you’re committing to most budget toward — and checked whether they photograph as well as they function?
None of these take long to work through. Combined, they cover the majority of the kitchen upgrade mistakes that are genuinely hard or expensive to fix after the fact.
If you’re planning a broader kitchen refresh rather than a full renovation, the budget kitchen upgrades homeowners love guide covers the highest-return changes that don’t require any of the above risk factors. And if you want a sense of what a full realistic kitchen transformation looks like at different budget levels, the DIY kitchen makeover before and after is worth a look before you set your numbers.
Frequently Asked Questions
What’s the biggest mistake homeowners make in a kitchen upgrade?
The most consequential mistake — in terms of both cost and livability — is optimising for aesthetics without testing the layout against how the kitchen actually gets used. A kitchen that looks right but disrupts workflow is a problem you’ll notice every day, and fixing a layout mistake after the build is significantly more expensive than getting it right in the planning stage.
Do I need a permit to upgrade my kitchen?
It depends on what you’re changing. Cosmetic upgrades — new tiles, cabinet refacing, hardware, paint — generally don’t require permits. Any work that involves moving or adding electrical circuits, relocating plumbing, or structural changes typically does. Permit requirements vary by location, so check with your local building authority before starting work that goes beyond surface-level changes. Unpermitted work can cause complications when selling.
How much should I budget for unexpected costs in a kitchen renovation?
A contingency of 10–20% of the total project budget is the standard recommendation. On a $15,000 renovation, that’s $1,500–$3,000 held in reserve. The most common surprises involve electrical panels needing upgrades to handle new appliances, plumbing that isn’t positioned where it was assumed to be, and structural issues behind walls that aren’t visible until work starts.
Which kitchen trends date the fastest?
Highly specific hardware finishes, all-white kitchens with high-maintenance grout and surfaces, and open shelving used as wholesale replacement for cabinet storage tend to cycle out of favour faster than most homeowners anticipate. Trend-forward choices are better reserved for elements that are relatively cheap to change — hardware, light fixtures, textiles — rather than cabinets, countertops, or tile.
What is the kitchen work triangle and does it still matter?
The kitchen work triangle is the spatial relationship between the three most-used stations in a kitchen: the sink, the stove, and the refrigerator. The principle is that movement between these three points should be unobstructed and efficient. It still matters in most kitchen layouts, though modern kitchens with multiple cooks often plan for a work zone approach rather than a strict triangle. Either way, the core idea — that friction between your main cooking stations makes a kitchen harder to use — holds up regardless of layout style.
Is getting kitchen lighting wrong really that expensive to fix?
Yes, and it’s underestimated. Retrofitting under-cabinet lighting in a finished kitchen can cost $400–$1,000+ when new wiring is required. The same installation during a renovation typically runs $150–$400. Beyond under-cabinet lighting, ceiling-level recessed lighting added post-build requires opening finished ceilings. Planning lighting properly at the outset is one of the highest-return decisions in a kitchen renovation.