
Estimated reading time: 13 minutes
Most expensive home repairs aren’t bad luck. They’re the predictable result of small things that got ignored, deferred, or done wrong — and then given enough time to compound.
If you’ve ever opened a repair bill and genuinely couldn’t pinpoint how it got that serious, the answer is almost always somewhere in this list. And that’s not a criticism. Most of these mistakes happen because nobody explains what to look for, or what the consequence of skipping something actually is. “Maintain your home” isn’t instruction. It’s a suggestion without a map.
Here’s the actual map — what the most common home maintenance mistakes are, what they quietly do to your home over time, and what to do differently from here.
Most Home Damage Starts Small — Then Gets Time to Grow
The ceiling stain that’s been there since winter. The faucet with the slow drip. The shingle that lifted in the last storm. None of these feel urgent. They’re not dripping on your head or flooding your floor. So they wait.
That waiting is where the real cost accumulates.
A slow drip under a sink, ignored for six months, produces enough moisture to warp the cabinet floor and create conditions for mould growth. A lifted shingle lets water under the underlayment over dozens of rain events, slowly saturating the decking beneath. By the time either problem is obvious, it’s a repair — not a quick fix.
Understanding that pattern is the most useful thing you can take from this article. Small problems don’t stay small. They just get more expensive.
Skipping Regular Inspections
The hardest home maintenance mistakes to catch are the ones with no obvious signs — until they’ve already done significant damage.
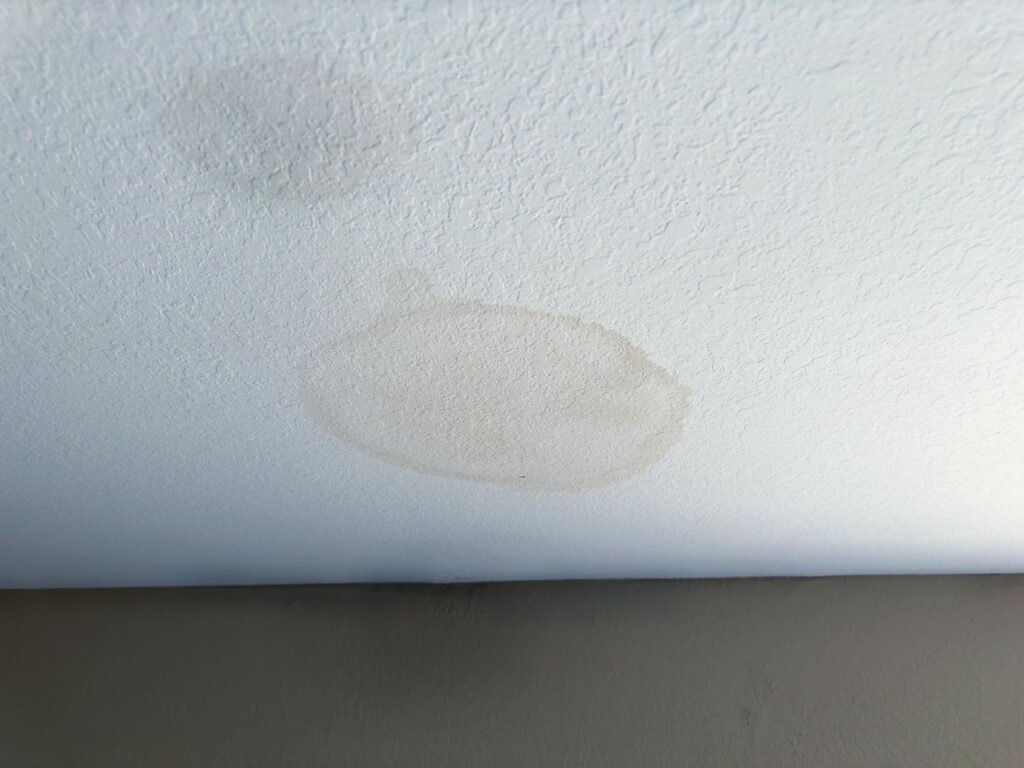
Ceiling stains that appear and then seem to dry up don’t mean the leak fixed itself. They mean it rained, water found a path in, and then things dried out temporarily. The path is still there. Hairline cracks in exterior walls or the foundation that seem cosmetic can indicate settling or water infiltration that’s actively working against your home’s structure.
Most homeowners do a mental scan of their home regularly — they notice things. The problem is that noticing and actually investigating are different actions. Make a habit of a slow walk-through every month, inside and out. Look up. Look at corners and where walls meet floors. Check around windows after heavy rain. Caught early, the fixes are minor. Left alone, they tend to escalate quietly.
For a structured approach to what to check and when, the yearly home maintenance guide maps the inspection calendar across all four seasons.
HVAC and Filter Neglect
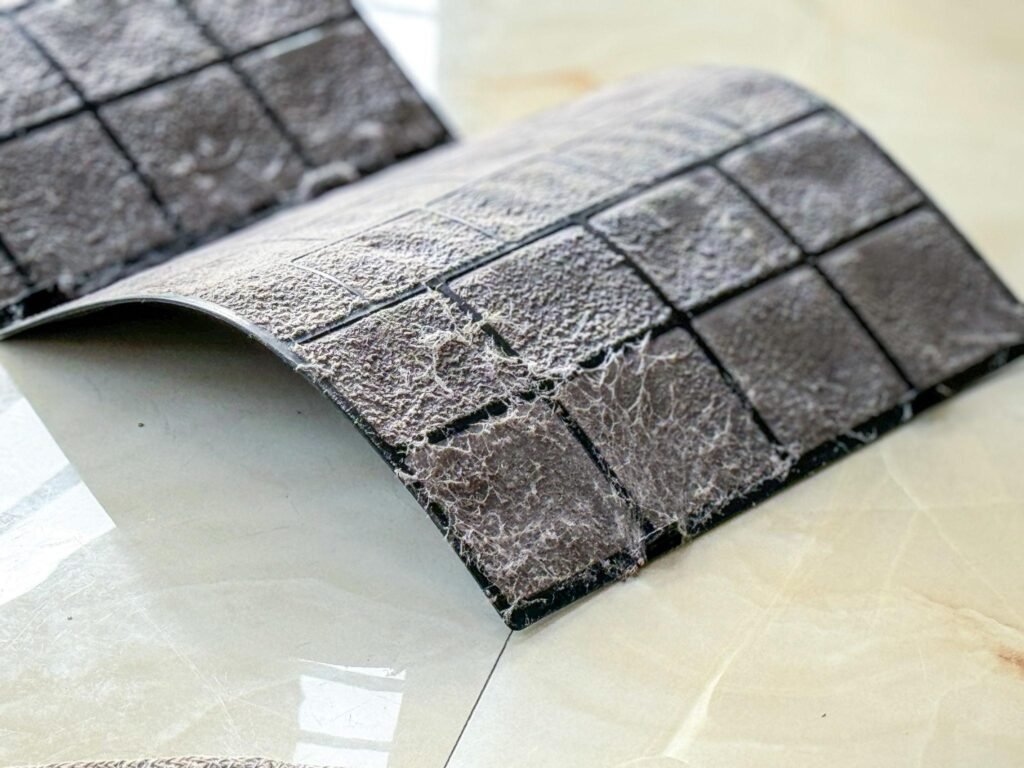
What Actually Happens When You Run a Dirty Filter Too Long
A clogged HVAC filter doesn’t just “reduce efficiency” — it makes your system physically work harder to pull air through a blocked medium. That strain lands on the blower motor. Run a badly clogged filter long enough and you’re looking at a motor that overheats, fails prematurely, or causes the evaporator coil to freeze over.
An HVAC replacement runs anywhere from $3,000 to $7,000 or more depending on your system and home size. A filter costs a few dollars and takes three minutes to swap.
Filters should be replaced every 30–90 days depending on the filter type and how much your system runs. Homes with pets or allergy sufferers should lean toward the shorter end. If you pull the filter out and can’t see light through it, it needed changing already.
The other half of HVAC care — professional servicing — gets skipped far too often. A licensed HVAC technician should check your system twice a year: once in spring for the AC, once in early fall for the furnace. Not because something is wrong, but because catching something small during a service visit costs far less than diagnosing it during a breakdown. Our HVAC maintenance checklist covers what a proper seasonal service should include and flag.
Ignoring Gutters Until Something Goes Wrong
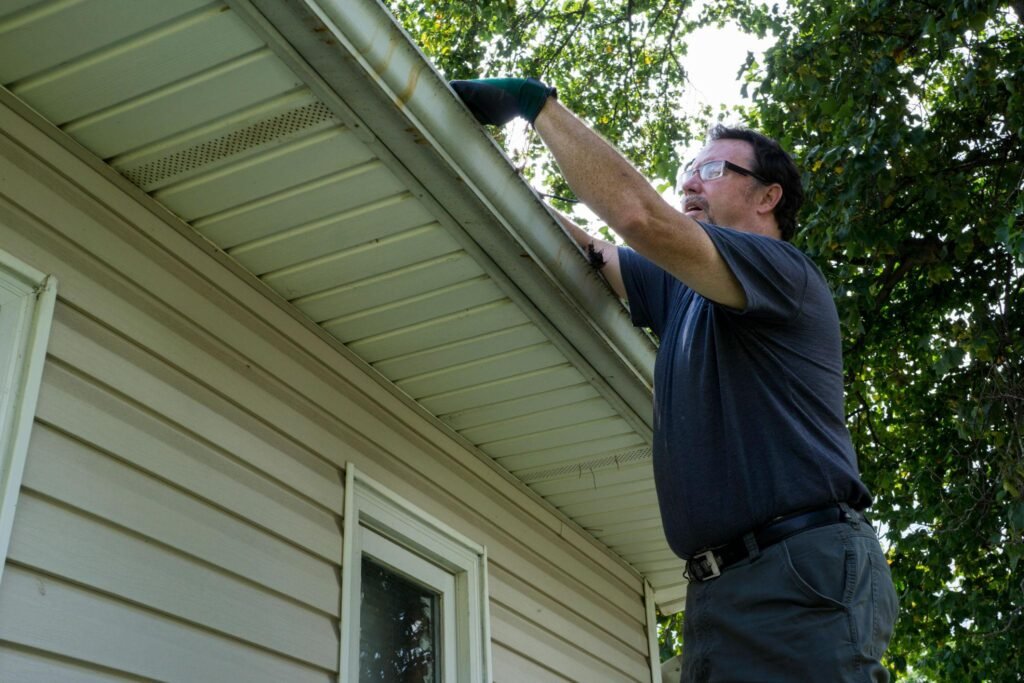
The gutters that haven’t been cleaned since two winters ago are doing more damage than most homeowners realise.
Clogged gutters overflow. That overflow doesn’t go away — it runs down the side of your home, pools along the foundation, and slowly saturates the soil against it. Over time, that moisture works against your foundation’s integrity: cracks, settling, and in serious cases, basement water infiltration. Foundation repairs can run $5,000 to $15,000 or more depending on what’s needed. Gutter cleaning costs a fraction of that.
Clean gutters in late fall after leaves have dropped and again in spring after winter debris has accumulated. While you’re at it, check that downspouts are directing water at least six feet away from the foundation — a $10 downspout extension is one of the cheapest protective investments a homeowner can make.
If you’re not comfortable working on a ladder, this is one task worth hiring out. The cost is low and the protection is real. For tasks you can genuinely handle yourself, the best tools for maintenance tasks covers what’s worth having on hand.
DIY Repairs That Go Beyond Your Skill Level
There’s a version of DIY confidence that saves homeowners thousands of dollars over the years. And then there’s the version that turns a $200 repair into a $2,000 one.
The Repairs That Almost Always Need a Professional
The honest distinction isn’t really about skill — it’s about consequences when things go wrong. Painting a room wrong means repainting. Wiring a light switch wrong can mean a fire hazard behind your wall that you won’t detect until something goes badly wrong. Overtightening a pipe fitting — an extremely common DIY plumbing mistake — can crack the fitting or the pipe, causing a slow leak inside your wall.
Electrical work involving the breaker panel, new circuits, or anything beyond replacing a switch or outlet: call a licensed electrician. Gas line connections of any kind: licensed professional, no exceptions. Structural work — removing walls, sistering joists, foundation repair: always a contractor. Our electrical safety maintenance tips cover the line between what’s homeowner-appropriate and what genuinely isn’t.
The DIY space where most homeowners do well: painting, caulking, filter and fixture replacement, deck sealing, basic landscaping, and minor plumbing like replacing a faucet cartridge or toilet flapper. That’s a substantial amount of money saved over time. The key is knowing where to stop.
Water Heater Maintenance Nobody Talks About
Signs Your Water Heater Has a Sediment Problem
This one is genuinely underserved by most home maintenance content, which is a problem because water heater neglect is both common and costly.
Here’s what happens: minerals in your water supply — especially in hard water areas — settle as sediment at the bottom of the tank over time. That sediment layer sits between the burner and the water, forcing the heater to work harder to heat through it. Energy use climbs. Heating cycles take longer. And if you listen carefully during a heating cycle, you may hear a popping or rumbling sound — that’s the sediment cracking and shifting as it heats up. It’s not a comforting noise.
Left long enough, sediment buildup can cause overheating at the bottom of the tank, accelerating corrosion and shortening the unit’s lifespan considerably. Water heaters typically last 8–12 years; a heavily neglected one may not make it to the lower end of that range.
The fix is annual flushing — connecting a hose to the drain valve and flushing sediment out of the tank. It’s a reasonable DIY task if your water heater is relatively young. One important caveat: if your water heater hasn’t been flushed in five or more years, don’t attempt it yourself. The drain valve may be corroded shut, and forcing it can cause it to fail in the open position — at which point you have a bigger problem than sediment. Have a plumber assess it first.
Delaying Small Repairs Until They’re Not Small Anymore
Leaky faucets. Cracked grout in the shower. A slightly soft spot on the bathroom floor. A damaged shingle or two.
Each of these is a minor fix at the moment it’s discovered. Each of them becomes a significantly more expensive fix if given six to twelve months to develop.
The leaky faucet dripping into the cabinet below eventually warps the wood and creates mould conditions. The cracked shower grout lets water into the substrate behind your tiles, which leads to soft spots and eventually the kind of tile job that needs full replacement. The soft bathroom floor means water has been getting somewhere it shouldn’t — by the time you feel it underfoot, the subfloor below may already need replacing.
The pattern is consistent: the cost of fixing something now is almost always a fraction of the cost of fixing the same thing after it’s had time to cause secondary damage. Addressing small repairs promptly isn’t being fussy about your home — it’s being financially sensible.
Poor Ventilation and Humidity Control
Where Mould Actually Starts in Most Homes
Most homeowners picture mould as something that happens to other people — to homes with obvious water damage or neglect. The reality is that mould starts in entirely ordinary places: the bathroom ceiling above the shower, the corner behind the toilet, the wall adjacent to the kitchen exhaust fan that barely pulls air anymore.
The cause is moisture without adequate airflow. Bathrooms and kitchens generate significant humidity during daily use. If exhaust fans are undersized, clogged with dust, or simply not run long enough, that moisture lingers. Over weeks and months, it finds a surface to settle on.
Test your bathroom exhaust fan with a piece of toilet paper: turn the fan on and hold the paper near the grille. It should be drawn toward the fan noticeably. If it barely moves, the fan isn’t doing its job. A clogged grille can be vacuumed clean in two minutes. A failing fan motor needs replacement — a straightforward job that most homeowners can handle with basic tools.
Run bathroom fans during showers and for at least 15–20 minutes afterward. Kitchen exhaust fans should run during any cooking that produces steam. These aren’t optional niceties — they’re your first line of defence against moisture accumulation.
Forgetting the Exterior Until It Forces Itself on You
Exterior maintenance is easy to deprioritise because the outside of the house is always “out there” — it’s not in your face the way a dripping faucet is. But the exterior is your home’s primary defence against weather, and when it fails, the problems move inside.
Roofing issues are the most consequential. A handful of damaged shingles can allow water infiltration that doesn’t become obvious until it’s stained a ceiling or, worse, worked its way into structural framing. A seasonal scan from ground level — or safely from a ladder at the eaves — takes ten minutes and can catch obvious damage before it develops.
Siding and exterior paint are slower to fail but still matter. Peeling or damaged exterior paint isn’t just cosmetic; it exposes the underlying material to moisture. Cracks in siding panels or where siding meets trim are entry points for water and insects.
Walking your home’s exterior once each season is enough to catch most developing issues before they become repairs. The seasonal roof maintenance checklist is a useful companion for knowing what to look for at each time of year.
Not Having a Maintenance Schedule at All
This one underlies almost every other mistake on this list.
Without a structured schedule, maintenance happens reactively — when something breaks, when it’s obviously overdue, or when you happen to remember. The result is that some tasks get done frequently while others are ignored for years. There’s no intentional prioritisation; it’s just whatever surfaces.
A simple schedule — even a basic checklist reviewed monthly and a seasonal task list — closes most of the gaps. You don’t need an elaborate system. A shared note on your phone with recurring reminders, a home maintenance app, or a printed checklist on the inside of a kitchen cabinet will do the job.
The monthly home maintenance checklist covers the recurring tasks worth building into a regular habit, and the yearly home maintenance guide maps out seasonal priorities so nothing falls through the cracks.
If You’ve Already Made Some of These Mistakes
Most people reading this will recognise at least two or three things they’ve been putting off. That’s not a crisis — it’s a starting point.
The most useful thing to do right now is triage. Walk through your home with fresh eyes and make a list of anything that’s been quietly nagging at you — the stain, the drip, the filter you haven’t changed. Then prioritise by consequence: water and structural issues first, efficiency and cosmetic concerns second.
For anything involving water — active leaks, soft spots in floors, mysterious stains — get eyes on it sooner rather than later. Water is patient and destructive. For things like a water heater that’s never been serviced, have a plumber assess it rather than attempting a DIY flush on an old unit.
The point isn’t to catch up on everything at once. It’s to stop the compounding. Fix one thing this week, schedule another for next month, and get a maintenance routine in place so the list stays manageable going forward.
Frequently Asked Questions
What are the most common home maintenance mistakes homeowners make?
The most common mistakes include neglecting HVAC filter changes, ignoring gutters until foundation damage sets in, delaying small repairs until they escalate, skipping water heater maintenance, attempting DIY repairs beyond their skill level, and having no regular maintenance schedule at all.
What happens if you don’t clean your gutters?
Clogged gutters overflow and direct water toward your foundation. Over time, this saturates the surrounding soil, which can cause foundation cracking, settling, and basement moisture infiltration. Foundation repairs can cost $5,000–$15,000 or more — significantly more than routine gutter cleaning.
How often should a water heater be flushed?
Most water heaters should be flushed annually to remove sediment buildup. Homes with hard water or well water may benefit from flushing every six months. If the unit hasn’t been flushed in five or more years, have a plumber inspect it before attempting a DIY flush, as the drain valve may be corroded.
What home repairs should never be DIY?
Electrical panel work and new circuit installation, gas line connections, structural modifications (wall removal, foundation repair, sistering joists), and any repair involving asbestos or lead paint should always go to licensed professionals. The consequence of mistakes in these areas is too serious for trial and error.
What are the signs of a dirty HVAC filter?
Reduced airflow from vents, visible dust buildup around registers, more frequent cycling of the system, higher energy bills, and a visible dark grey or grey-black filter when you pull it out. If you can’t see light through the filter, it needs replacing immediately.
What is deferred maintenance?
Deferred maintenance refers to repairs and upkeep tasks that have been postponed beyond their appropriate timeframe. It’s the backlog of “I’ll get to that” items that accumulate over months or years. The financial danger is that deferred maintenance compounds — each delayed task tends to create secondary damage that makes the eventual repair more expensive.
How much does neglected home maintenance typically cost?
The cost varies widely depending on what’s neglected, but common consequences are significant: foundation repairs run $5,000–$15,000+, HVAC replacement $3,000–$7,000+, water damage remediation $2,000–$10,000+, and roof repairs $1,000–$8,000+ depending on severity. Regular preventive maintenance typically costs a fraction of these figures annually.
What home maintenance tasks do most people forget? Water heater flushing, GFCI outlet testing, exhaust fan cleaning, caulking around exterior windows and doors, dryer vent cleaning, and sump pump testing are among the most commonly skipped. Our outdoor maintenance tasks homeowners forget covers the exterior version of this list in detail.