Estimated reading time: 13 minutes
Here’s the thing nobody tells you upfront: painting kitchen cabinets is absolutely doable as a DIY project. It’s also the kind of job that goes sideways fast if you skip the boring parts.
I’ve seen it both ways. Done right, a cabinet repaint looks genuinely transformative — the kind of result that makes people ask if you got a whole new kitchen. Done wrong, the paint starts lifting at the edges within a month, and you’re standing there wondering what went wrong.
The difference almost always comes down to prep, the right primer for your specific cabinets, and one overlooked concept called cure time. This guide covers all of it — including the bits that most how-to articles quietly leave out.
What You’ll Need Before You Start
Get everything together before you open a single tin. Running out of sandpaper halfway through is how projects stall for three days.
Cleaning & prep:
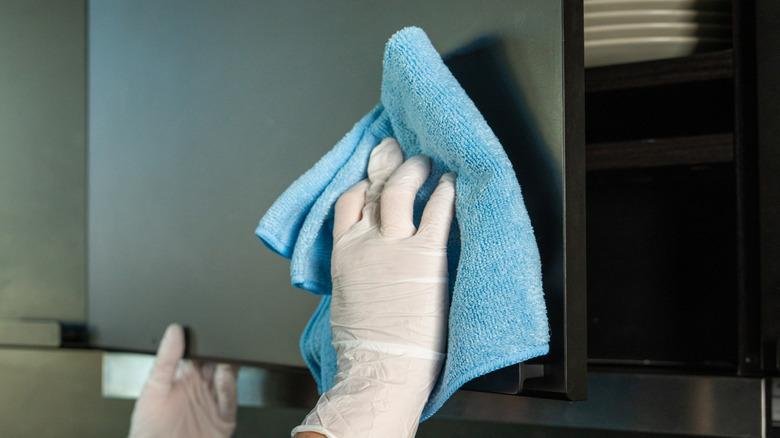
- TSP cleaner or a degreaser (Simple Green works too)
- Clean rags or microfibre cloths
- Tack cloth
- Painter’s tape
- Drop cloths
Sanding:
- 100–120 grit sandpaper (for scuffing the surface)
- 220 grit sandpaper (for smoothing between coats)
- Sanding block
Priming & painting:
- Primer (specific type depends on your cabinet material — more on this below)
- Cabinet-grade paint — enamel or alkyd-based for durability
- Angled brush for edges and detail work
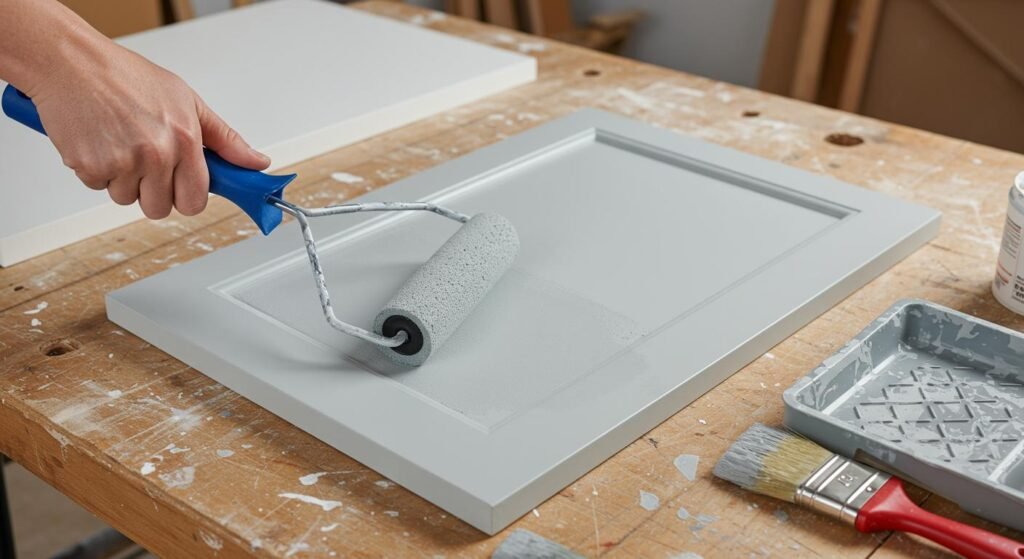
- 4-inch foam roller for flat surfaces
- Small roller tray
Hardware:
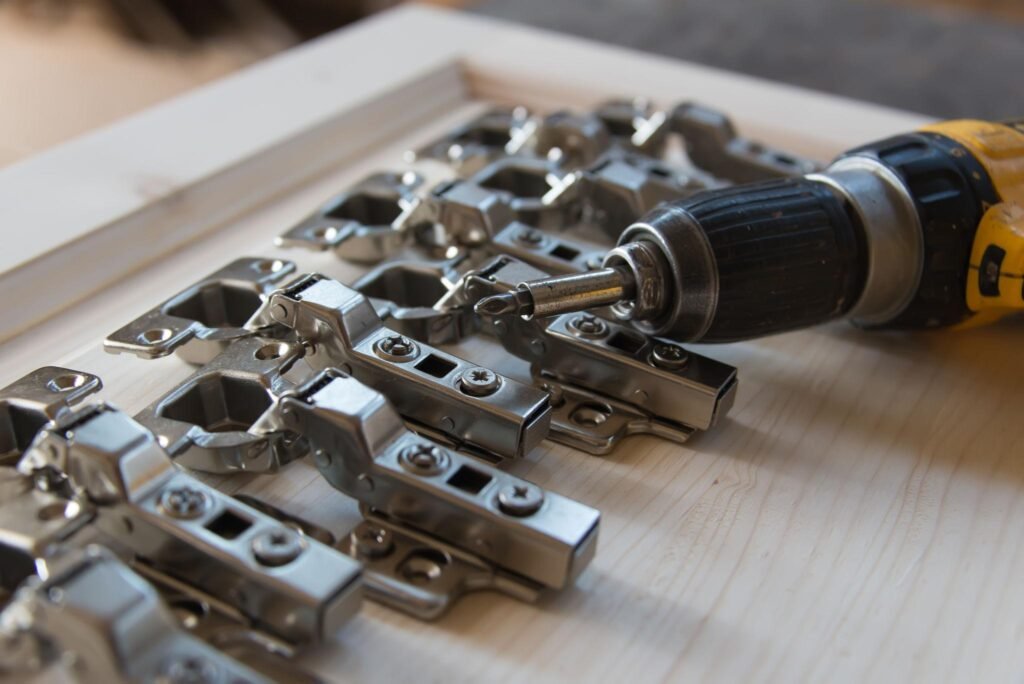
- Screwdriver (manual or electric)
- Small plastic bags and a marker for labelling hardware
- Painter’s tape for labelling door positions
If you’re thinking about skipping the foam roller and just brushing everything — don’t. Foam rollers on flat panels are what separate a smooth, professional-looking finish from one that looks hand-painted in a bad way. (More on that in the mistakes section.)
This Step Most Guides Skip: Know Your Cabinet Material
Before you choose a primer or pick up sandpaper, figure out what your cabinets are actually made of. This single thing affects every product decision you’ll make, and most painting guides treat all cabinets like they’re identical. They’re not.
Solid wood cabinets are the most forgiving. They sand well, hold primer readily, and take paint without drama. A standard acrylic bonding primer works well here. If there’s any stain bleed-through (darker woods can do this), a shellac-based primer like Zinsser BIN stops that in its tracks.
MDF cabinets are common in mid-range kitchens. MDF is dense and smooth, which sounds ideal — but it absorbs primer heavily on the edges. Those edges need an extra coat of primer, or they’ll drink up your topcoat and look uneven. Use a water-based acrylic primer and don’t skip the edge sealing.
Laminate cabinets are the ones that catch people out. Paint doesn’t naturally want to stick to laminate — it’s a slick, non-porous surface. You need a bonding primer specifically designed for slick surfaces. Zinsser Bulls Eye 1-2-3 is a solid pick. Skip this and the paint will peel. Not eventually — relatively quickly.
Thermofoil cabinets (the ones with a vinyl wrap over MDF) are tricky. The film can lift when exposed to heat during painting or in a hot kitchen environment. If the thermofoil is already peeling at the edges, painting over it usually makes the problem worse. In that case, you’re better off peeling the film entirely and treating what’s underneath as MDF.
Not sure what you’ve got? Check the back of a door or inside a cabinet box — that usually gives you a clearer look at the material.
How to Paint Kitchen Cabinets: The Step-by-Step
Step 1: Remove everything first
Take off all the doors, drawer fronts, and hardware. Every hinge, every handle. I know — it’s tempting to paint around them. Don’t. You’ll end up with paint overlap on your hinges and edges that don’t look finished.
Label each door as you remove it. A piece of painter’s tape inside the door with a number and the corresponding location (“upper left”, “under sink”) takes two minutes and saves a frustrating reinstallation puzzle later.
Why this matters: Painting with the doors on means uneven access to edges, paint pooling in hinge recesses, and a finish that looks exactly like it was painted in-situ. Removing everything is what makes the result look like it was professionally done.
Step 2: Clean like you mean it
Kitchen cabinets collect grease. Even ones that look clean have a film of cooking residue built up over months or years, and paint won’t bond properly over grease — it’ll just slide off.
Wipe every surface down with TSP cleaner or a degreaser, then rinse with clean water and let everything dry completely. If you’re not sure it’s clean, clean it again.
Why this matters: This is the step people rush because it feels like it shouldn’t matter that much. It matters enormously. Grease contamination is one of the top reasons paint adhesion fails.
Step 3: Sand the surfaces
For most cabinets, a light scuff with 120 grit sandpaper is all you need. You’re not trying to strip the finish — just rough up the surface enough for the primer to grip. Follow with a 220 grit pass to smooth things out.
Wipe down with a tack cloth after sanding. Every single time. Dust left on the surface gets sealed under your primer and creates a gritty texture you can’t fix later without starting over.
Can you skip sanding? Technically, yes — with a high-quality bonding primer on the right surface. But sanding first gives your primer a mechanical key to grip onto, and on a high-traffic surface like kitchen cabinets, that extra adhesion is worth the twenty minutes.
For more detail on surface prep that actually holds up, this furniture painting guide covers the process in depth.
Step 4: Fill any damage
Nail holes, small dents, chips at the edges — fill them with wood filler, let it dry fully, then sand smooth with 220 grit. Primer doesn’t hide physical imperfections. Paint definitely doesn’t. Fix them now or they’ll be visible forever.
Step 5: Prime properly (this is the important one)
Apply your primer in thin, even coats using a brush on the edges and recesses and a foam roller on the flat panels. Let the first coat dry completely, then lightly sand with 220 grit before applying a second coat.
Two coats of primer is usually the right call for cabinets — one for adhesion, one to even out porosity and give your topcoat a consistent base to sit on.
Refer back to the material section above for which primer to use. “Any primer” is not the answer here.
Why this matters: Primer is not optional decoration before the real paint. It’s what the paint actually bonds to. A good primer can turn a mediocre topcoat into a durable finish. A skipped primer can turn a great topcoat into a peeling disaster.
Step 6: Apply paint in thin coats
Use a brush for the edges, frames, and any recessed detail. Switch to a foam roller for all the flat panel surfaces. Apply thin coats — thinner than you think you need.
Thick coats look fast on the roller but take longer to dry, sag at edges, and dry with a texture problem. Two thin coats always beat one heavy coat, both in appearance and durability.
Let each coat dry to touch before applying the next — usually 2–4 hours depending on the paint and your environment. Lightly sand with 220 grit between coats, then wipe down with a tack cloth before painting again.
For flat doors, consider painting the back first. It gives you practice on the surface before you commit to the visible front.
On paint choice: For kitchen cabinets, you want either an alkyd (oil-based) enamel or a water-based cabinet-specific paint like Benjamin Moore Advance. Alkyd paints self-level beautifully and are extremely durable — but they’re slower to dry, smell stronger, and require mineral spirits for cleanup. Water-based cabinet enamels have improved dramatically and are much easier to work with. Benjamin Moore Advance specifically is worth the premium — it levels out brush marks as it cures and dries to a genuinely hard finish.
If you’re considering a sprayer for a more factory-smooth result, this overview of paint sprayers for homeowners is worth reading before you decide.
Step 7: Reinstall — but only after the paint cures
Once the final coat looks good, leave everything to cure. Not just dry — cure. This is where a lot of otherwise great paint jobs get ruined in the final hour.
Dry Time vs Cure Time: The Distinction That Changes Everything
Dry time is how long the paint takes to feel dry to the touch — typically a few hours. Cure time is how long the paint takes to reach its full hardness and durability. These are completely different things.
Cabinet paint feels dry after 2–4 hours. It reaches full cure in 2–4 weeks. In the first week, it’s still soft enough to dent, mark, and stick to itself.
Reassemble the cabinets within a day or two of painting and you’ll see it: doors sticking to frames, paint peeling off at the hinge points, marks where surfaces have touched. That’s not a product failure — it’s curing interrupted.
Leave doors off for at least 3–5 days before reinstalling, and handle the surfaces gently for the first couple of weeks. Line shelves with paper for the first month if you can.
Common Mistakes (and How to Recover From Them)
Brush marks in the finish
Usually caused by overloading the brush or using the wrong type. Load the brush lightly, use long strokes in the direction of the grain, and finish each pass without going back over drying paint. If brush marks are already in the primer, sand them out with 220 grit before applying paint. In the topcoat, a water-based alkyd like Benjamin Moore Advance will self-level most minor brush marks as it dries.
Drips and runs
These happen when too much paint is applied at once, especially on vertical surfaces. If the paint is still wet, brush it out immediately. If it’s dried, sand it flat with 220 grit once fully dry, dust off, and recoat. Chasing a run with a brush while it’s partially dry makes it worse.
Paint peeling after a week
Almost always one of three things: the surface wasn’t cleaned properly before priming, the wrong primer was used for the material (especially on laminate), or the surface wasn’t scuffed before priming. Unfortunately there’s no quick fix here — you need to sand back to a sound surface and start the primer stage again. Not fun, but it’s the only way to get a result that actually lasts.
To avoid the most common DIY missteps before you even begin, this rundown of beginner painting mistakes is genuinely worth a read.
Paint not covering evenly
Usually a porosity issue, most common on MDF edges. Apply an extra coat of primer to the affected areas, let it dry fully, sand lightly, then repaint. Trying to compensate with thicker topcoat just creates more problems.
A Realistic Timeline
Most guides say something like “this is a weekend project.” That’s true — but only if you plan carefully and don’t rush the drying steps.
Day 1 (Friday evening or Saturday morning): Remove all doors and hardware. Clean everything thoroughly. Fill any damage. Sand all surfaces. Apply first coat of primer.
Day 1 afternoon: Apply second coat of primer once the first is dry (usually 2–4 hours).
Day 2: Lightly sand primed surfaces. Wipe down. Apply first coat of paint. Let dry fully. Apply second coat if coverage looks good.
Day 3 or Monday: Assess the finish. Apply a final coat if needed. Leave to dry undisturbed.
Days 3–7: Leave doors off to cure. Reinstall hardware and rehang doors gently at the end of this window.
Weeks 2–4: Handle everything carefully. The finish is still hardening.
This isn’t a rush job. The people who get beautiful results are the ones who respect the drying and curing windows. The ones who reassemble on Sunday evening because the paint “looks done” are usually the ones back in the comments section asking why it’s peeling.
Taking Care of Painted Cabinets Long-Term
Once the paint has fully cured, painted cabinets are genuinely durable — but they’re not indestructible. A few habits that keep the finish looking good:
Wipe spills and splashes quickly. Acidic things like tomato sauce and citrus juice can dull a paint finish over time if left sitting.
Clean with a soft cloth and mild dish soap. Avoid anything abrasive — even those rough-side sponges. Scratching through the topcoat into the primer is easier than it looks, and it shows.
Avoid slamming doors during the first month. The paint is still curing, the hinges are newly set, and the finish is more vulnerable than it will be once fully hardened.
If you notice any chips or small areas of damage, touch them up early. A tiny chip repaired now is invisible. Left to expand, it becomes a much bigger repair job later.
For more ideas on refreshing your space without a full renovation, this before-and-after room makeover guide has some genuinely inspiring projects in a similar budget range.
Frequently Asked Questions
Do I need to sand kitchen cabinets before painting?
You don’t strictly have to — a good bonding primer can adhere to an unsanded surface on solid wood or MDF. But a light scuff with 120 grit sandpaper gives the primer a mechanical key to grip, which significantly improves long-term adhesion. On high-use surfaces like kitchen cabinets, it’s worth the extra step.
How many coats of paint do kitchen cabinets need?
Two coats of paint over two coats of primer is the standard. In some cases — very light paint over very dark cabinets, or highly porous surfaces — a third topcoat improves coverage and depth. Thin coats applied correctly always outperform thick ones applied quickly.
What’s the best paint finish for kitchen cabinets?
Semi-gloss or satin. Both are wipeable, resist moisture, and hold up to the general wear of a kitchen environment. Matte and eggshell finishes look beautiful in theory but absorb grime and aren’t easy to clean — not ideal in a kitchen.
Can you paint laminate kitchen cabinets?
Yes, but the primer matters. Laminate is non-porous and paint won’t bond to it without a bonding primer specifically designed for slick surfaces. Zinsser Bulls Eye 1-2-3 is a reliable pick. Skip this and the paint will eventually peel regardless of how carefully everything else was done.
How long does cabinet paint take to fully cure?
Most cabinet-grade paints cure fully in 2–4 weeks, even though they feel dry within hours. During the first week especially, the paint is still soft enough to dent and mark easily. Handle painted surfaces gently and avoid stacking or pressing items against doors for at least the first two weeks.
Can you paint kitchen cabinets without removing the doors?
You can, but the results usually show it. Painting in-place makes it hard to reach the full edge of each door, leads to paint pooling around hinges, and means you can’t paint the back of the doors or the face of the cabinet boxes properly. If you want a finish that looks deliberate rather than patched, removing the doors is the right call.