Estimated reading time: 14 minutes
You spent a weekend painting. You stood back, looked at the wall, and something wasn’t right. Maybe the sheen looks uneven in certain light. Maybe there are faint stripes where the roller overlapped. Maybe it looked fine when you finished but started peeling three weeks later.
That feeling — the gap between what you expected and what’s actually on the wall — is exactly why this article exists.
Most painting mistakes aren’t about skill. They’re about not knowing a handful of technical things that professionals learn early and never forget. Nobody teaches you this stuff. You figure it out the hard way, or you read something like this first.
Let’s make it the second option.
What Separates a Professional Finish from a DIY One
It’s not the brand of paint. It’s not even the tools — though those matter.
It’s understanding how paint actually behaves: how temperature affects it, how long it really needs to dry, why a dry roller leaves marks even when it looks loaded. Once you understand the why, the right choices become obvious.
Here are the ten painting mistakes beginners make most often — each one with a plain-English explanation and, crucially, what to do if you’ve already made it.
1. Painting at the Wrong Temperature
Why it goes wrong: Paint is surprisingly sensitive to temperature. Too cold — below around 50°F (10°C) — and it thickens, struggles to flow evenly, and bonds poorly to the surface. Too hot — especially in direct sunlight above 85°F (29°C) — and it dries so fast that you can’t maintain a smooth finish. This is called flash drying: the paint on your roller’s edge has already started setting before you’ve finished the stroke. That’s what causes those hard roller lines.
It’s not just air temperature either. Wall surfaces, doors, and cabinets absorb heat differently. A dark exterior door in direct afternoon sun can be 20 degrees hotter than the surrounding air.
The fix: Aim for 60–75°F with moderate humidity. For interior painting, that’s most of the year in a conditioned home. For exterior work, paint in the morning when surfaces are cooler and you have time before afternoon heat. Check the surface temperature, not just the room.
Already done it? If paint was applied in very cold conditions and adhesion looks weak, you’ll likely need to reprime and repaint once temperatures are more stable. Flash-dried sections with visible hard lines can sometimes be sanded smooth and overcoated — but if the whole wall has uneven sheen from inconsistent drying, a full recoat over properly prepped surface is the cleaner fix.
For more on working in challenging conditions, this guide to DIY exterior painting covers temperature and timing in detail.
2. Skipping the Paint Boxing Step
Why it goes wrong: You bought three gallons of the same colour. Same brand, same code. But paint is mixed in batches, and batch-to-batch variation is real — the same colour can reflect light slightly differently between tins. If you finish one gallon mid-wall and open the next without mixing them together first, you might end up with a subtle but visible seam running down your wall. In certain lighting, it’s obvious.
Boxing paint is the professional term for combining all your tins into one large container and stirring everything together before you start. It takes five minutes and eliminates the problem entirely.
The fix: Before you open tin number two, pour what’s left in the first into a large bucket, add the new tin, and stir. Continue this way across all tins. One consistent mixture, start to finish.
Already done it? If you’re seeing a line where tins changed, let the wall dry fully, then apply a unified coat from boxed paint across the whole wall. Trying to feather the join on a dry wall without a full recoat usually makes it more visible, not less.
3. Using Painter’s Tape Incorrectly
Why it goes wrong: Most people assume tape is foolproof. Press it on, paint, peel off — done. But tape fails in predictable ways: paint seeps under loose edges, bleeds through on textured surfaces, or pulls existing paint off when removed.
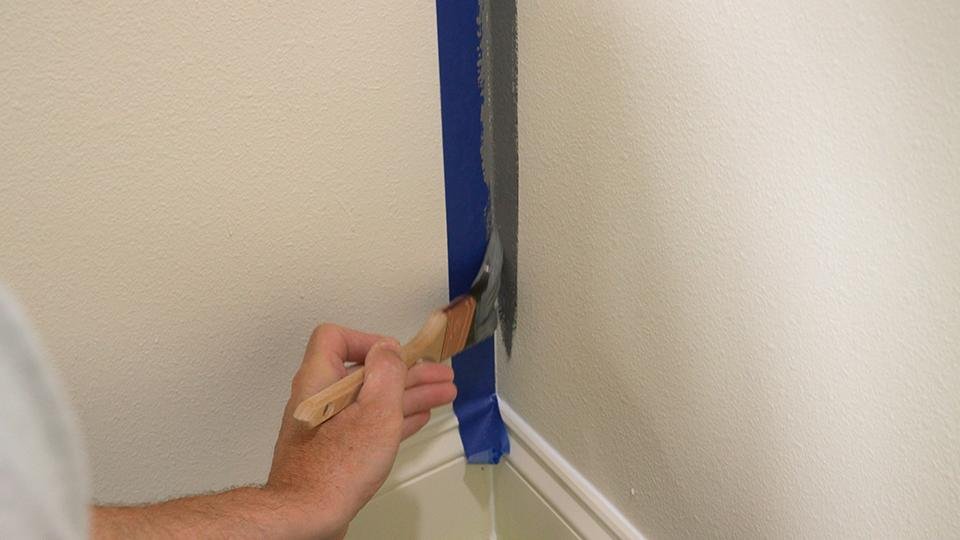
The edge where tape meets wall is actually the most critical inch of the whole job, and it needs more attention than people give it.
The pro seal technique: After applying and pressing tape firmly along its entire length, apply a thin coat of the original wall colour along the tape edge first. Let it dry. Then apply your new colour. Any bleed-through under the tape will be the original colour — invisible against the existing wall. The new colour stays crisp.
This one technique alone is responsible for the difference between edges that look professional and edges that look like they need touching up.
The fix: Press tape firmly, especially on textured surfaces. Use the seal coat method above. Remove tape while the final coat is still slightly tacky — not fully dry — by pulling back at a 45-degree angle slowly.
Already done it? Bleed-through lines can be touched up with a small angled brush and the original wall colour once everything is fully dry. On textured surfaces, this takes patience and a light hand.
4. Rolling with a Dry Roller
Why it goes wrong: There’s a natural instinct to stretch paint as far as it’ll go — load the roller once and roll until it’s almost dry, covering as much wall as possible. This feels efficient. It isn’t.
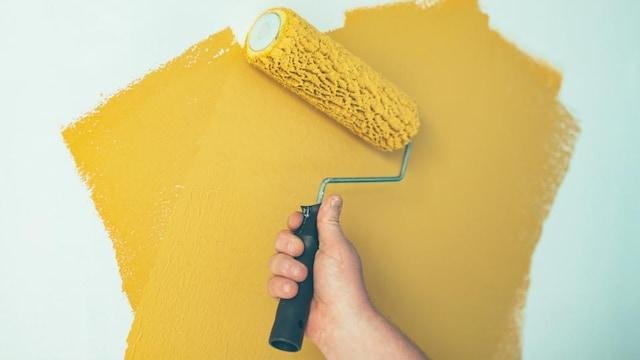
A dry roller can’t maintain what’s called a wet edge — the boundary of still-wet paint that you need to keep alive to blend each new stroke into the last. Once that edge starts drying, every overlap leaves a visible line. Those are lap marks, and they’re stubborn once dry.
A properly loaded roller should feel saturated but not dripping. When you roll it across the wall, it should glide. If it makes a scratchy sound, it’s too dry.
The fix: Reload more often than you think you need to. Work in sections, maintain the wet edge, and overlap each stroke into the last by about 30% while paint is still wet.
Already done it? Minor lap marks can sometimes be wet-sanded very lightly with 400-grit once fully dry, then overcoated. If the marks are significant or widespread, a full recoat is more reli good news: with a properly loaded roller and maintained wet edge this time, one coat usually covers them.
If you’re unsure which roller is right for your walls, this breakdown of the best rollers for smooth finishes is worth reading before you buy.
5. Ignoring Dry Time Between Coats
Why it goes wrong: The second coat feels urgent — you want to see the finished result. But applying a second coat over paint that hasn’t fully stabilised causes lifting, streaking, and a phenomenoable. Then called flashing: irregular patches where the paint sheen looks different across the same wall. You’re essentially disturbing a film that hasn’t set yet, dragging it around rather than coating over it.
“Dry to touch” and “ready to recoat” are completely different things. The recoat window — the point at which a coat has stabilised enough to receive another — is typically two to four hours for water-based paint and much longer for oil-based. But it varies by humidity, temperature, and paint brand.
The fix: Check the tin. Respect the recoat window. When conditions are humid or cool, add an hour to whatever the label says. The wait is boring. The alternative is worse.
Already done it? Flashing and streaking from premature recoating usually means waiting for full cure (24–48 hours) and then applying a properly timed third coat. In bad cases, you may see lifting or wrinkling that needs to be sanded back before recoating.
6. Not Cleaning the Surface Before Painting
Why it goes wrong: Paint doesn’t stick to grease, dust, or the thin film of hand oils that builds up on every frequently touched surface. Kitchen walls, door frames, trim, furniture — they all have it. You can’t see it, which is why it’s easy to skip the clean.
When paint is applied over contaminated surfaces, adhesion fails. Not immediately — sometimes weeks later, in the form of peeling or flaking at the very spots where contamination was worst.
The fix: Wipe all surfaces down with a degreaser or TSP cleaner before anything else. Rinse with clean water, let dry fully, then proceed to sanding and priming. For kitchen surfaces especially, don’t skip this step.
Already done it? If paint is already peeling at contamination points, those areas need to be stripped back to a clean surface, degreased properly, reprimed, and repainted. There’s no way to bond new paint to a contaminated layer that’s already failing.
For a full walkthrough of surface prep done properly, this guide to prepping walls before painting covers every step.
7. Skipping Primer — Or Using the Wrong One
Why it goes wrong: Primer isn’t just a coat of white paint. It’s a bonding agent, a stain blocker, and a surface equaliser — depending on which type you use. Skipping it on the wrong surfaces is one of the most common reasons paint peels.
But using the wrong primer is almost as bad as skipping it. Here’s a quick breakdown:
- Standard acrylic primer — works well on bare drywall, previously painted surfaces in good condition, and raw MDF
- Bonding primer (like Zinsser Bulls Eye 1-2-3) — needed when painting over gloss, laminate, or any slick non-porous surface
- Shellac-based primer (like Zinsser BIN) — the right choice when dealing with stains, wood tannin bleed, or heavy nicotine/smoke damage
- High-build primer — fills minor imperfections and surface porosity, useful on rough or repaired surfaces
The fix: Match the primer to the surface. “High-quality primer” from a list article tells you nothing useful. Knowing why each type exists tells you everything.
Already done it? Peeling paint caused by wrong or missing primer means stripping back to a sound surface and starting the primer stage properly. There’s no topcoat fix for a failed bond underneath.
8. Painting Over Gloss Without Scuff Sanding
Why it goes wrong: Gloss paint creates a hard, smooth surface that new paint can’t grip. Without mechanical texture — what painters call tooth — the new coat sits on top rather than bonding into the surface. It might look fine for a few weeks. Then it starts chipping at edges and peeling at seams.
Scuff sanding doesn’t mean stripping the gloss off. A light pass with 120-grit sandpaper dulls the sheen and creates enough micro-texture for the new coat to grab.
The fix: Sand, wipe with a tack cloth, apply a bonding primer, then paint. If the glossy surface is on cabinets or furniture — especially laminate — the bonding primer step is non-negotiable.
Already done it? If paint is already applied over an unscuffed gloss surface and seems to be holding, you might get lucky. But if it starts chipping at corners or edges, you’re dealing with adhesion failure — strip it back, scuff properly, reprime, and redo.
For surfaces like cabinets and furniture where this matters most, the furniture painting guide here goes into the prep process in detail.
9. Choosing the Wrong Roller Nap
Why it goes wrong: Roller nap — the thickness of the fabric sleeve — determines how much paint gets deposited and what texture it leaves behind. Use a nap that’s too thick on smooth walls and you’ll get an orange-peel stipple texture that looks unintentional. Use a nap that’s too thin on a heavily textured surface and you’ll get thin coverage and patchy results.
Here’s a simple guide:
- 3/16 to 1/4 inch nap — very smooth surfaces, high-gloss finishes
- 3/8 inch nap — smooth to lightly textured walls, most interior rooms
- 1/2 inch nap — medium texture, older plaster, slightly rough surfaces
- 3/4 inch and above — heavy texture, brick, rough render
The roller cover material matters too. Synthetic microfibre covers work well with water-based paints. Woven wool or blended covers suit oil-based paints and leave a smoother finish.
The fix: Match nap to surface before you buy. A quick touch test on the wall — if your fingertip catches texture, step up the nap — takes thirty seconds.
Already done it? Unwanted stipple texture from an overly thick nap can sometimes be lightly sanded once fully dry and overcoated with the correct nap. If the texture is significant, sanding and recoating is the cleanest fix.
10. Not Back-Rolling After Spraying
Why it goes wrong: Paint sprayers give beautiful, even results — but only if you back-roll after spraying. Back-rolling means running a roller over sprayed paint while it’s still wet to press it into the surface and even out the thickness. Skip this on textured walls especially, and you’ll have sections where paint sits on top of the texture peaks but barely touches the recesses. Those thin spots are adhesion issues waiting to appear.
The fix: Spray in sections and back-roll immediately while the paint is still wet. Use a short-nap roller with light pressure. The goal is pressing paint in, not re-distributing it.
Already done it? Thin spots in textured surfaces can be touched up with a short-nap roller and a fresh coat once everything is dry. If adhesion is already looking poor in low spots, a proper recoat with back-rolling is the only reliable fix.
If you’re considering investing in a sprayer to get a more consistent finish, this guide to paint sprayers for homeowners covers what’s actually worth buying.
Quick Reference: Mistakes at a Glance
| Mistake | Root cause | Fix |
| Wrong temperature | Flash drying or weak adhesion | Paint at 60–75°F; check surface temp |
| Skipped boxing | Batch sheen variation | Mix all tins together before starting |
| Tape failure | Unsealed edges or texture | Seal with base coat first; remove at 45° |
| Dry roller | Lost wet edge → lap marks | Reload often; maintain wet edge overlap |
| Rushing coats | Flashing, lifting, streaking | Respect the recoat window on the tin |
| Dirty surface | Failed adhesion, peeling | Degrease with TSP before every job |
| Wrong primer | Poor bond or bleed-through | Match primer type to surface |
| No scuff sanding | Gloss repels paint | 120-grit scuff + bonding primer |
| Wrong roller nap | Stipple or thin coverage | 3/8″ smooth, 1/2″ light texture |
| No back-rolling | Thin spots in texture | Roll while paint is still wet |
Frequently Asked Questions
Why does my paint look patchy after drying?
Patchy paint is almost always caused by one of three things: uneven surface porosity (some areas absorb more paint than others), a dry roller losing its wet edge mid-stroke, or recoating before the first coat had fully stabilised. A second coat applied after the proper recoat window, with a well-loaded roller, usually evens things out.
Why is my second coat of paint streaky?
Streaking in a second coat usually means the first coat wasn’t fully dry when you applied it, or the roller was too dry during application. The wet film from the second coat disturbs the partially set first coat and creates drag marks. Let everything cure fully, sand lightly with 220-grit if the surface feels rough, and apply a third coat with a properly loaded roller.
How do I avoid lap marks when painting walls?
Lap marks happen when paint dries at the edge of a stroke before the next stroke overlaps it. Maintain a wet edge by working quickly in sections, overlapping each pass by about a third while the paint is still wet, and reloading the roller more often than feels necessary. In warm or dry conditions, work in smaller sections so you don’t outrun the wet edge.
What’s the correct roller nap for smooth interior walls?
For most smooth to lightly textured interior walls, a 3/8-inch nap is the right starting point. It deposits enough paint for good coverage without leaving a noticeable stipple texture. For very smooth surfaces like cabinet doors or trim, drop to a 3/16 or 1/4-inch nap. For older plaster with more texture, step up to a 1/2-inch.
Do I really need primer, or can I just use two coats of paint?
It depends on the surface. On bare drywall, raw wood, laminate, or gloss surfaces, primer isn’t optional — two topcoats over an unprimed surface won’t bond the same way. On already-painted walls in good condition where you’re staying in a similar colour range, a quality paint-and-primer product can sometimes work. But for any furniture, cabinets, or problem surfaces, use proper primer. The cost of primer is minimal compared to the cost of redoing a failing paint job.
Can I fix peeling paint without repainting the whole wall?
Sometimes. If the peeling is localised to a small area, scrape back all loose paint, feather the edges by sanding, spot prime, and repaint the section. Blend it into the surrounding wall with the same paint. If the peeling is widespread, or if the underlying surface was contaminated or unprimed, a full repaint after proper prep is more reliable than patching multiple spots.