Estimated reading time: 11 minutes
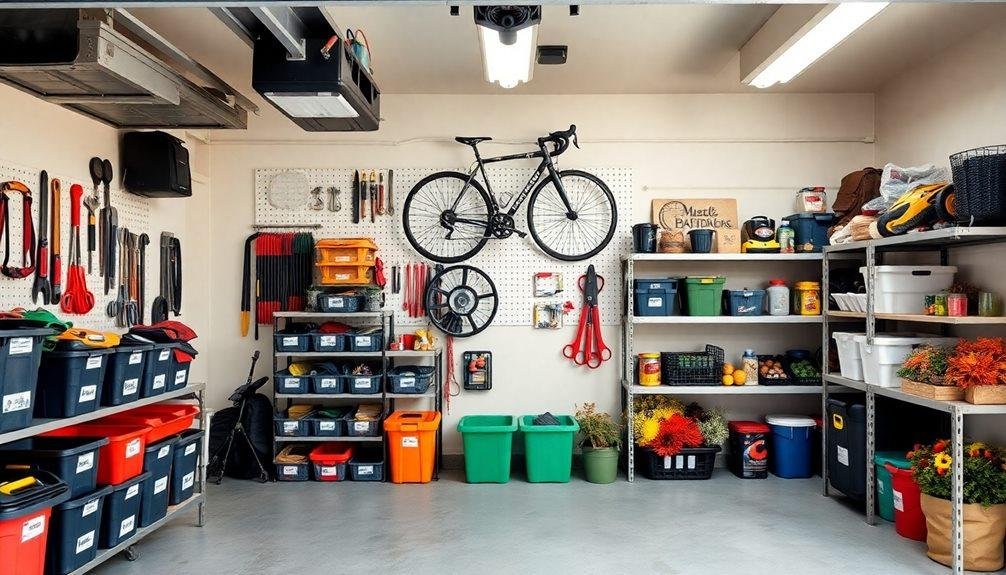
If your garage floor hasn’t been fully visible since the last time you moved house, you’re not alone. Most of us have that one space — the room that absorbs everything with nowhere else to go. The camping gear that went out twice. The bikes that haven’t moved in a year. Seventeen cardboard boxes labeled “misc.”
The good news? You don’t need a renovation budget or a free weekend. You just need a starting point.
This guide gives you actual DIY garage organization ideas you can act on — with real approximate costs, honest skill levels, and a clear sense of where to begin. No fluff, no “$5,000 custom cabinetry” suggestions dressed up as “affordable.”
Start Here: What’s Actually the Problem?
Before you buy a single hook or drill a single hole, spend two minutes honestly identifying your biggest pain point. Most garages have one main issue, not five.
The most effective garage storage system combines vertical wall space, overhead racks, and modular shelving. Most projects cost under $100 and take one weekend to complete.
Here’s a quick way to figure out where to start:
- Chaos is tools and hardware → Jump to the wall storage and tool organization sections
- Bikes and sports gear taking over → Go straight to specialty storage
- Seasonal stuff with nowhere to live → Overhead ceiling storage is your answer
- Just… no shelves at all → Start with modular shelving, it’ll transform the space fastest
Pick your problem. Then solve that one first. The rest can wait.
Wall Storage: The Biggest Bang for Your Effort
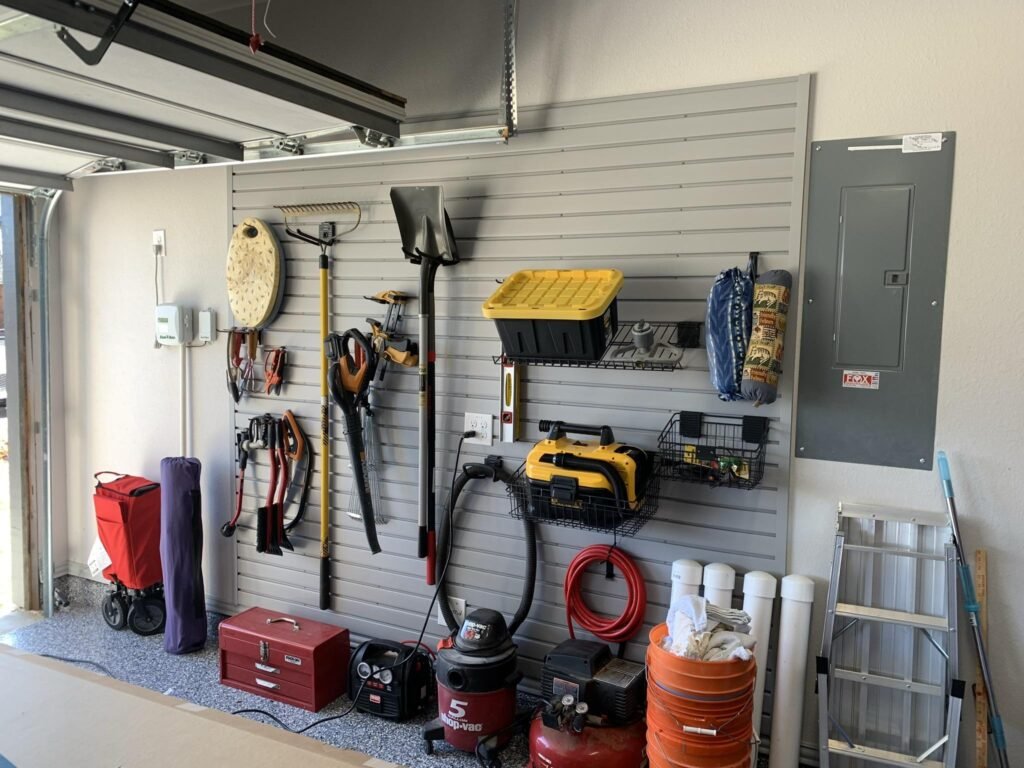
Walls are the most underused real estate in a garage. Most people stick a few hooks up and call it done — but a properly set-up wall storage system can hold an enormous amount without taking up a single square foot of floor space.
Pegboard Systems
Pegboard gets a lot of love online, and honestly, it deserves most of it — with one caveat. It’s brilliant for hand tools, spray cans, and lightweight items. It’s not the move for heavy power tools or anything over a few kilos. I’ve seen pegboards sag and pull from the wall because someone hung a full socket set off one corner.
Mount it properly with spacers behind the board so hooks seat correctly, and fix it into studs rather than just drywall. A 4×4 foot pegboard setup costs roughly $25–$45 in materials and takes a couple of hours.
Skill level: Beginner | Tools needed: Drill, level, stud finder
Wall-Mounted Shelving
For heavier items — paint cans, power tools, bins of hardware — wall-mounted shelving brackets with timber boards is the move. You can find the brackets at any hardware store, pair them with a 2×8 or 2×10 plank, and have a solid shelf up in under an hour.
Space them at different heights depending on what you’re storing. Taller gaps for bins, tighter spacing for smaller items. If you want a more permanent built-in look, our floating shelf installation guide walks through the full process.
Skill level: Beginner | Approx. cost: $15–$30 per shelf run
Hooks, Rails, and Track Systems
Slatwall panels and metal track rails let you rearrange hooks and holders without re-drilling every time your storage needs change. They’re pricier upfront ($60–$120 for a wall section) but genuinely flexible. Individual heavy-duty hooks cost almost nothing and are perfect for extension cords, hoses, and garden tools.
Magnetic Tool Strips
A magnetic strip mounted at eye level near your workbench is one of the most satisfying small upgrades you can make. Screwdrivers, chisels, small wrenches — all visible, all reachable, all off the bench surface. A 24-inch strip runs about $10–$20.
Overhead and Ceiling Storage: Don’t Waste That Space Above You
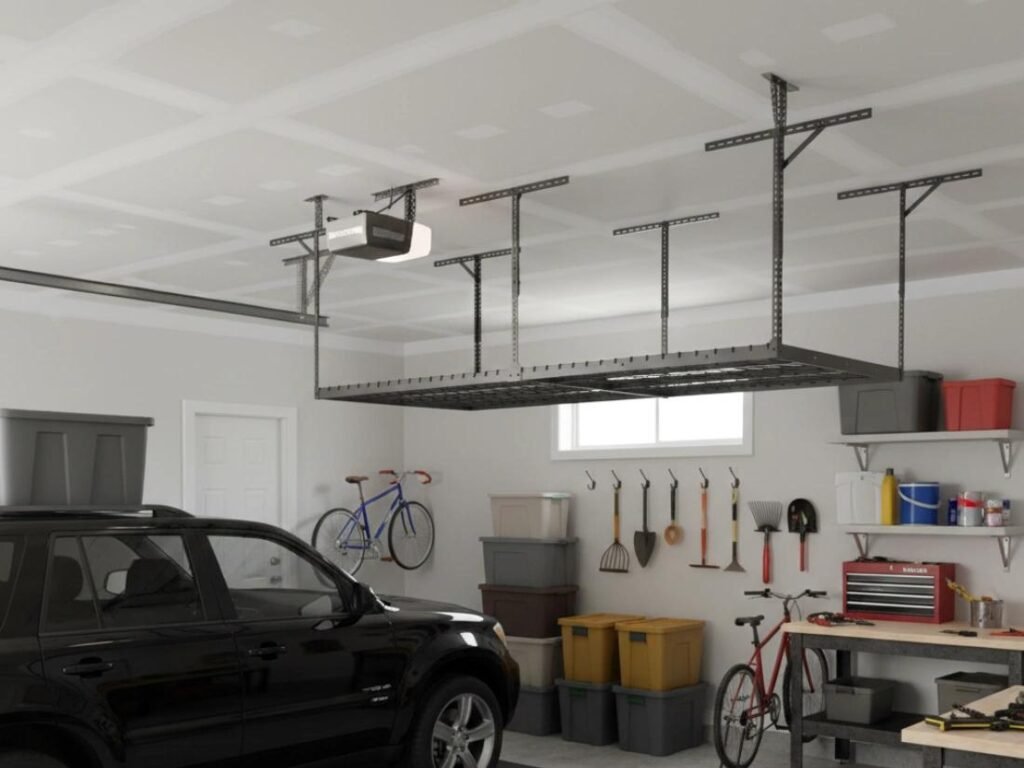
Most garages have 8–12 feet of ceiling height. The space above your car is almost always completely empty. That’s where holiday decorations, luggage, roof boxes, and anything you use less than twice a year should live.
Before You Drill Anything Overhead This matters more than people realize. Ceiling racks must be anchored into ceiling joists — not drywall, not plasterboard alone. Use a stud finder to locate the joists first. Most standard ceiling racks are rated for 200–600 lbs depending on the product, but that’s only true if they’re properly anchored. Store lightweight-to-medium items up there: bins, sleeping bags, sports gear. Never heavy power tools or anything sharp that could fall. Check your racks every few months for any loosening.
Ceiling Rack Systems
Overhead ceiling racks — the kind that hang down on adjustable legs from ceiling joists — are genuinely one of the best garage storage purchases you can make. A standard 4×8 foot platform rack sits at ceiling level, holds bulky bins, and frees up an enormous amount of floor space. Expect to pay $80–$150 for a decent one. We’ve reviewed the best options in our ceiling storage rack guide if you’re not sure which to pick.
Skill level: Intermediate | Tools needed: Drill, stud finder, ladder, a second person
Pulley Systems for Bikes
A ceiling-mounted bike pulley lets you hoist a bicycle up and out of the way with almost no effort. The bike hangs horizontally from the ceiling and you pull a rope to lower it. Most systems run $25–$50 and take about 30 minutes to install — though the measuring takes longer than the actual mounting.
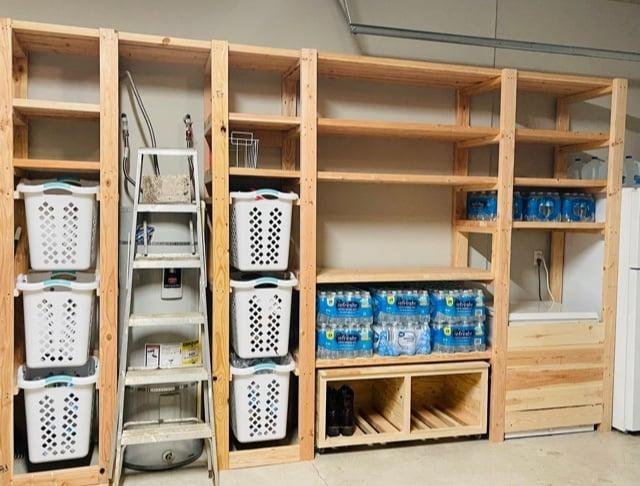
DIY Shelving: The Most Useful Thing You Can Build
If you’ve got zero shelving in your garage right now, building a simple freestanding unit from 2×4 lumber is the single best first project. I built my first one in a Saturday afternoon with about $40 in timber and it’s held up for years. It wasn’t perfect — I had to re-cut one board after measuring wrong — but it works, and that’s the point.
Basic 2×4 Shelving Unit
A standard freestanding shelf unit (about 6 feet tall, 4 feet wide, 3–4 shelves) uses:
- Six 8-foot 2×4 studs for the frame
- Four 1×10 or 1×12 boards for the shelves
- Wood screws (2.5 inch)
- Optional: plywood for the back if you want it fully enclosed
Total material cost: roughly $35–$60 depending on lumber prices in your area.
This is a weekend project you can do solo, and there’s no shortage of step-by-step tutorials. Our full DIY garage shelving guide walks through cutting lists and exact dimensions if you want to follow a plan rather than wing it.
Skill level: Beginner–Intermediate | Tools needed: Saw (circular or miter), drill, tape measure
Adjustable Modular Systems
If you’re not confident with a saw, pre-made modular shelving systems from hardware stores are a solid alternative. The wire rack systems (think heavy-duty metal frames with adjustable wire shelves) are great for garages because air circulates through them — no mold, no mustiness on stored items. They’re also easy to reconfigure. A full setup runs $100–$200.
Tool Organization: Getting the Small Stuff Under Control
Hand tools, drill bits, screws, nails, sandpaper, cable ties — this stuff multiplies. And if it’s not organized, you’ll buy duplicates of things you already own (I have four tape measures, which is embarrassing).
Dedicated Pegboard Zones
Rather than hanging random tools across a huge pegboard, create dedicated zones. Power tools on one section. Hand tools on another. Painting supplies in a third. Label the outline of each tool with a marker — that way you always know what’s missing and where it goes back.
PVC Pipe Holders
Cut short sections of PVC pipe (about 4–6 inches) and mount them to a board or wall. They make perfect holders for chisels, screwdrivers, paintbrushes, and even fishing rods. Cost: almost nothing if you have leftover pipe, or a few dollars from a hardware store.
Upcycled Jars and Tins
Old coffee tins, glass jars, or even soup cans mounted to a board make surprisingly good storage for screws, nails, and bits. Mount the lids to a piece of plywood, screw the filled jars into the lids, and you’ve got visible, accessible hardware storage for essentially zero cost.
A Magnetic Strip for Small Metal Bits
Drill bits, hex keys, and metal fittings will always end up scattered without a home. A magnetic strip — the same kind used in kitchens for knives — does the job perfectly.
Specialty Storage: Bikes, Sports Gear, and Garden Tools
Bikes
A ceiling pulley system (mentioned above) is the gold standard for single bikes. If you’ve got two or more bikes and ceiling height is tight, wall-mounted horizontal bike hooks are the next best option — the bike sits parallel to the wall at about head height, taking up minimal space. Each hook costs about $15–$25. More options in our dedicated bike storage guide.
Sports Equipment
A dedicated sports gear bin zone — large open-top bins on a low shelf, one per category (balls, rackets, helmets) — is much more practical than trying to hang everything. Stackable storage towers work well here. Label each bin so the system actually gets used. Our best storage bins for homeowners guide has solid options across different budgets.
Garden and Lawn Tools
Rakes, shovels, and brooms are awkward because they’re long and lean. A simple wall-mounted tool rack (horizontal hooks or a pallet with cut timber brackets) keeps them upright and stops them from falling over and clattering around. You can build a basic rack from a scrap pallet for close to nothing, or buy a wall-mount rack for $20–$40.
What Things Actually Cost: A Realistic Breakdown
This is the table nobody else publishes. Here’s an honest look at what common garage organization projects actually cost to DIY:
| Project | Approx. DIY Cost | Skill Level |
| Pegboard wall (4×4 ft) | $25–$45 | Beginner |
| Wall-mounted shelf (per shelf) | $15–$30 | Beginner |
| 2×4 freestanding shelving unit | $35–$60 | Beginner–Intermediate |
| Magnetic tool strip (24 in) | $10–$20 | Beginner |
| Overhead ceiling rack (4×8 ft) | $80–$150 | Intermediate |
| Bike wall hook (per bike) | $15–$25 | Beginner |
| Bike ceiling pulley system | $25–$50 | Beginner–Intermediate |
| Slatwall panel system (per wall) | $60–$120 | Intermediate |
| Wire modular shelving unit | $100–$200 | Beginner |
| PVC pipe tool holders | $5–$15 | Beginner |
Most people can overhaul a one-car garage for $100–$200 total if they’re selective and do the work themselves. A full double garage with ceiling racks, shelving, and pegboard can run $300–$500 — still a fraction of what prefab storage systems cost.
For more ideas across every budget range, our budget storage ideas guide is worth a look.
A Note on Small Garages
Most garage organization content quietly assumes you’ve got a two-car garage with high ceilings and four open walls. If you’ve got a single-car garage — or one of those awkward ones with a weird door placement, a sloped ceiling, or a boiler taking up a wall — a lot of standard advice just doesn’t apply.
For small garages, the priority order changes: vertical wall storage first, overhead second, floor footprint last. Every square foot of floor space is precious. Keep the shelving shallow (12 inches deep is usually enough for most items) so you don’t lose walkability. And be ruthless — a small garage can only hold so much, and storage solutions can’t fix a fundamentally overstuffed space.
Our small space storage guide has some ideas specifically built around tight constraints.
Frequently Asked Questions
How do I organize a small garage on a budget?
Start with wall-mounted shelving and a pegboard for tools — both cost under $50 combined if you go DIY, and they free up floor space immediately. Prioritize vertical storage over floor-based solutions in a small garage. Once the walls are working for you, add overhead ceiling storage for seasonal items.
What’s the cheapest way to add shelving to a garage?
Building a freestanding unit from 2×4 lumber and plywood boards is the most cost-effective option, typically running $35–$60 in materials. It requires a saw, drill, and a few hours — but it’s sturdy, fully customizable to your space, and far cheaper than buying a pre-made system.
Is pegboard actually good for garages?
Yes, but with realistic expectations. Pegboard is excellent for hand tools, spray cans, and small items. It’s not suitable for heavy power tools or anything over 5–10 lbs per hook. Mount it into studs with proper spacers and it’ll serve you well for years. Skip it if your main storage need is bulky or heavy gear.
Should ceiling racks be attached to joists or drywall?
Always joists. Drywall alone cannot safely support the weight of a loaded ceiling rack. Use a stud finder to locate your ceiling joists (typically 16 or 24 inches apart) before drilling anything. Most ceiling racks come with hardware designed for joist mounting — follow the weight limit on the product, and don’t exceed it.
What’s the best first garage organization project for a complete beginner?
A wall-mounted shelf using bracket supports and timber boards. It takes under an hour, costs $15–$30, needs only a drill and a level, and makes an immediate visible difference. Once you’ve done one, the rest of the projects feel a lot less intimidating. Start there, then build from it.