Estimated reading time: 8 minutes
Last updated on June 23rd, 2026 at 07:16 am
There’s a specific kind of dread that comes with finding a puddle behind your washing machine. You pull the unit away from the wall, see the hose, and think… okay, now what.
Good news: removing a washing machine drain hose is genuinely one of the more approachable appliance jobs you can tackle yourself. The bad news — if you want to call it that — is that nobody tells you about the water sitting inside the hose until it’s already on the floor. So let’s fix that first.
How Do You Remove a Washing Machine Drain Hose?
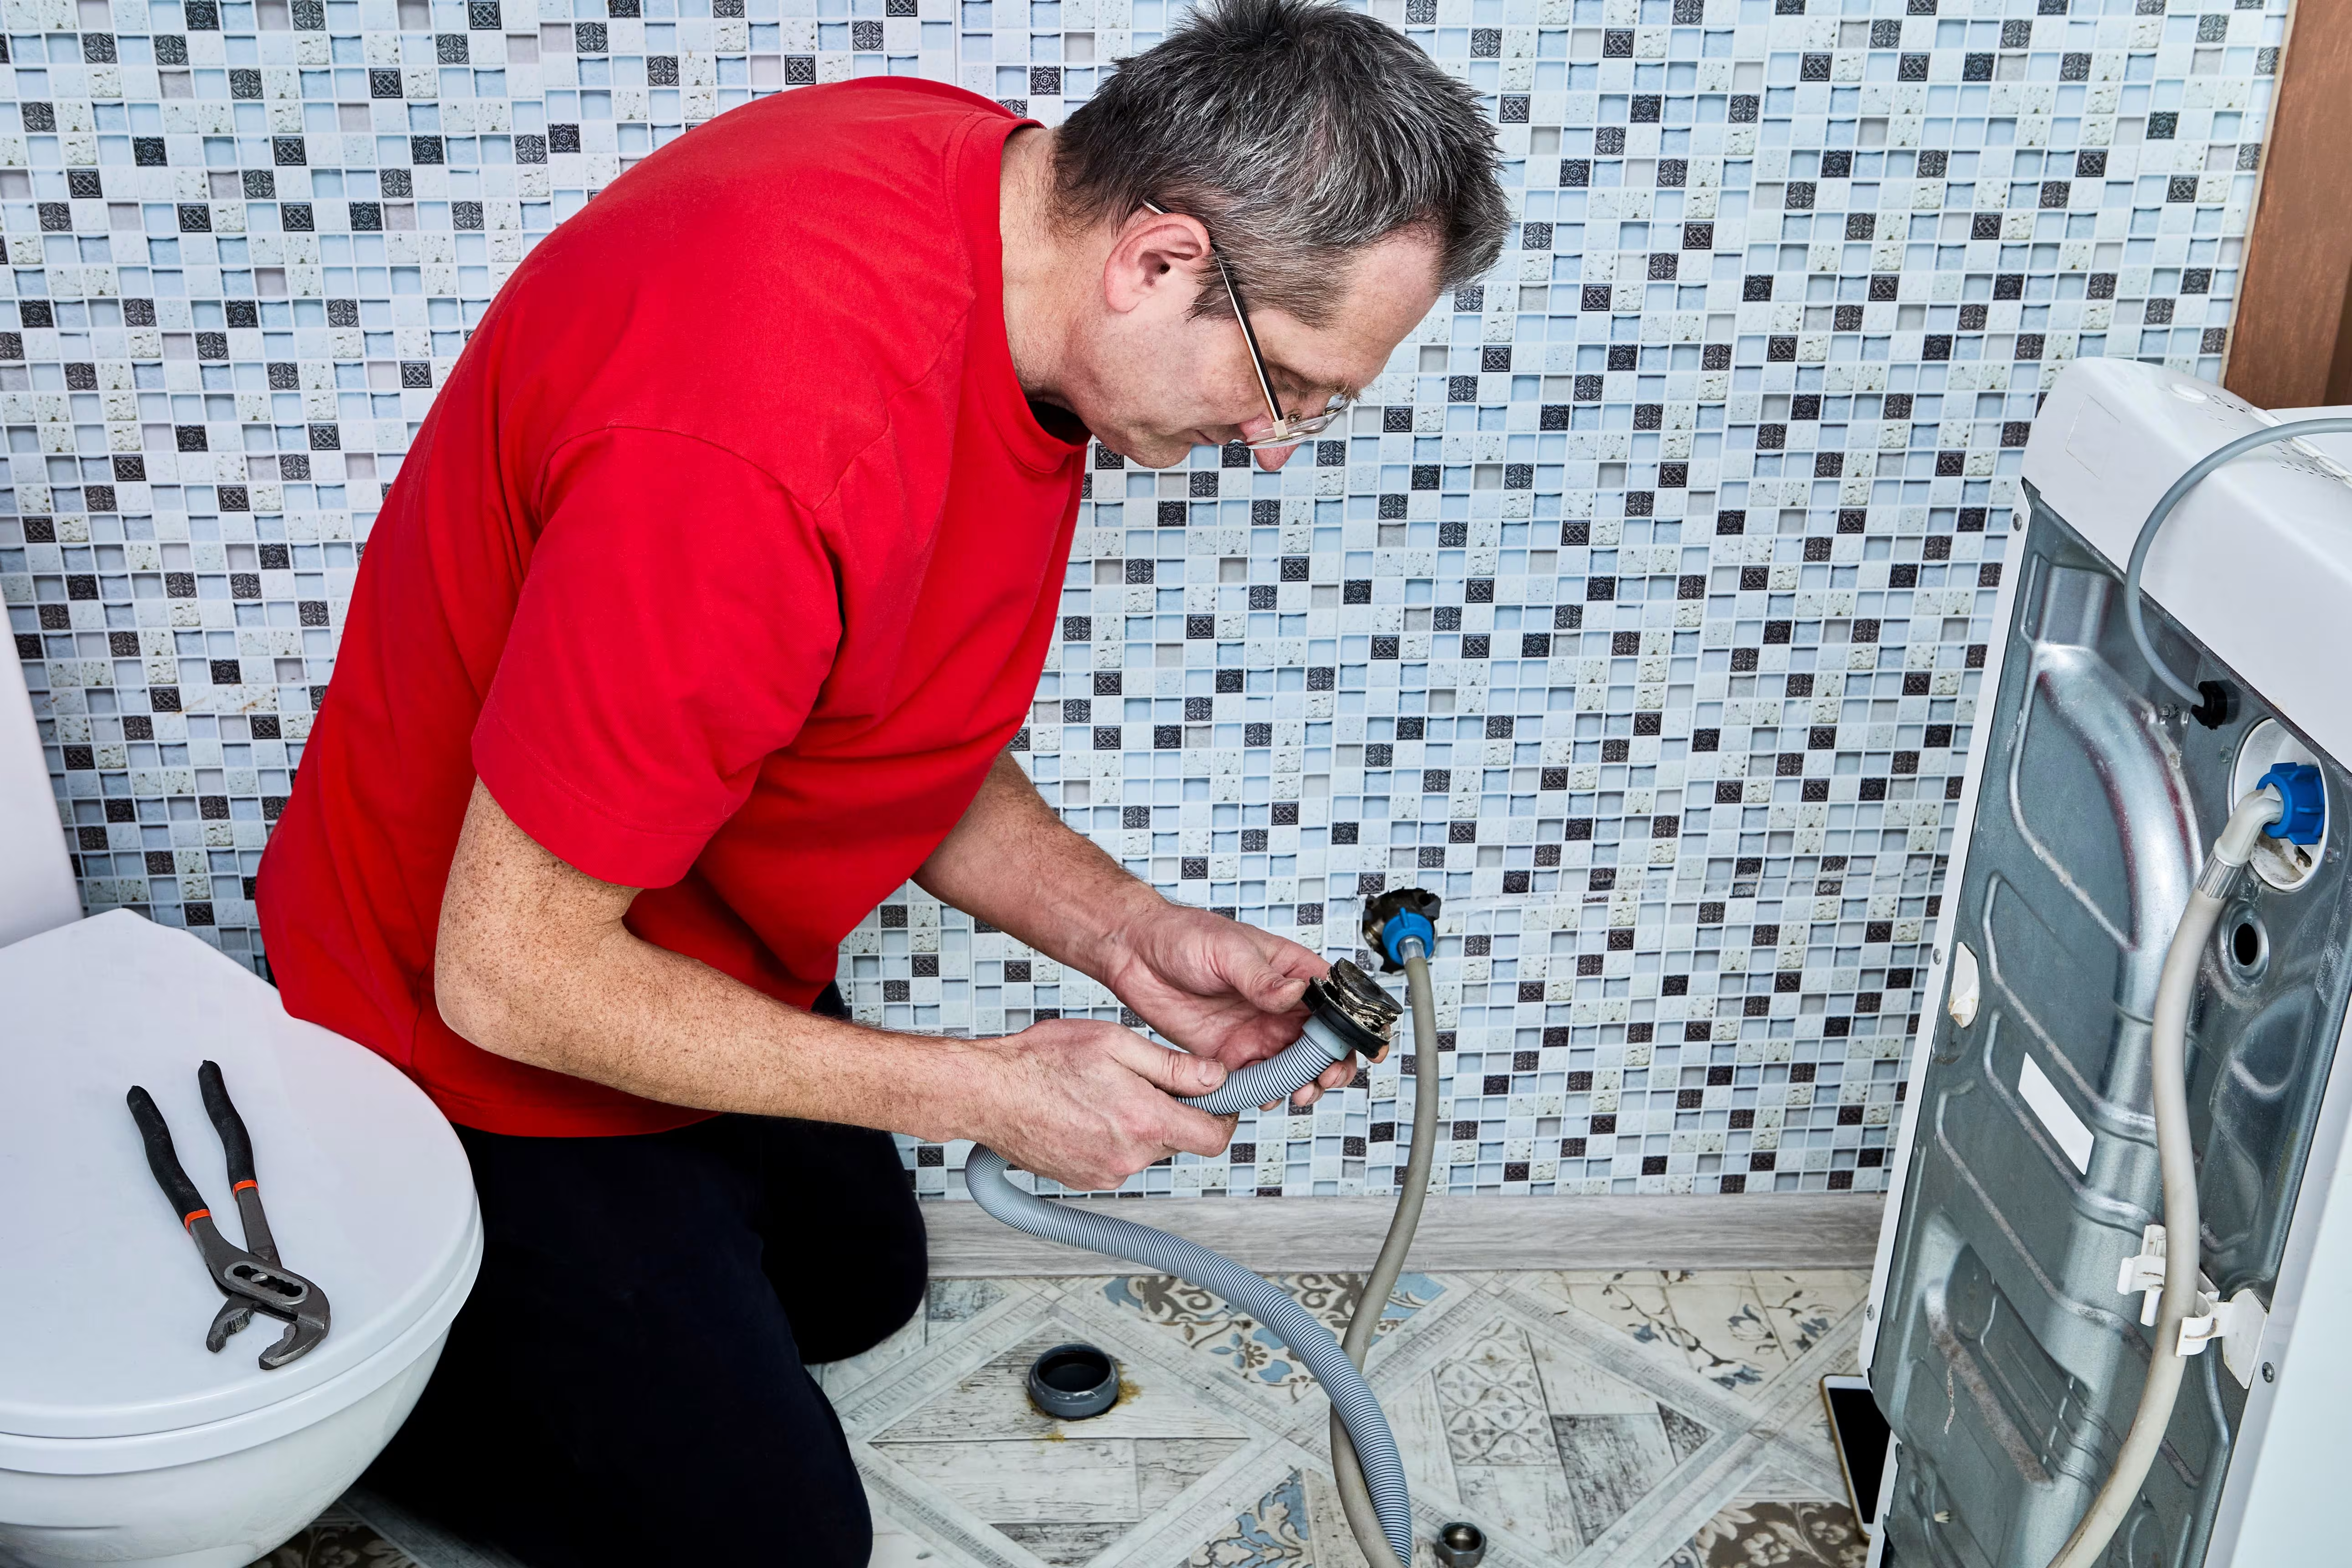
Unplug the washer and shut off the water supply first. Pull the machine away from the wall, place towels or a shallow bucket underneath to catch leftover water, then disconnect the hose from the wall pipe (or laundry sink) and from the back of the machine, loosening the clamp on each end before pulling the hose free.
That’s the whole job in one breath. Now here’s the part that actually matters: doing it without soaking your floor.
What You’ll Need Before You Start
You don’t need a toolbox full of gear for this one. Here’s the realistic list:
- Slip-joint pliers (for squeeze-tab clamps) or a flathead screwdriver (for screw clamps)
- A few old towels, or a shallow bucket/basin
- Work gloves, if you’d rather not handle a hose that’s been sitting in a damp spot for years
Before you touch anything, here’s the heads-up almost every guide forgets to give you upfront: there’s water sitting inside that hose, and it’s coming out the moment you disconnect either end. Not a flood — but enough to make a mess if you weren’t expecting it. Lay your towels down before you start, not after you’ve already got water running down your arm.
Disconnecting the Hose, Step by Step
Once your towels are down and the washer’s unplugged with the water supply off, here’s the order that causes the least amount of drama.
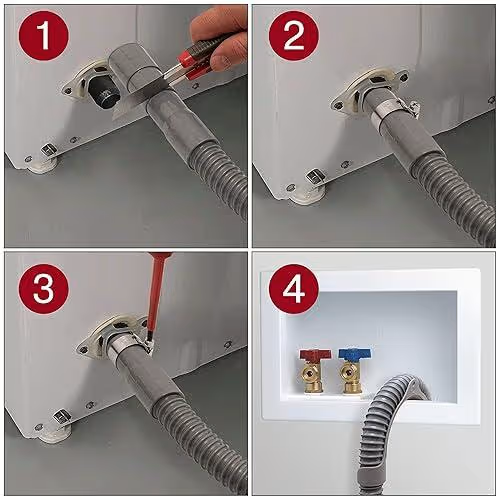
1. Pull the hose out of the standpipe or laundry sink first. This is the “wall end” — usually just resting in or clipped to a vertical pipe (the standpipe) or hooked over the edge of a utility sink. It’s rarely clamped tightly here, so it tends to come free with a gentle pull. Water trapped in the hose will start draining out immediately, so have your bucket ready.
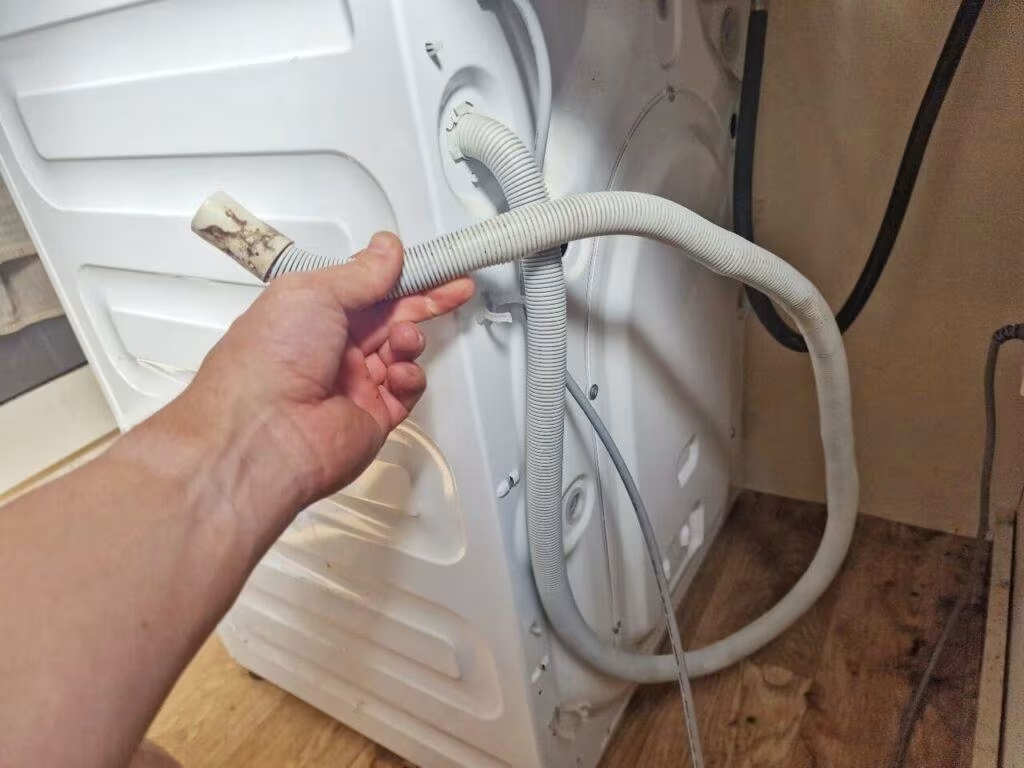
2. Find the connection at the back of the washer. This is near the bottom of the machine, where the hose attaches to a plastic or metal connector port. It’s held on with a hose clamp — and which type you’ve got changes how easy this next part is.
3. Loosen the clamp. If it’s a metal clamp with two tabs sticking out, squeeze those tabs together with your pliers — that releases the tension so the clamp slides freely. If it’s a screw-style clamp, just turn the screw counterclockwise with your screwdriver until it loosens. Either way, slide the clamp a few inches back up the hose, away from the connector, so it’s out of your way.
4. Pull the hose off the connector. Grip it close to the connector and wiggle it gently while pulling straight off — not at an angle, since that’s how connector ports get cracked.
5. Drain what’s left. Lift the disconnected end up so any remaining water pools toward the other end, then slowly lower it into your bucket to empty it out.
Dealing With a Stuck Clamp
Sometimes step 4 just… doesn’t happen. If the hose has been on that connector for several years, it can fuse slightly — the rubber stiffens and almost bonds to the plastic. If a firm wiggle isn’t budging it, don’t force it sideways or you risk snapping the connector port, which turns a simple swap into a bigger repair.
A bit of penetrating oil around the connection, left to sit for a few minutes, can help loosen old rubber that’s stuck to plastic. Twisting the hose slightly as you pull (rather than just yanking) also helps break that seal. Realistically, a stuck clamp can turn a 5-minute job into a 20-minute one — and that’s normal, not a sign you’re doing it wrong.
Why Your Hose Might Be Leaking — And What That Tells You
If you’re here because of a leak rather than a planned hose swap, where the water’s coming from actually tells you a lot.
Leaking at the Wall vs. Leaking at the Machine
Leaking near the wall connection usually means the hose has slipped too far out of the standpipe, or it’s siphoning — meaning it’s pushed in too far and creating a vacuum that pulls water back out during the drain cycle. This is often an easy fix: reposition the hose so it sits a few inches inside the standpipe without bottoming out completely.
Leaking near the machine connection points to a worn or loose clamp, a cracked connector port, or a hose that’s developed a split near where it bends sharply behind the unit. Hoses get stiff and brittle over time, and that stiffness eventually shows up as cracking right at the connection point — which is often the actual reason people end up needing to replace the whole hose rather than just reseat it.
If you’re seeing water pooling closer to the wall, start there. If it’s closer to the machine, the clamp or the hose itself is probably the culprit.
Putting a New Hose On (or Reattaching the Old One)
If you’re reattaching the same hose, the process is basically the removal steps in reverse. If you’re putting on a new one, here’s the order that gives you a proper watertight seal:
- Slide the hose clamp onto the new hose first — it’s much harder to add afterward.
- Push the hose onto the washer’s connector port until it bottoms out, meaning it’s seated all the way against the ridge.
- Slide the clamp back down so it sits directly over those ridges, not just somewhere on the smooth part of the hose.
- Place the other end into the standpipe or over the laundry sink edge — without pushing it in too far, to avoid that siphoning issue mentioned earlier.
Testing It Before You Push Everything Back
This step gets skipped constantly, and it’s the reason people end up with a slow leak nobody notices for a week. Before you shove the washer back against the wall, turn the water supply back on, run a short cycle (or just the drain/spin portion), and watch both connection points for a minute or two. If everything’s dry, you’re good to push the machine back into place. If you see even a small drip, it’s far easier to fix now than after the washer’s wedged back in the corner.
If your machine’s drain setup felt unfamiliar during any of this — especially if you’re dealing with a front-load model — it might help to check out this breakdown of types of washing machines, since drain configurations vary a bit between styles. And if this whole project started because of a leak you’re still puzzling over, the washing machine drum guide covers a few other common sources of water where you wouldn’t expect it.
Once the hose is sorted, it’s also a decent moment to check your washing machine agitator vs impeller setup if you’ve been having other performance questions — you’re already back there anyway.
FAQs
How do you remove a washing machine drain hose?
Unplug the machine and turn off the water supply, then pull the washer away from the wall and place towels underneath to catch residual water. Disconnect the hose from the standpipe or laundry sink first, then loosen the clamp at the back of the machine and pull the hose off the connector port.
What tools do I need to disconnect a washing machine hose?
Most setups just need slip-joint pliers (for clamps with squeeze tabs) or a flathead screwdriver (for screw-style clamps), plus towels or a shallow bucket to catch water that drains out of the hose.
Why is my washing machine drain hose leaking?
A leak near the wall often means the hose is sitting too far into the standpipe and siphoning water back out, while a leak near the machine usually points to a worn clamp, a cracked connector, or a hose that’s cracked from age near the bend.
How do I replace a washing machine drain hose?
Remove the old hose using the same disconnection steps, then slide the clamp onto the new hose, push it onto the connector port until it bottoms out, slide the clamp over the ridges for a watertight seal, and place the other end into the standpipe without pushing it in too far.
What if my hose clamp won’t come off?
Older hoses can fuse slightly to the connector over time. A little penetrating oil left to sit for a few minutes, combined with a gentle twisting motion as you pull, usually loosens it. Avoid forcing it sideways, since that can crack the connector port.