Estimated reading time: 11 minutes
My first roll of peel and stick wallpaper ended up in the trash. Not because the pattern was wrong, but because I slapped it straight onto a textured rental wall and watched it bubble up like it was trying to escape. That was four apartments ago. I’ve since redone three different spaces with the stuff, made a lot of small mistakes, and figured out which rooms it’s genuinely great for and which ones are a setup for disappointment.
So here’s the quick version, if you’re standing in a store aisle or scrolling through options right now: peel and stick wallpaper works best on smooth, painted drywall, in low-moisture rooms, for projects you can finish in an afternoon. It’s not great on heavily textured plaster, popcorn ceilings, or anywhere that gets steady heat and steam, like right behind a stove. If your walls are flat and your room stays dry, you’re in good shape.
Now let’s get into where this stuff actually shines, because there’s a real difference between the rooms where it looks intentional and the rooms where it screams “I covered this up for my landlord.”
Where Peel and Stick Wallpaper Actually Earns Its Reputation
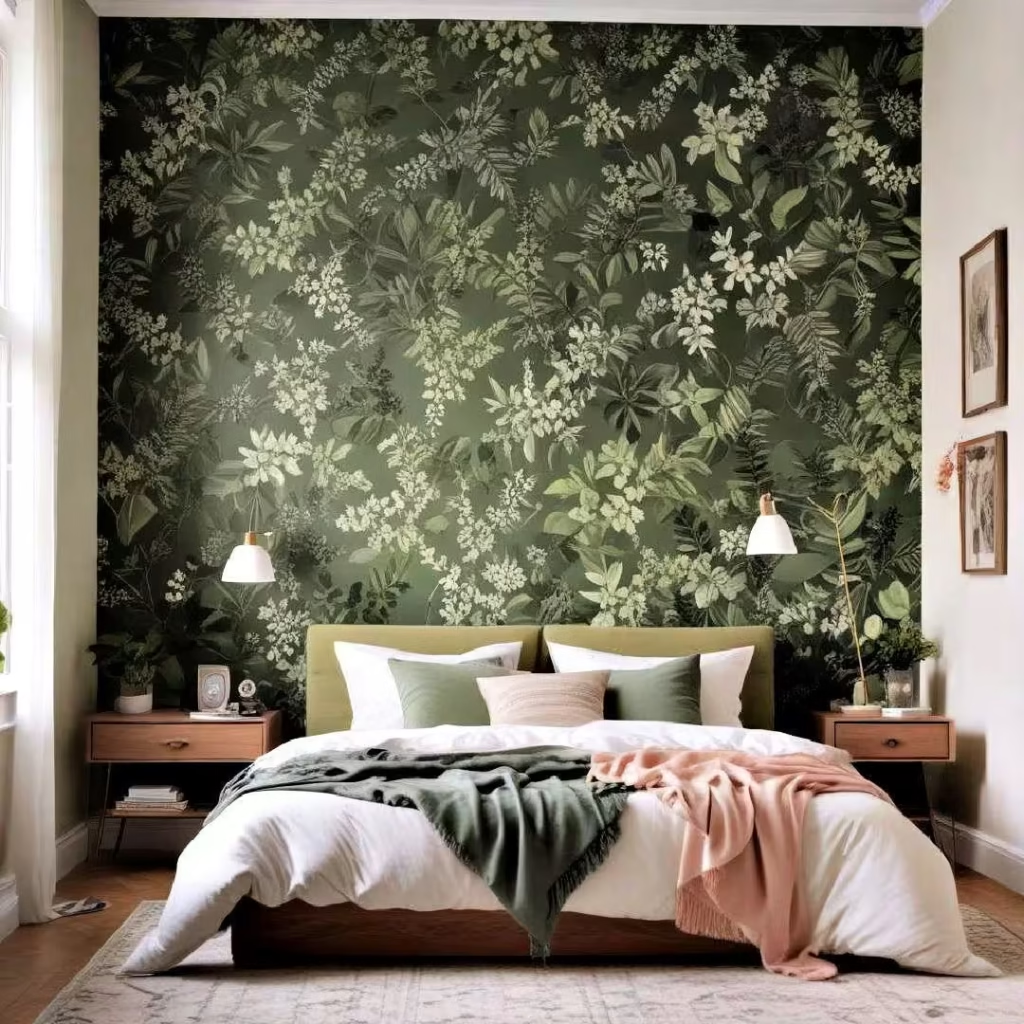
The Accent Wall (Still the Best Use of a Single Roll)
This is the classic for a reason. One wall, one bold pattern, done in an afternoon. A deep botanical print behind a bed, a graphic geometric pattern in a home office, a vintage floral in a reading nook — the trick is picking just one wall and letting it do all the visual work. I’ve found that busier patterns read better on a smaller wall, while subtler textures like a faux grasscloth or linen look work on bigger walls without overwhelming the room.
A standard 10×10 wall usually takes two to three rolls, depending on the brand’s roll width and your pattern’s repeat size. Budget roughly $30 to $90 per roll — the cheaper end tends to be thinner vinyl that’s more prone to peeling at the seams within a few months, so if you’re going for something you’ll live with for a year or more, the mid-range stuff is worth the extra cost.
Staircase Risers
This one surprises people, but it’s genuinely one of the highest-impact, lowest-effort projects on this list. You’re not papering a full wall — you’re covering the vertical part of each step, which means you can use a pattern that would be way too loud for an entire room. A small floral, a bold stripe, even a map print, all work because you’re only seeing a few inches of it at a time, repeated up the staircase.
Risers also use way less material than you’d think. A typical staircase with twelve to fourteen steps might only need a single roll, sometimes two if your risers are unusually wide. It’s one of the few projects where you can go bold without it becoming the whole personality of the room.
Furniture Upcycling
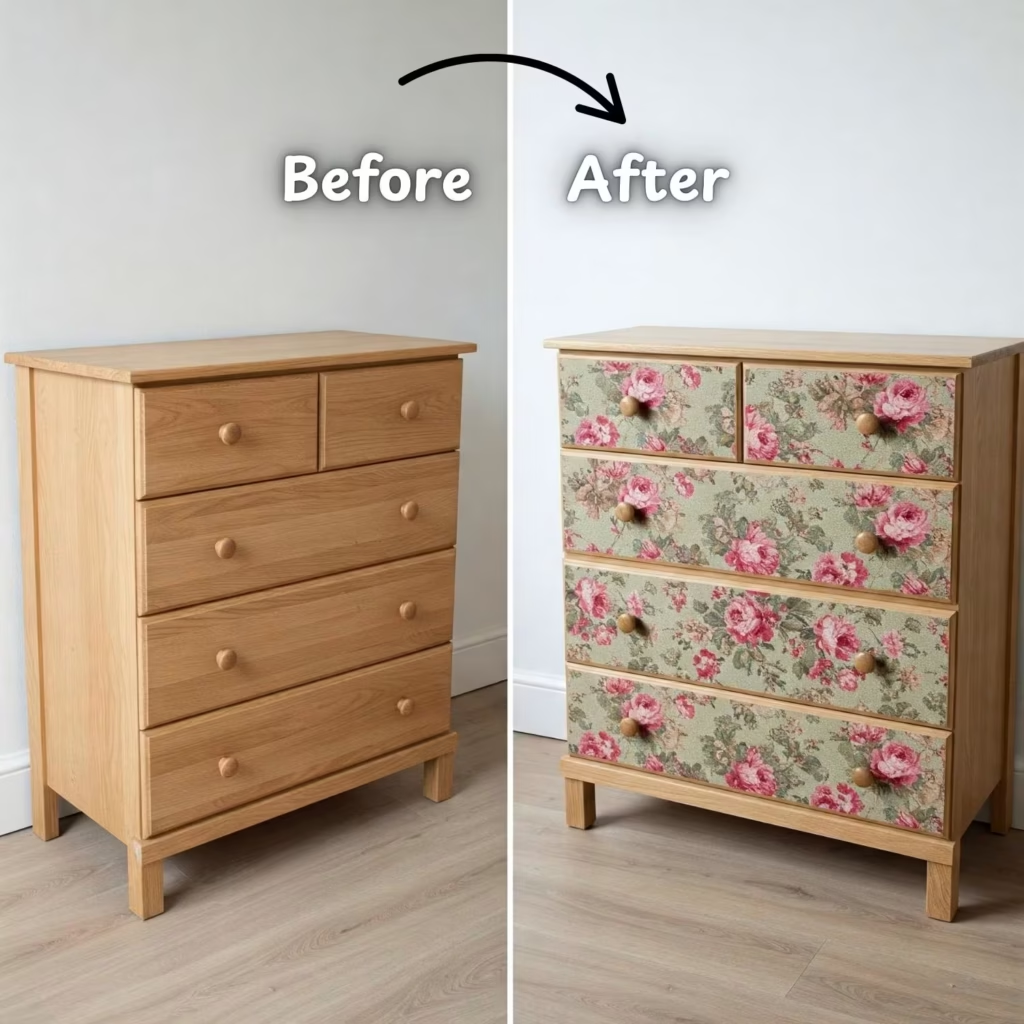
If you’ve got a dresser, a side table, or a bookshelf that’s structurally fine but visually tired, peel and stick wallpaper can solve that without a full refinishing project. Drawer fronts are an easy entry point — peel, smooth, trim, done — and they pair surprisingly well with the kind of small-space storage solutions covered in clothes storage ideas for small spaces, where giving an old dresser new life saves you from buying new furniture altogether.
One thing worth knowing: furniture surfaces get more wear than walls, so go for a textured vinyl rather than a thin paper-style option here. It holds up better against everyday bumps and scuffs.
Inside Cabinets and Closets
This is the one nobody talks about enough. Lining the inside back panel of a cabinet, the inside of a closet door, or the back of open shelving gives you a pop of pattern every time you open it, without committing to anything visible from across the room. It’s a low-stakes way to test a pattern you’re not sure you’d want on a full wall — and if you end up loving it, you’ve got your answer for next time.
This pairs naturally with a broader shelving refresh too. If you’re already rethinking storage layout, the ideas in essential racks, shelves, and drawers work well alongside a cabinet-lining project like this one.
Small Bathrooms and Powder Rooms
Here’s where I’ll give you a direct answer instead of a hedge: a half bath or powder room with no shower or tub is genuinely a great candidate. There’s no constant steam exposure, the room is small enough that one or two rolls cover everything, and a bold pattern in a small space tends to read as a deliberate design choice rather than overkill.
A full bathroom with a shower is a different story, and I’ll get into why in the next section.
Behind Open Shelving
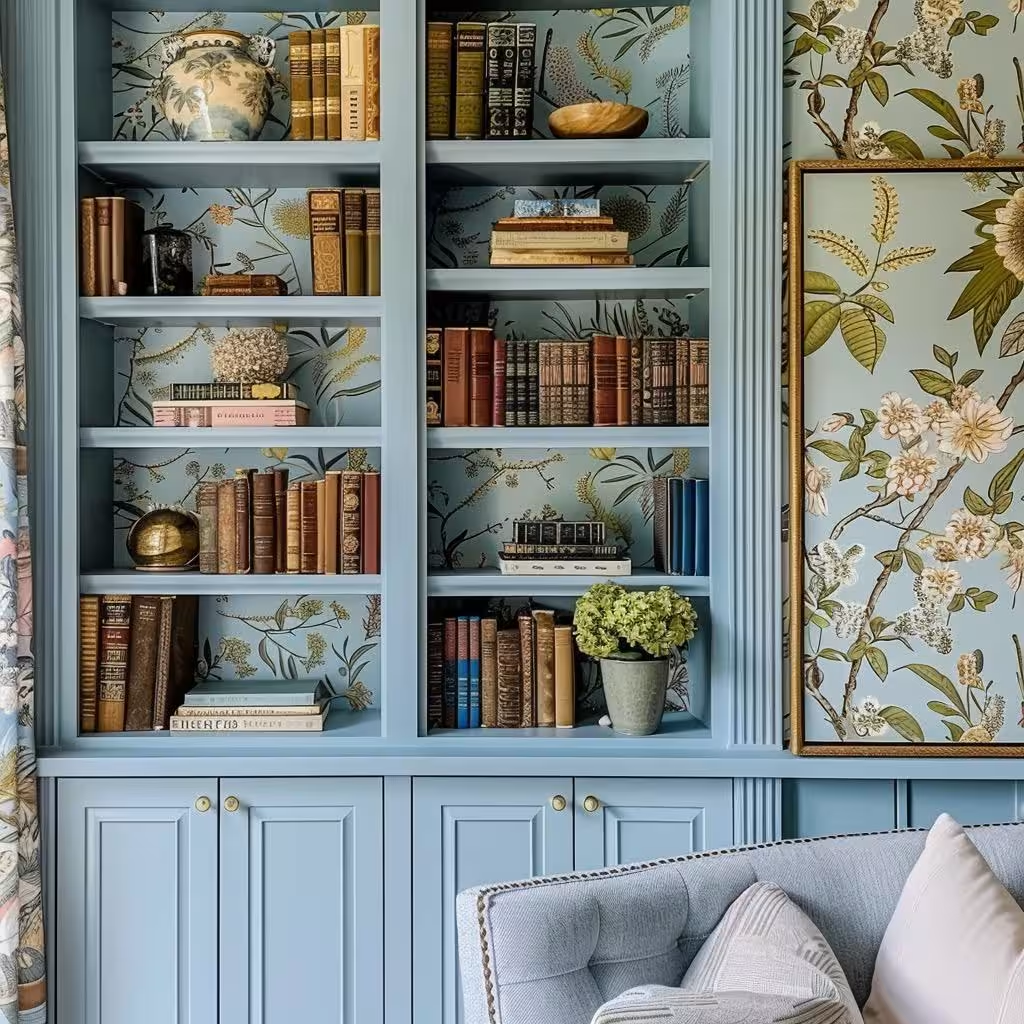
If you’ve got open shelving in a kitchen or living room, the wall behind it is basically a built-in accent wall waiting to happen. Because the shelves themselves break up most of the visual space, you can go with a slightly busier pattern than you might choose for an open wall — the objects on the shelves do some of the visual balancing for you.
Where It Doesn’t Hold Up (Skip It Here)
Textured and popcorn walls are the single biggest failure point I see, and it’s not close. Peel and stick adhesive needs a flat, smooth surface to actually grip. On anything textured, the wallpaper bridges the bumps instead of bonding to them, which means air pockets form almost immediately and the edges start lifting within days. If your rental has those slightly bumpy “orange peel” walls, which a lot of apartments do, skip the wallpaper there entirely and look at art, fabric panels, or a temporary chair rail instead.
Steady heat and humidity are the second problem zone. Directly behind a stove, the adhesive can soften and the seams curl from repeated heat exposure. In a full bathroom with a shower, the constant humidity cycle — steamy, then dry, then steamy again — works the adhesive loose over time. I had a strip near a bathroom window curl at the edge after about a month of regular showers, and that’s a pretty common outcome, not a fluke.
So here’s the honest line: smooth walls, low humidity, no direct heat. If a room checks those three boxes, you’re set. If it’s missing even one, go in expecting a shorter lifespan or skip it for that specific spot.
Getting It On the Wall Without Bubbles and Crooked Seams
The application part is where most first-timers lose confidence, and it’s almost always fixable with a couple of adjustments.
Clean the wall first. Dust and grease are the enemy of adhesion, and a quick wipe-down with a damp cloth makes a bigger difference than people expect. While you’re at it, if you’re doing a broader cleaning pass through the house, the techniques in window cleaning equipment carry over surprisingly well to wiping down walls before a wallpaper project.
Peel back six to twelve inches at a time, not the whole backing at once. This is the single biggest mistake I made on that first disastrous roll — pulling the entire backing off and trying to position a six-foot strip freehand is basically guaranteed to end in wrinkles.
Smooth from the center outward using a smoothing tool, or honestly, a credit card works fine in a pinch. Push air bubbles toward the edges as you go rather than trying to fix them after the strip is fully down.
For seams, slightly overlap each strip rather than trying to butt them perfectly edge to edge — a clean overlap hides pattern mismatches far better than a gap does. And save the trimming for last: use a sharp utility knife along outlets, corners, and baseboards only after the strip is fully smoothed down, not before.
Realistically, budget two to four hours for a single accent wall your first time through. It goes faster on the second wall, once your hands know what they’re doing.
How Long It Lasts and Getting It Off Without Drama
In a smooth, dry room, expect one to three years of solid wear before edges start to loosen on their own. Humid rooms cut that down, sometimes significantly — that bathroom strip I mentioned earlier started curling at the one-month mark, which is the low end of what you might see in a steamy room.
Removal is generally clean if the wall underneath was properly painted and cured. Warm the strip slightly with a hairdryer on low heat, then peel slowly at a low angle rather than yanking straight out from the wall. Most of the time you’ll get the wall back close to its original state. The exception is freshly painted walls — if the paint hasn’t fully cured (give it at least a few weeks after painting), the wallpaper’s adhesive can pull a thin layer of paint off with it. So if you just painted and you’re eager to wallpaper over it, give the paint more time than you think you need.
What It Actually Costs
For a single accent wall, you’re typically looking at $60 to $200 total, depending on roll quality and how many rolls your wall needs. That’s two to three rolls at $30 to $90 each, plus a smoothing tool if you don’t already have a credit card lying around (you do).
Compare that to traditional wallpaper, which usually runs $150 to $400 for materials on a similar wall, often requiring paste, a longer drying period, and either a professional installer or a much steeper DIY learning curve. Paint, on the other hand, is often cheaper — $40 to $80 for a single wall — but it doesn’t give you texture or pattern, and it’s a more involved process to change your mind about later.
Here’s the quick breakdown:
Peel and stick wallpaper: $60–200 per wall, 2–4 hours, fully reversible, best for smooth walls only.
Traditional wallpaper: $150–400 per wall, often a full day with paste and drying time, much harder to remove without wall damage.
Paint: $40–80 per wall, a few hours plus drying time, easiest to redo but no pattern or texture options.
If you’re already weighing bigger renovation decisions alongside something like this, it’s worth a glance at home renovation tips for beginners before you decide whether wallpaper or a more permanent change makes sense for your space.
A Few More Places People Don’t Think to Use It
Beyond the obvious wall and furniture spots, a few smaller applications are worth knowing about. Lining the inside of a closet door turns a boring storage spot into something you actually enjoy opening. A small pattern behind a headboard does a lot of the same visual work as a full accent wall but uses far less material, which is handy if you’re working with a tight budget. And if you’ve got a dining nook that feels flat, pairing a subtle wallpaper backdrop with something like the ideas in dining table centerpiece ideas can pull the whole space together without a full room overhaul.
What ties all of these together is restraint. The projects that actually look intentional are the ones where the wallpaper has a clear job — one wall, one drawer front, one staircase — rather than being spread thin across a whole room. Pick a spot where a bold choice can stand on its own, account for whether that spot is dry and smooth, and you’ll end up with something that looks like a deliberate design decision instead of a quick rental fix.
FAQs
Does peel and stick wallpaper ruin walls?
Not if the underlying paint is fully cured. On properly painted, smooth drywall, removal is usually clean. The main risk is on freshly painted walls, where peeling the wallpaper off can pull a thin layer of paint with it if the paint hasn’t had a few weeks to cure first.
How long does peel and stick wallpaper last?
Typically one to three years in a dry, smooth-walled room. Humid spaces, like full bathrooms with showers, can cut that down significantly — sometimes to just a few weeks at the edges before curling starts.
Can it go over textured walls?
Generally, no. Textured and popcorn walls don’t give the adhesive a flat surface to bond to, which leads to air pockets and lifting edges almost immediately. Smooth, flat walls are what this material needs to actually stick.
Can you use it in a bathroom or kitchen?
A powder room with no shower works well since there’s no constant steam exposure. A full bathroom with regular showers is riskier — the humidity cycle tends to loosen the adhesive over time. In kitchens, it’s fine away from direct heat sources, but skip the area directly behind a stove.
Is it reusable once removed?
Occasionally, if you’re gentle and the backing hasn’t degraded, but most rolls lose enough adhesive strength after one application that reusing them isn’t reliable. It’s smarter to treat each roll as a one-time application rather than counting on reusing it elsewhere.